IOS開發(7)之UINavigationController導航
1 前言
UINavigationController會讓App從一個試圖控制器切換到另一個,在開發中十分常見,今天我們來學習一下這個控件。
2 UINavigation簡介
delegate代碼
.h文件:
[plain]
#import <UIKit/UIKit.h>
#import "ZYRootViewController.h"
@interface ZYAppDelegate : UIResponder <UIApplicationDelegate>
@property (strong, nonatomic) UIWindow *window;
@property(nonatomic,strong) ZYRootViewController *zYRootViewController;
@property(nonatomic,strong) UINavigationController *navigationController;
@end
#import <UIKit/UIKit.h>
#import "ZYRootViewController.h"
@interface ZYAppDelegate : UIResponder <UIApplicationDelegate>
@property (strong, nonatomic) UIWindow *window;
@property(nonatomic,strong) ZYRootViewController *zYRootViewController;
@property(nonatomic,strong) UINavigationController *navigationController;
@end.m文件:
[plain]
@synthesize navigationController;
@synthesize zYRootViewController;
- (BOOL)application:(UIApplication *)application didFinishLaunchingWithOptions:(NSDictionary *)launchOptions
{
self.window = [[UIWindow alloc] initWithFrame:[[UIScreen mainScreen] bounds]];
// Override point for customization after application launch.
self.window.backgroundColor = [UIColor whiteColor];
[self.window makeKeyAndVisible];
self.zYRootViewController = [[ZYRootViewController alloc] initWithNibName:nil bundle:nil];
//實例化導航欄
self.navigationController = [[UINavigationController alloc] initWithRootViewController:self.zYRootViewController];
//向當前視圖添加導航欄
self.window.rootViewController = self.navigationController;
// [self.window addSubview:self.navigationController.view];
return YES;
}
ZYRootViewController代碼
.m文件:
[plain]
- (void)viewDidLoad
{
[super viewDidLoad];
// Do any additional setup after loading the view.
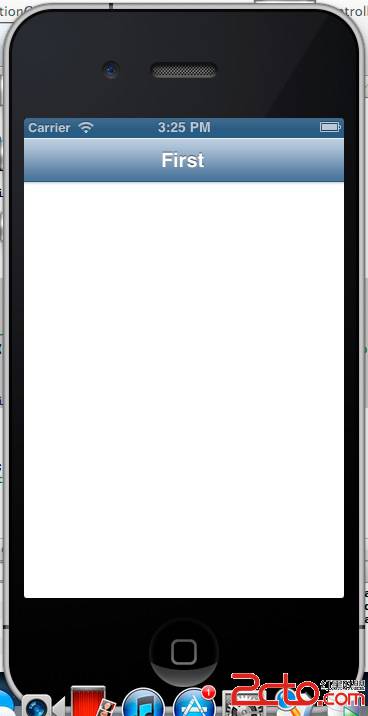
self.title = @"First";//設置標題
[self performSelector:@selector(pushSecondController) withObject:nil afterDelay:3.0f];//3秒後調用自身pushSecondController方法
}
-(void)pushSecondController{
ZYSecondViewController *zYSecondViewController = [[ZYSecondViewController alloc] initWithNibName:nil bundle:nil];
[self.navigationController pushViewController:zYSecondViewController animated:YES];//向導航欄堆棧推入zYSecondViewController視圖
}
- (void)viewDidLoad
{
[super viewDidLoad];
// Do any additional setup after loading the view.
self.title = @"First";//設置標題
[self performSelector:@selector(pushSecondController) withObject:nil afterDelay:3.0f];//3秒後調用自身pushSecondController方法
}
-(void)pushSecondController{
ZYSecondViewController *zYSecondViewController = [[ZYSecondViewController alloc] initWithNibName:nil bundle:nil];
[self.navigationController pushViewController:zYSecondViewController animated:YES];//向導航欄堆棧推入zYSecondViewController視圖
}ZYSecondViewController代碼
.m文件:
[plain]
- (void)viewDidLoad
{
[super viewDidLoad];
self.title = @"Second";
// Do any additional setup after loading the view.
[self performSelector:@selector(goBack) withObject:nil afterDelay:3.0f];//3秒後調用自身goBack方法
}
-(void)goBack{
[self.navigationController popViewControllerAnimated:YES];//將自身視圖彈出導航欄堆棧
}
- (void)viewDidLoad
{
[super viewDidLoad];
self.title = @"Second";
// Do any additional setup after loading the view.
[self performSelector:@selector(goBack) withObject:nil afterDelay:3.0f];//3秒後調用自身goBack方法
}
-(void)goBack{
[self.navigationController popViewControllerAnimated:YES];//將自身視圖彈出導航欄堆棧
}運行結果:
最初的效果
3秒以後跳到第二個視圖:

又3秒以後彈出本視圖,顯示初始視圖: