iOS9-by-Tutorials-學習筆記二:App-Search
iOS9-by-Tutorials-學習筆記二:App-Search
本文為自己讀書的一個總結,可能與原書有一定出入
iOS 9推出了搜索技術,能夠讓用戶在Spotlight中搜索到APP內部的內容。蘋果提供了三個APP Search API:
* NSUserActivity
* Core Spotlight
* Web markup
下面簡單的說一下我對於這三個API的理解:
1. NSUserActivity:
NSUserActivity在iOS8就已經提出來了,只是那時候提出來是用作HandOff。在iOS9中它可以用來搜索App中的內容。我們可以把一些想要在Spotlight中被搜到的東西,放到NSUserActivity中,然後就能在Spotlight中被搜到,但是這個有一點限制,就是只能搜索用戶訪問過得內容。因為UIViewController的userActivity屬性繼承自UIResponser,只有在UIViewcontroller訪問的時候,才有機會設置userActivity屬性。
2. Core Spotlight:
這個是在iOS9新推出的技術,能夠將APP的內容在Spotlight中被搜索到。這個技術我理解:蘋果給開發者提供了一個全局的index數據庫,我們能夠把我們想要能夠在Spotlight中搜索的內容,按照蘋果的要求放到數據庫中,然後蘋果就做了其他的事情,讓其能夠被搜索到。同樣我們也可以刪除我們存儲到數據庫中的內容。
3. Web markup:
Web Markup在網頁上顯示App的內容並編入Spotlight索引,如此一來即便沒有安裝某個App,蘋果的索引器也能在網頁上搜索特別的標記(markup),在Safari或Spotlight上顯示搜索結果。具體會在下一篇文章中詳細介紹。
Getting started
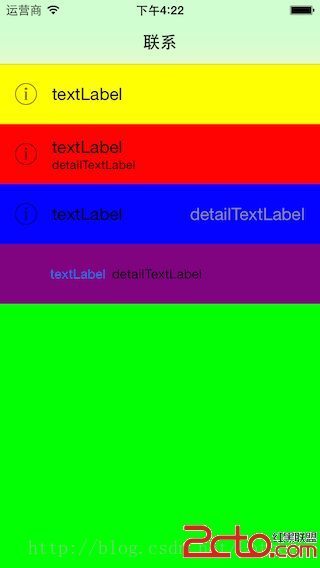
下面開始試驗一下相關的技術,這裡還是利用書中的star工程。現在這個工程運行後,就兩個界面:

下面是這個工程的截圖:

下面是圖中標注的幾個關鍵類的解釋:
1. AppDelegate
點擊搜索結果跳跳轉到程序中,會先在這個類裡面做一定的處理
2. EmployeeViewController
人員的詳細界面,這個裡面主要設置NSUserActivity
3. EmployeeService
這個主要是寫CoreSpotlight中index相關的東西
4. EmployeeSearch
主要是擴展了Employee類,添加了與搜索相關的屬性
另外工程中有員工相關的一些操作都封裝在了一個EmployeeKit的target,由於跟主target不在一個module,所以在主target中需要import。
在Iphone的Setting/Colleagues/Indexing中有如下三個選項:
* Disabled 不使用Search API,即不能在Spotlight中搜索到APP中的內容
* ViewedRecords 只有打開過的才能夠被搜索到
* AllRecZ喎?/kf/ware/vc/" target="_blank" class="keylink">vcmRzIMv509C1xNSxuaTQxc+itrzE3Lm7sbvL0cv3tb08L3A+DQo8aDQgaWQ9"搜索我們已經打開過的內容">搜索我們已經打開過的內容
使用NSUserActivity實現這個比較簡單,只要兩個步驟就可以了:
1. 創建NSUserActivity的一個實例,設置相關的屬性
2. 賦值給UIViewController的userActivity屬性
下面我們在EmployeeSearch中添加如下代碼:
如果沒有該文件,需要手動創建一個,然後target選擇EmployeeKit
import Foundation
import CoreSpotlight

extension Employee {
  // 這個用於區分Activity,會在點擊搜索結果進入APP,相關處理的時候用到,同樣也可以在CoreSpotlight中使用到,對於添加、刪除index數據的時候都會用到
  public static let domainIdentifier = "com.mengxiangyue.colleagues.employee"
  // 字典 在處理點擊的時候,可以根據該字典獲取我們想要的數據
  public var userActivityUserInfo: [NSObject: AnyObject] {
    return ["id": objectId]
  }

  // 給Employee添加userActivity屬性,主要是方便我們獲取userActivity
  public var userActivity: NSUserActivity {
    let activity = NSUserActivity(activityType: Employee.domainIdentifier)
    activity.title = name  // 顯示的名字
    activity.userInfo = userActivityUserInfo  // 與該Activity相關的數據
    activity.keywords = [email, department]  // 關鍵字 表示搜索什麼關鍵字,能夠搜索出來該條記錄,當然這個只是補充,這裡沒有添加name,同樣也是可以按照name搜索
    return activity
  }
}
這裡擴展了Employee,然後添加了幾個屬性,屬性的意義見注釋。
這時候我們需要重新編譯一下EmployeeKit(因為與主target不是同一個target)。
下面打開EmployeeViewController.swift,在viewDidLoad()中添加如下代碼:
let activity = employee.userActivity
switch Setting.searchIndexingPreference {
case .Disabled:
  activity.eligibleForSearch = false
case .ViewedRecords:
  activity.eligibleForSearch = true
  // relatedUniqueIdentifier 定義一個id 防止NSUserActivity和Core Spotlight重復索引,這裡設置為nil,顯示一下會重復
  activity.contentAttributeSet?.relatedUniqueIdentifier = nil
case .AllRecords:
  activity.eligibleForSearch = true
}

userActivity = activity
下面在該類中添加如下的方法,用於在合適的時機更新Activity:
// 更新NSUserActivity關聯的信息
  override func updateUserActivityState(activity: NSUserActivity) {
    activity.addUserInfoEntriesFromDictionary(employee.userActivityUserInfo)
  }
下面在Iphone的Setting/Colleagues/Indexing中選擇ViewedRecords。然後啟動APP,在列表中點擊Brent Reid進入詳細頁面,然後使用Command+shift+H,計入Home頁面,下拉出現搜索框,然後輸入brent出現如下界面:

看到這個搜索結果界面,感覺太難看了,下面我們豐富一下這個搜索結果,蘋果提供的搜索結果可以設置如下的內容:

下面我們在EmployeeSearch.swift添加如下屬性:
public var attributeSet: CSSearchableItemAttributeSet {
  let attributeSet = CSSearchableItemAttributeSet(itemContentType: kUTTypeContact as String)
  attributeSet.title = name  // 不太清楚是干啥的
  attributeSet.contentDescription = "\(department), \(title)\n\(phone)"
  attributeSet.thumbnailData = UIImageJPEGRepresentation(loadPicture(), 0.9)
  attributeSet.supportsPhoneCall = true
  attributeSet.phoneNumbers = [phone]
  attributeSet.emailAddresses = [email]
  attributeSet.keywords = skills
  attributeSet.relatedUniqueIdentifier = objectId

  return attributeSet
}
然後將給userActivity添加如下屬性:
public var userActivity: NSUserActivity {
  let activity = NSUserActivity(activityType: Employee.domainIdentifier)
  activity.title = name
  activity.userInfo = userActivityUserInfo
  activity.keywords = [email, department]
  activity.contentAttributeSet = attributeSet   // 新添加的這一行
  return activity
}
然後運行程序,搜索結果如下:

但是現在我們注意到,我們點擊搜索結果,打開APP並沒有按照我們預想的跳轉到該員工的詳細界面。這個因為我們在程序中沒有做對應的處理,下面我們在AppDelete中添加如下的方法:
func application(application: UIApplication, continueUserActivity userActivity: NSUserActivity, restorationHandler: ([AnyObject]?) -> Void) -> Bool {
  let objectId: String
  // 先判斷了一個type是不是我們自己定義的 然後獲取到對應的EmployeeId
  if userActivity.activityType == Employee.domainIdentifier, let activityObjectId = userActivity.userInfo?["id"] as? String {
    objectId = activityObjectId
  }
  // 獲取對應Employee實例 然後跳轉到對應的界面
  if let nav = window?.rootViewController as? UINavigationController, listVC = nav.viewControllers.first as? EmployeeListViewController, employee = EmployeeService().employeeWithObjectId(objectId) {
    nav.popToRootViewControllerAnimated(false)
    let employeeViewController = listVC.storyboard?.instantiateViewControllerWithIdentifier("EmployeeView") as! EmployeeViewController
    employeeViewController.employee = employee
    nav.pushViewController(employeeViewController, animated: false)
    return true
  }
  return false
}
這時候我們再點擊搜索結果就能夠跳轉到對應的詳細界面了。
CoreSpotlight
下面我們開始使用CoreSpotlight添加這些搜索內容。首先在EmployeeSearch.swift的attributeSet中設置如下屬性:
// 在前面的代碼中已經設置過了
attributeSet.relatedUniqueIdentifier = objectId
這個屬性主要是將NSUserActivity與Core Spotlight indexed object進行一個關聯,防止出現重復的內容(如果出現重復內容,是因為開始的時候測試NSUserActivity的時候沒有設置id,還原一下模擬器就好了)
然後在EmployeeSearch.swift添加如下的代碼:
// CoreSpotlight需要將一個個item放入其索引數據庫中,這裡創建一個方便使用
var searchableItem: CSSearchableItem {
  let item = CSSearchableItem(uniqueIdentifier: objectId, domainIdentifier: Employee.domainIdentifier, attributeSet: attributeSet)
  return item
}
然後在EmployeeService.swift添加如下代碼:
import CoreSpotlight

..............<省略一部分代碼>

public func indexAllEmployees() {
  let employees = fetchEmployees()
  let searchableItems = employees.map{ $0.searchableItem }
  // 將我們需要被索引的item放入到defaultSearchableIndex中
  CSSearchableIndex.defaultSearchableIndex().indexSearchableItems(searchableItems) { (error) -> Void in
    if let error = error {
      print("Error indexing employees: \(error)")
    } else {
      print("Employees indexed.")
    }
  }
}
然後在設置中選擇AllRecords,這時候啟動APP,然後搜索,看到的搜索結果如下:

但是這時候我們點擊搜索結果沒有反應,想想應該也能猜到,我們需要在AppDelete中添加代碼,最終代碼如下:
func application(application: UIApplication, continueUserActivity userActivity: NSUserActivity, restorationHandler: ([AnyObject]?) -> Void) -> Bool {
    let objectId: String
    if userActivity.activityType == Employee.domainIdentifier, let activityObjectId = userActivity.userInfo?["id"] as? String {
      objectId = activityObjectId
    }
    // 這部分else是新添加的 使用不一樣的type區分NSUserActivity和CoreSpotlight,然後獲取對應的objectId,其他的處理都一樣了
    // CSSearchableItemActivityIdentifier這個是CoreSpotlight提供的一個key值
    else if userActivity.activityType == CSSearchableItemActionType, let activityObjectId = userActivity.userInfo?[CSSearchableItemActivityIdentifier] as? String {
      objectId = activityObjectId
    } else {
      return false
    }
    if let nav = window?.rootViewController as? UINavigationController, listVC = nav.viewControllers.first as? EmployeeListViewController, employee = EmployeeService().employeeWithObjectId(objectId) {
      nav.popToRootViewControllerAnimated(false)
      let employeeViewController = listVC.storyboard?.instantiateViewControllerWithIdentifier("EmployeeView") as! EmployeeViewController
      employeeViewController.employee = employee
      nav.pushViewController(employeeViewController, animated: false)
      return true
    }
    return false
  }
這時候我們點擊搜索結果應該就能夠跳轉進入對應的人員詳情了。
刪除Item
最後在簡單的說下刪除已經索引的Item,修改EmployeeService.swift對應的方法如下:
public func destroyEmployeeIndexing() {
  CSSearchableIndex.defaultSearchableIndex().deleteAllSearchableItemsWithCompletionHandler { (error) -> Void in
    if let error = error {
      print("Error deleting searching employee items: \(error)")
    } else {
      print("Employees indexing deleted.")
    }
  }
}
這個方法會在APP啟動並且Indxing設置為Disabled的時候調用。
另外對於CoreSpotlight中對於Item的操作方式還有好多種,這裡我就不一一寫出來了,有興趣的可以看看我翻譯的API注釋,當然文章可能有點老了,但是基本思想應該沒變。