詳解iOS App中圖片的線段塗鴉功效的添加辦法
接上去我們要講圖片的塗鴉,我們離開一點一點拓展,先給圖片上劃線
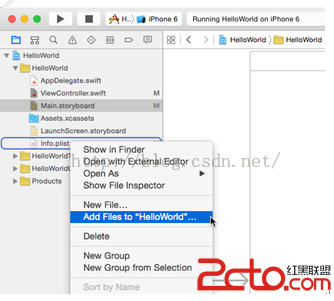
創立項目 起名testAddLine


接上去我們在默許生成的ViewController中添加一張圖片 待用
同時添加一個按鈕
- (void)viewDidLoad {
[super viewDidLoad];
// Do any additional setup after loading the view, typically from a nib.
UIImageView *imageV = [[UIImageView alloc]initWithFrame:CGRectMake(10, 120, screen_Width-20, screen_Height-150)];
imageV.image = [UIImage imageNamed:@"640-960-1.jpg"];
[self.view addSubview:imageV];
UIButton *testBtn = [[UIButton alloc]initWithFrame:CGRectMake(screen_Width/2.0-60, 60, 120, 36)];
[testBtn setTitleColor:[UIColor blackColor] forState:UIControlStateNormal];
[testBtn setTitle:@"添加直線" forState:UIControlStateNormal];
[testBtn addTarget:self action:@selector(addLineAct:) forControlEvents:UIControlEventTouchUpInside];
[self.view addSubview:testBtn];
}
- (void)addLineAct:(id)sender{
NSLog(@"測試按鈕");
}
接上去我們創立一個UIView 用來添加直線 起名:DrawLine

創立幾個變量
@property(nonatomic,strong) NSMutableArray * completeLines; //曾經畫好的線條 存入數組
@property(nonatomic,strong) NSMutableDictionary* LinesInProscess; //正在畫的線條 存入字典
@property(nonatomic,strong) UIColor *lineColor;//線條色彩
@property (nonatomic)float lineWidth;//線條的粗細
初始化DrawLine
//初始化
- (id)initWithFrame:(CGRect)frame{
if (self = [super initWithFrame:frame]) {
//初始化變量
_completeLines = [[NSMutableArray alloc]init];
_LinesInProscess = [[NSMutableDictionary alloc]init];
//設置通明配景
self.backgroundColor = [UIColor clearColor];
}
return self;
}
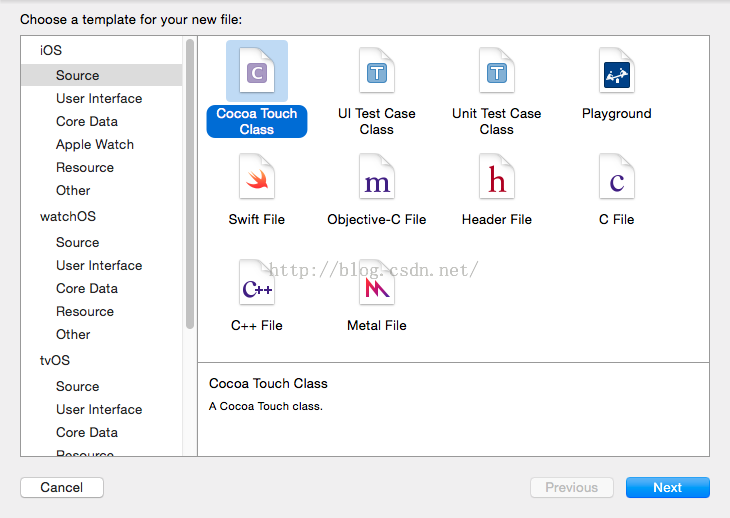
我們把線條零丁籠統出來 創立一個類 創立對象 起名 Line

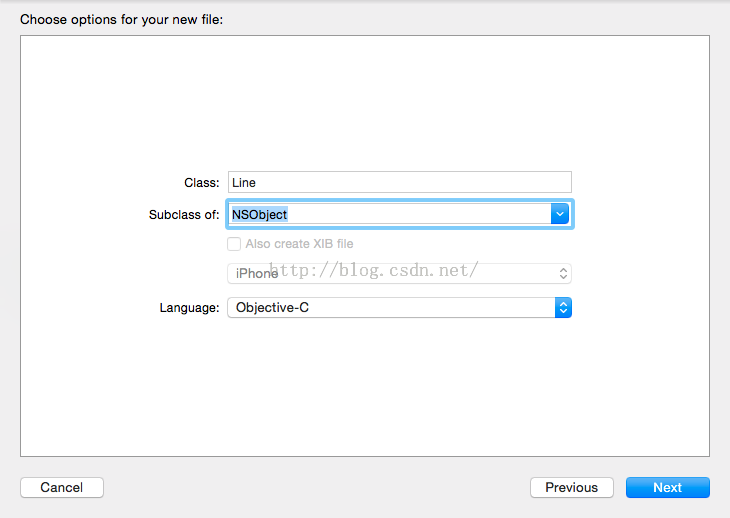
線條 兩個屬性 肇端點 停止點(這就是數學中的兩點肯定一條直線)
給Line 類創立兩個屬性
#import <Foundation/Foundation.h>
#import <UIKit/UIKit.h>
@interface Line : NSObject
@property(nonatomic)CGPoint begin; //線條開端點
@property(nonatomic)CGPoint end; //線條停止點
@end
接上去 我們重寫DrawLine 的 drawRect 辦法 繪制線條
// Only override drawRect: if you perform custom draWing.
// An empty implementation adversely affects performance during animation.
- (void)drawRect:(CGRect)rect {
// DraWing code
//獲得高低文
CGContextRef cgt=UIGraphicsGetCurrentContext();
//設置線條寬度
CGContextSetLineWidth(cgt, self.lineWidth);
//設置線條兩頭外形為圓角
CGContextSetLineCap(cgt, kCGLineCapRound);
//設置色彩
[self.lineColor set];
//繪制曾經完成的線段
for (Line *line in _completeLines){
CGContextMoveToPoint(cgt, [line begin].x, [line begin].y);
CGContextAddLineToPoint(cgt, [line end].x, [line end].y );
CGContextStrokePath(cgt);
}
//繪制正在畫的線段
for (NSArray *v in _LinesInProscess) {
Line *line =[_LinesInProscess objectForKey:v];
CGContextMoveToPoint(cgt, [line begin].x, [line begin].y);
CGContextAddLineToPoint(cgt, [line end].x, [line end].y );
CGContextStrokePath(cgt);
}
}
完成幾個手指滑動辦法 用來接收手指的地位畫線
//清空畫板
-(void)clearAll
{
[_completeLines removeLastObject];
[_LinesInProscess removeAllObjects];
[self setNeedsDisplay];
}
-(void)touchesBegan:(NSSet *)touches withEvent:(UIEvent *)event
{
//斷定能否連按
for (UITouch *t in touches) {
if ([t tapCount]>1) {
//第二次畫線時第一條線還未完成時停止畫線
[self clearAll];
return;
}
//NSValue 作為鍵應用
NSValue *key=[NSValue valueWithNonretainedObject:t];
// 依據觸摸地位創立Line對象
CGPoint loc=[t locationInView:self];
Line *newLine=[[Line alloc]init ];
newLine.begin=loc;
newLine.end=loc;
//將以後正在畫的線存入字典
[_LinesInProscess setObject:newLine forKey:key];
}
}
-(void)touchesMoved:(NSSet *)touches withEvent:(UIEvent *)event
{
//手指挪動進程中依照以後手指的地位靜態更新線條
for (UITouch * t in touches) {
NSValue *key=[NSValue valueWithNonretainedObject:t];
// 找對象以後UITouch對象的Line對象
Line *line =[_LinesInProscess objectForKey:key];
CGPoint loc=[t locationInView:self];
line.end=loc;
}
[self setNeedsDisplay];
}
-(void)endTouches:(NSSet *) touches
{
//畫線完成以後將以後線條參加_completeLines 數組中 同時刪除字典_LinesInProscess裡的線條
for (UITouch *t in touches) {
NSValue *key=[NSValue valueWithNonretainedObject:t];
Line *line =[_LinesInProscess objectForKey:key];
if (line) {
[_completeLines addObject:line];
[_LinesInProscess removeObjectForKey:key];
}
}
[self setNeedsDisplay];
}
-(void)touchesCancelled:(NSSet *)touches withEvent:(UIEvent *)event
{
[self endTouches:touches];
}
-(void)touchesEnded:(NSSet *)touches withEvent:(UIEvent *)event
{
[self endTouches:touches];
}
回到 ViewController中 給按鈕點擊事宜中 添加DrawLine到ImageView上
- (void)addLineAct:(id)sender{
NSLog(@"測試按鈕");
DrawLine *touchdrawView = [[DrawLine alloc]initWithFrame:imageV.frame];
touchdrawView.lineColor = [UIColor yellowColor];
touchdrawView.lineWidth = 5.0;
touchdrawView.tag = 902;
[self.view addSubview:touchdrawView];
}
好了 運轉法式嘗嘗
點擊 添加直線 按鈕以後 嘗嘗在圖片上畫線
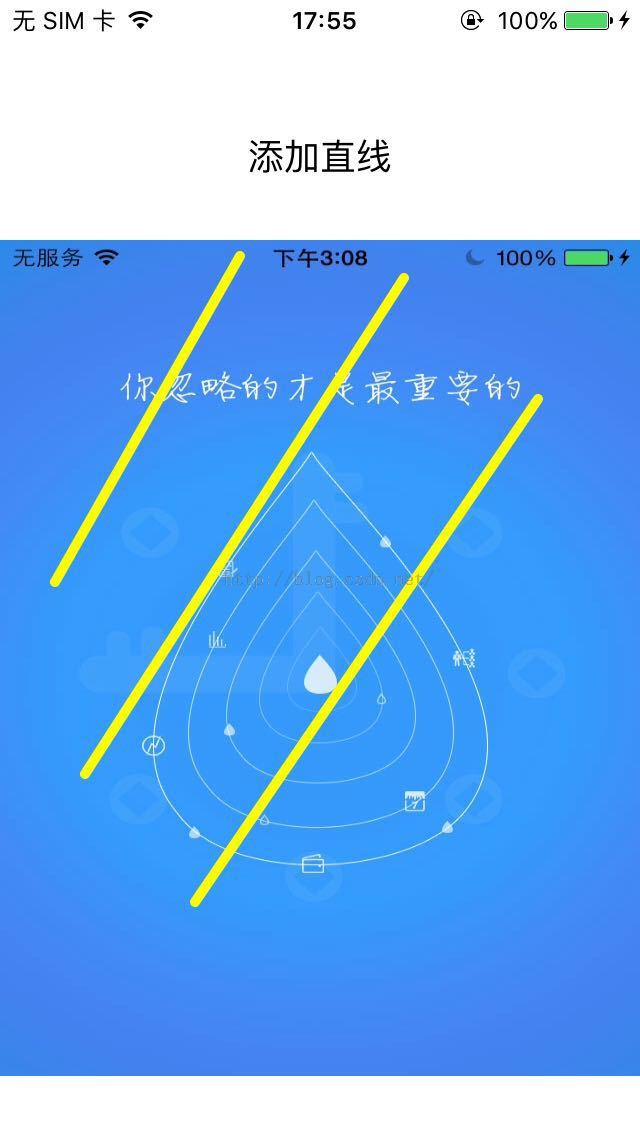
帶剪頭的線條
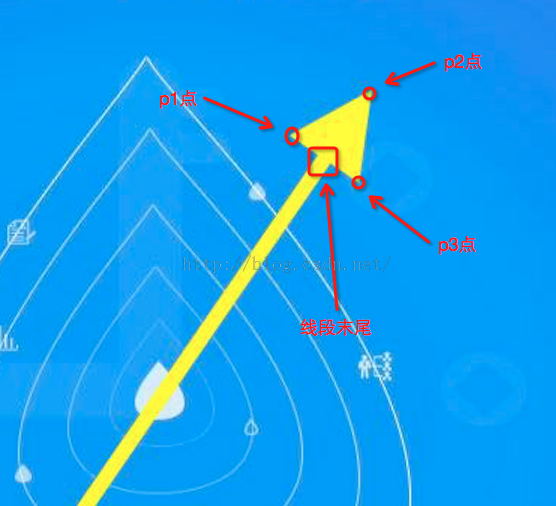
在下面例子的基本上略微拓展一下,給線段末尾加上一個箭頭
給DrawLine 類中添的辦法 drawRect 中添加一段代碼

//添加剪頭
double r = sqrt((line.end.x-line.begin.x)*(line.end.x-line.begin.x)+(line.begin.y-line.end.y)*(line.begin.y-line.end.y));//線條長度
CGContextMoveToPoint(cgt,line.end.x,line.end.y);
//P1
CGContextAddLineToPoint(cgt,line.end.x-(10*(line.begin.y-line.end.y)/r),line.end.y-(10*(line.end.x-line.begin.x)/r));
//P3
CGContextAddLineToPoint(cgt,line.end.x+(20*(line.end.x-line.begin.x)/r), line.end.y-(20*(line.begin.y-line.end.y)/r));
//P2
CGContextAddLineToPoint(cgt,line.end.x+(10*(line.begin.y-line.end.y)/r),line.end.y+(10*(line.end.x-line.begin.x)/r));
CGContextAddLineToPoint(cgt, line.end.x,line.end.y);
CGContextDrawPath(cgt,kCGPathFillStroke);
CGContextStrokePath(cgt);
以上辦法的思緒 就是在線段畫完以後 肯定三個點 畫一個三角形作為箭頭外形
【詳解iOS App中圖片的線段塗鴉功效的添加辦法】的相關資料介紹到這裡,希望對您有所幫助! 提示:不會對讀者因本文所帶來的任何損失負責。如果您支持就請把本站添加至收藏夾哦!