
iOS應用中使用Toolbar工具欄方式切換視圖的方法詳解
關於UIToolbar
ToolBar工具欄是視圖View的屬性,可以在工具欄上添加工具欄按鈕Bar Button Item(可以是自定義的Custom、也可以是系統自帶的BarButtonSystemItem ),視圖控制器可以通過工具欄項對視圖中內容進行操作。
注意事項:
在導航欄控制器中會有一個UIToolBar實例,但默認是隱藏的,如果需要顯示,需要通過這個方法將其打開:

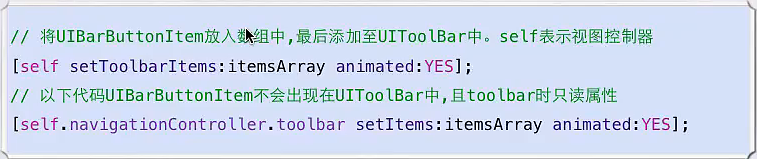
在這裡需要注意的是,與UINavigationBar類似,導航控制器擁有且只擁有一個UIToolBar實例,但UIToolBar擁有的UIBarButtonItem實例,是由視圖控制器進行管理的,如下所示:
工具欄風格:
typedef NS_ENUM(NSInteger, UIBarStyle) {
  UIBarStyleDefault     = 0,    //默認風格,藍色文字
  UIBarStyleBlack      = 1,    //黑色背景,褐色文字
  UIBarStyleBlackOpaque   = 1,  // 純黑色背景,白色文字
  UIBarStyleBlackTranslucent = 2,  // 透明黑色背景,白色文字
};
屬性:
@property(nonatomic)    UIBarStyle barStyle;  //工具欄風格,默認為藍色
@property(nonatomic,copy)  NSArray  *items;   //工具欄中的按鈕單元,UIBarButtonItem
@property(nonatomic,assign,getter=isTranslucent) BOOL translucent //是否透明
@property(nonatomic,retain) UIColor *tintColor;    //按鈕顏色
@property(nonatomic,retain) UIColor *barTintColor; //工具欄顏色
方法:
※設置工具欄中的按鈕單元
- (void)setItems:(NSArray *)items animated:(BOOL)animated;
※設置工具欄的背景圖像
復制代碼 代碼如下:
- (void)setBackgroundImage:(UIImage *)backgroundImage forToolbarPosition:(UIBarPosition)topOrBottom barMetrics:(UIBarMetrics)barMetrics;
※獲取工具欄的背景圖像復制代碼 代碼如下:
- (UIImage *)backgroundImageForToolbarPosition:(UIBarPosition)topOrBottom barMetrics:(UIBarMetrics)barMetrics;
※設置工具欄的陰影圖像
復制代碼 代碼如下:
- (void)setShadowImage:(UIImage *)shadowImage forToolbarPosition:(UIBarPosition)topOrBottom;
※獲取工具欄的陰影圖像
復制代碼 代碼如下:
- (UIImage *)shadowImageForToolbarPosition:(UIBarPosition)topOrBottom ;
Tool Bar方式切換視圖
1、創建工程:
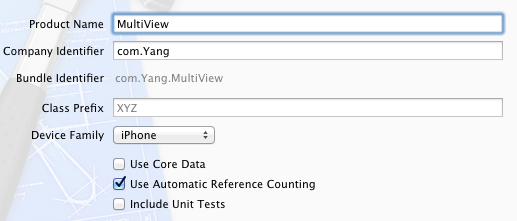
運行Xcode,新建一個Empty Application,名稱為MultiView,其他設置如下圖:
2、創建3個View Controller:
依次選擇File — New — New File,打開如下窗口:
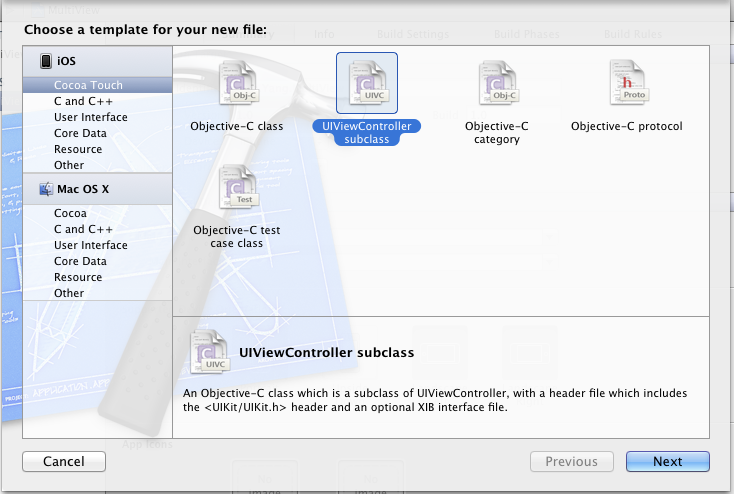
找到UIViewController subclass並單擊Next,打開下面的窗口:
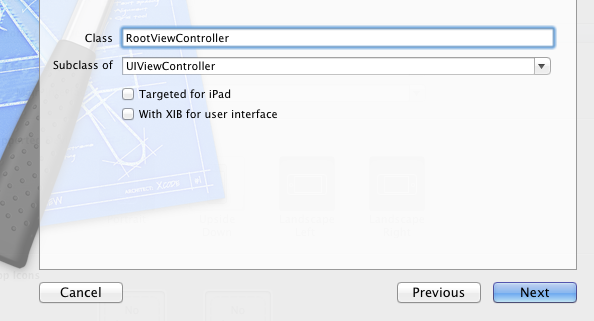
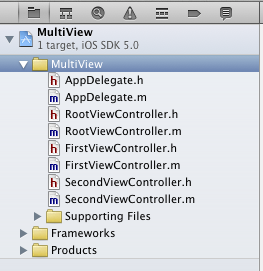
輸入名稱RootViewController,並且保證Subclass of選擇UIViewController,下面的兩個選框都不選;按照同樣的步驟新建兩個View Controller,名稱分別是FirstViewController和SecondViewController。建好後,在Project Navigation中顯示文件如下:
3、為三個View Controller創建.xib文件:
依次選擇File — New — New File,打開如下窗口:
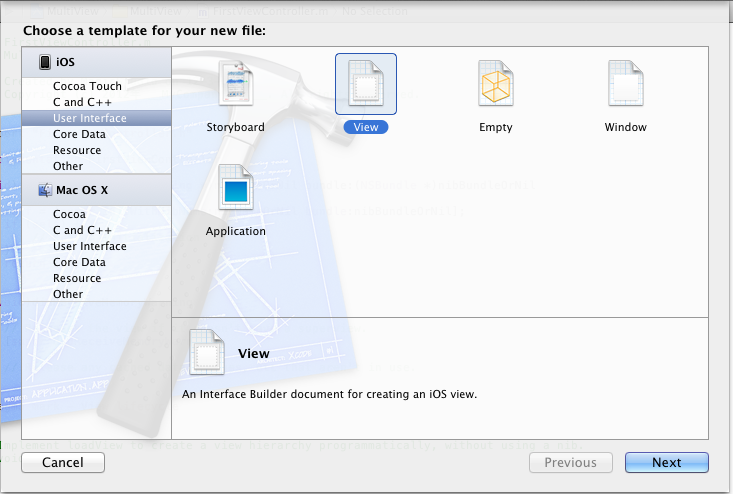
在左邊選User Interface,右邊選View,單擊Next,在新窗口中的Device Family中選擇iPhone,單擊Next,打開如下窗口:

輸入名稱RootView,單擊Create,創建了一個.xib文件。用同樣的方法再創建兩個.xib,名稱分別是FirstView和SecondView。
4、修改App Delegate:
4.1 單擊AppDelegate.h,在其中添加代碼,在@interface之前添加@class RootViewController;在@end之前添加@property (strong, nonatomic) RootViewController *rootViewController;添加之後的代碼如下:
#import <UIKit/UIKit.h>
@class RootViewController;
@interface AppDelegate : UIResponder <UIApplicationDelegate>
@property (strong, nonatomic) UIWindow *window;
@property (strong, nonatomic) RootViewController *rootViewController;
@end
4.2 單擊AppDelegate.m,修改其代碼。在@implementation之前添加#import "RootViewController.h",在@implementation之後添加@synthesize rootViewController;然後修改didFinishLaunchingWithOptions方法如下:
- (BOOL)application:(UIApplication *)application didFinishLaunchingWithOptions:(NSDictionary *)launchOptions
{
  self.window = [[UIWindow alloc] initWithFrame:[[UIScreen mainScreen] bounds]];
  // Override point for customization after application launch.
  self.rootViewController = [[RootViewController alloc] initWithNibName:@"RootView" bundle:nil];
  UIView *rootView = self.rootViewController.view;
  CGRect rootViewFrame = rootView.frame;
  rootViewFrame.origin.y += [UIApplication sharedApplication].statusBarFrame.size.height;
  rootView.frame = rootViewFrame;
  [self.window addSubview:rootView];
  self.window.backgroundColor = [UIColor whiteColor];
  [self.window makeKeyAndVisible];
  return YES;
}
① 復制代碼 代碼如下: self.rootViewController = [[RootViewController alloc] initWithNibName:@"RootView" bundle:nil];
這行代碼用於從RootView.xib文件中初始化rootViewController,注意initWithNibName:@"RootView"中不要後綴名.xib
② 復制代碼 代碼如下:rootViewFrame.origin.y += [UIApplication sharedApplication].statusBarFrame.size.height;
使得RootViewController的視圖不會被狀態欄擋住
5、修改RootViewController.h:
單擊RootViewController.h,在其中添加兩個屬性和一個方法,如下:
#import <UIKit/UIKit.h>
@class FirstViewController;
@class SecondViewController;
@interface RootViewController : UIViewController
@property (strong, nonatomic) FirstViewController *firstViewController;
@property (strong, nonatomic) SecondViewController *secondViewController;
- (IBAction)switchViews:(id)sender;
@end
6、打開RootView.xib,在坐邊選擇File's Owner,在右邊打開Identity Inspector,在Class下拉菜單選擇RootViewController:
這樣,我們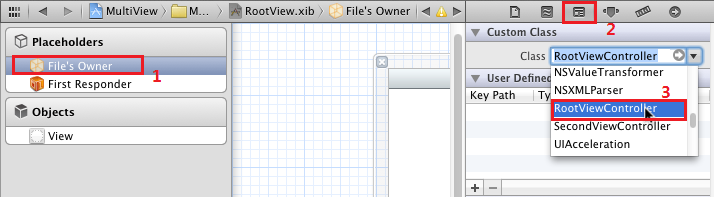 就可以從RootView.xib文件向RootViewController創建Outlet和Action了。
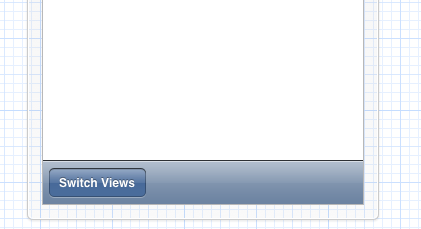
7、為RootView.xib添加工具欄:打開RootView.xib,拖一個Tool Bar到視圖上,雙擊Tool Bar上的按鈕,修改其名稱為Switch Views:
8、添加Action映射:
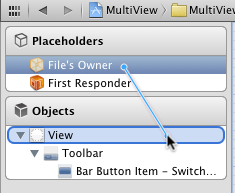
選中Switch Views按鈕,按住Control,拖到File's Owner,松開鼠標後選擇switchViews方法:

9、選擇File's Owner,按住Control鍵,拖到View,松開鼠標,選擇view:
10、修改RootViewController.m:
打開RootViewController.m文件,在@implementation之前添加代碼:
#import "FirstViewController.h"
#import "SecondViewController.h"
在@implementation之後添加代碼:
@synthesize firstViewController;
@synthesize secondViewController;
接下來修改viewDidLoad方法,這個方法默認是被注釋掉的,先去掉其周圍的注釋符,然後修改其代碼如下:
- (void)viewDidLoad
{
  self.firstViewController = [[FirstViewController alloc] initWithNibName:@"FirstView" bundle:nil];
  [self.view insertSubview: firstViewController.view atIndex:0];
  [super viewDidLoad];
}
添加switchViews方法:
- (IBAction)switchViews:(id)sender {
  if (self.secondViewController.view.superview == nil) {
    if (self.secondViewController == nil) {
      self.secondViewController = [[SecondViewController alloc] initWithNibName:@"SecondView" bundle:nil];
    }
    [firstViewController.view removeFromSuperview];
    [self.view insertSubview:self.secondViewController.view atIndex:0];
  } else {
    if (self.firstViewController == nil) {
      self.firstViewController =
      [[FirstViewController alloc] initWithNibName:@"FirstView" bundle:nil];
    }
    [secondViewController.view removeFromSuperview];
    [self.view insertSubview:self.firstViewController.view atIndex:0];
  }
}
修改didReceiveMemoryWarning方法:
- (void)didReceiveMemoryWarning
{
  [super didReceiveMemoryWarning];
  if (self.firstViewController.view.superview == nil) {
    self.firstViewController = nil;
  } else {
    self.secondViewController = nil;
  }
}
11、打開FirstView.xib文件,選擇左邊的File's Owner,然後在Identity Inspector中選擇Class為FirstViewController;然後按住Control鍵從File's Owner圖標拖到View,在彈出的菜單選擇view。為SecondView.xib進行同樣的操作,不過Class選擇為SecondViewController。
12、打開FirstView.xib文件,選擇View,打開Attribute Inspector,進行如下設置:
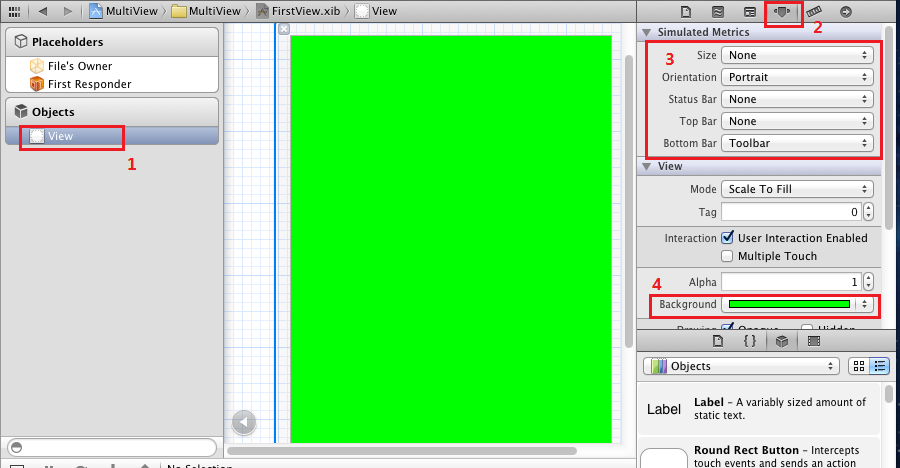
對SecondView.xib進行同樣設置,不過背景顏色設成紅色。
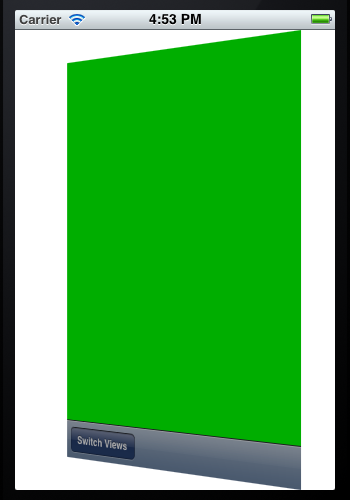
13、此時運行程序,你會看見剛啟動的時候,程序顯示的綠色背景,輕觸Switch Views按鈕後,背景變成了紅色。不斷輕觸按鈕,背景不斷變換。
14、添加切換背景的動畫效果:
打開RootViewController.m,修改其中的switchViews方法如下:
- (IBAction)switchViews:(id)sender {
  [UIView beginAnimations:@"View Flip" context:nil];
  [UIView setAnimationDuration:1.25];
  [UIView setAnimationCurve:UIViewAnimationCurveEaseInOut];
  if (self.secondViewController.view.superview == nil) {
    if (self.secondViewController == nil) {
      self.secondViewController = [[SecondViewController alloc] initWithNibName:@"SecondView" bundle:nil];
    }
    [UIView setAnimationTransition: UIViewAnimationTransitionFlipFromRight forView:self.view cache:YES];
    [self.firstViewController.view removeFromSuperview];
    [self.view insertSubview:self.secondViewController.view atIndex:0];
  } else {
    if (self.firstViewController == nil) {
      self.firstViewController = [[FirstViewController alloc] initWithNibName:@"FirstView" bundle:nil];
    }
    [UIView setAnimationTransition: UIViewAnimationTransitionCurlUp forView:self.view cache:YES];
    [self.secondViewController.view removeFromSuperview];
    [self.view insertSubview:self.firstViewController.view atIndex:0];
  }
  [UIView commitAnimations];
}
注意四個表示切換效果的常量:
UIViewAnimationTransitionFlipFromLeft
UIViewAnimationTransitionFlipFromRight
UIViewAnimationTransitionCurlDown
UIViewAnimationTransitionCurlUp
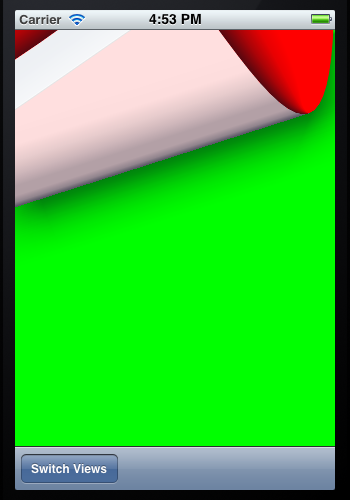
分別表示從左翻轉、從右翻轉、向下卷、向上卷。
運行後翻頁效果如下:


- iOS二維碼的生成和掃描
- 解析iOS10中的極光推送新聞的適配
- ios獲取未知類所有屬性和方法
- iOS9使用提示框的正確實現方式
- iOS7新特性 ViewController轉場切換(二) 系統視圖控制器容器的切換動畫---push pop present dismis
- iOS實現第三方微信登錄方式實例解析(最新最全)
- iOS xib和代碼關聯運用
- iOS 8 引入的 UIActionSheet 和 UIAlertView 的替代品 - UIAlertController
- iOS開發之--通訊錄、藍牙、內購、GameCenter、iCloud、Passbook功能開發匯總
- 上架AppleStore被拒絕的部分因素