如何實現iOS圖書動畫-第2部分(上)
歡迎回到iOS圖書動畫系列教程!在第一部分,我們學習了如何創建兩個自定義的collection view layout並在圖書書頁中使用了陰影圖層以使我們的App顯得更加立體和真實。
在這一部分,我們將學習如何創建自定義的轉場動畫並通過捏放手勢來打開一本書。
注意:感謝Attila Hegedüs創建了本教程的示例程序。
開始
本教程以前一部分的內容為基礎。如果你還沒有看過第一部分,或者想從一個新項目開始,你可以在這裡下載上一部分教程中的完整示例程序。
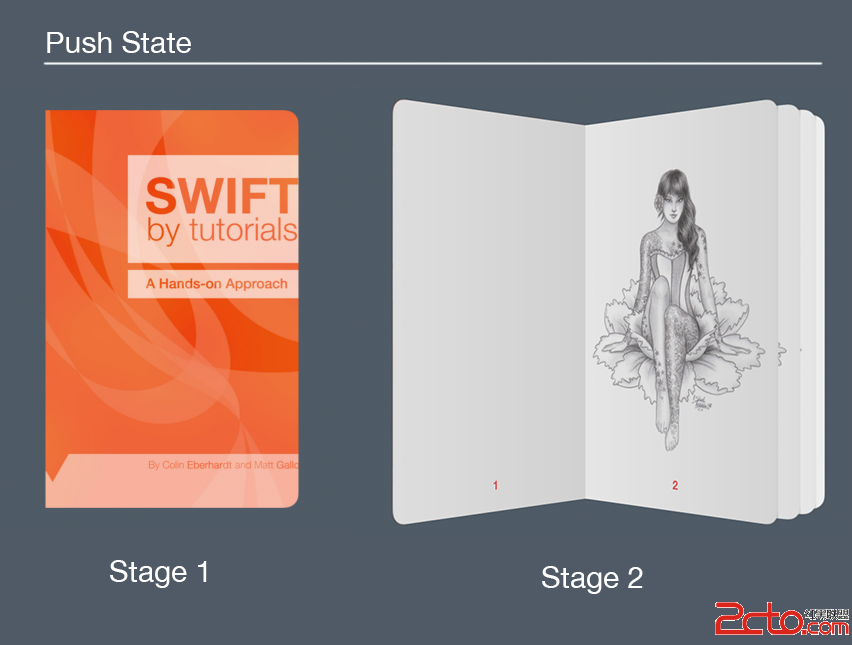
在Xcode中打開項目。現在,你可以選擇一本書進行閱讀,並從右邊滑動進行翻頁。這時的轉場動畫使用的是UINavigationController自帶的動畫效果。通過本教程的學習,我們將自定義這個動畫效果,如下圖所示:
這個動畫會在“打開書”和“合起書”兩個狀態之間一一種更加自然的方式平滑過渡,這將更能獲得用戶的歡心。讓我們馬上開始吧!
創建自定義的導航控制器
要創建自定義的push動畫和pop動畫,我們必須創建自定義導航控制器並實現UINavigationControllerDelegate協議。
在App文件夾上右擊(或ctrl+左鍵)並點擊New File。選擇iOSSourceCocoa Touch Class模板並將類名設置為CustomNavigationController。讓它繼承自UINavigationController並將語言設置為Swift。點擊Next,Create。
打開CustomNavigationController.swift,編輯其內容為:
import UIKit

class CustomNavigationController: UINavigationController, UINavigationControllerDelegate {

  override func viewDidLoad() {
    super.viewDidLoad()
    //1
    delegate = self
  }

  //2
  func navigationController(navigationController: UINavigationController, animationControllerForOperation operation: UINavigationControllerOperation, fromViewController fromVC: UIViewController, toViewController toVC: UIViewController) -> UIViewControllerAnimatedTransitioning? {
    if operation == .Push {
      return nil
    }

    if operation == .Pop {
      return nil
    }

    return nil
  }
}
上述代碼分別解釋如下:
在 viewDidLoad 方法中,設置CustomNavigationController的delegate屬性為它自己。 navigationController(_:animationControllerForOperation:fromViewController:toViewController:) 方法屬於UINavigationControllerDelegate協議。這個方法在兩個View Controller之間發生push或pop導航時調用。你可以在這個方法中分別針對push導航和pop導航返回各自的Transition對象。目前我們都返回了nil,這表明我們將使用UINavigationController內置的標准Transition。稍後我們將替換為自己的Transition對象。現在我們擁有了自己的Navigation Controller類,接下來在故事板中將默認的UINavigationController替換為我們的CustomNavigationController。
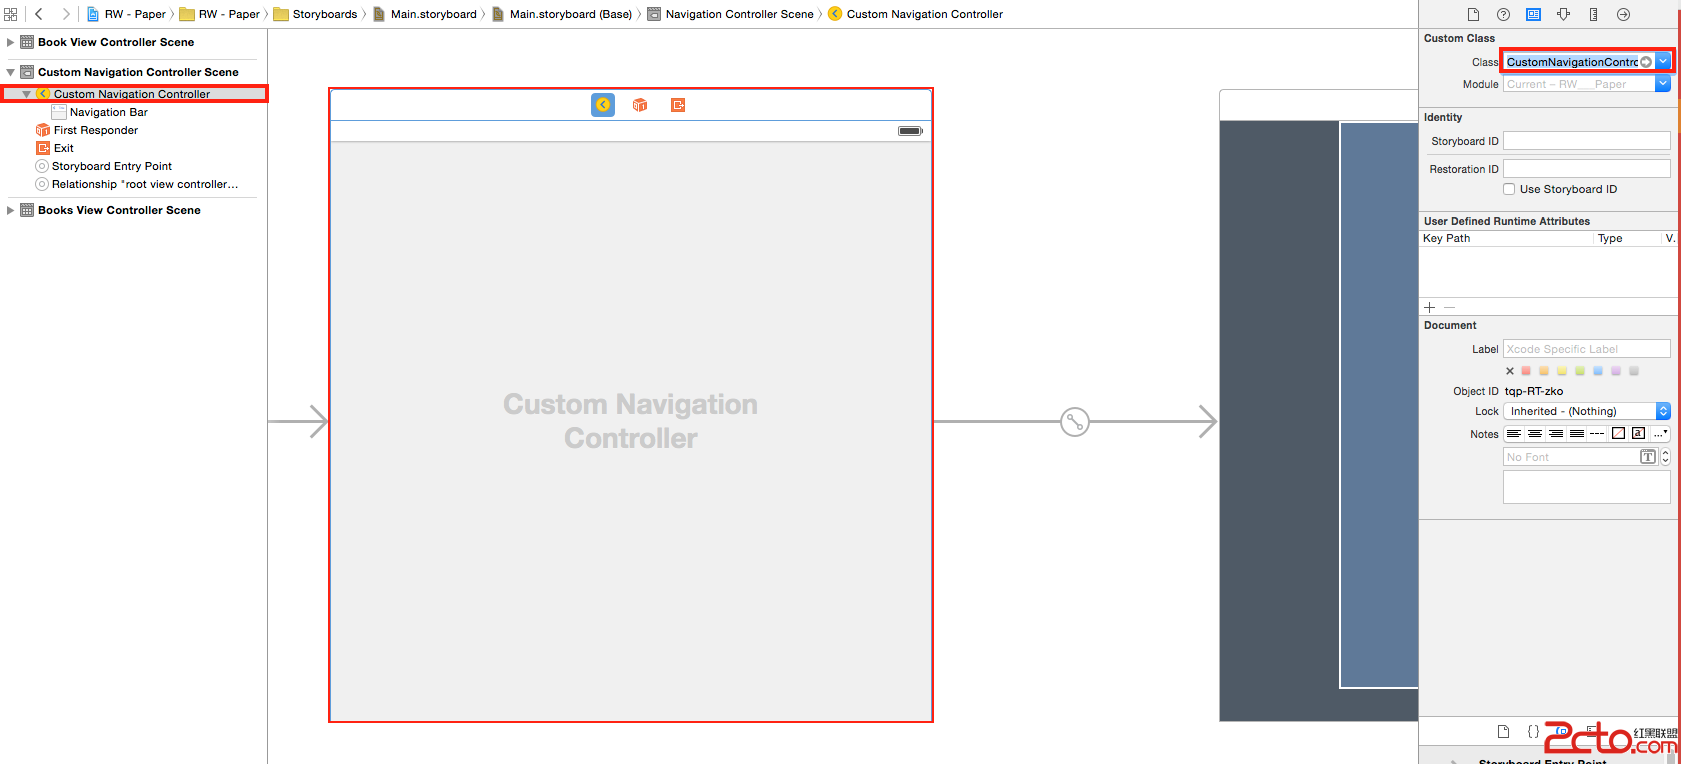
打開Main.storyboard,在故事板編輯器左側的對象窗口中選擇Navigation Controller對象,打開Identity窗口,在Custom Class下,將Class由UINavigationController修改為CustomNavigationController,如下圖所示:
編譯運行,什麼變化都沒有發生。這是因為在委托方法中我們仍然返回了nil,因此使用的仍然是UINavigationController內置的標准Transition。
創建自定義導航動畫
最有趣的部分來了——創建我們的自定義Transition對象!:]
要自定義Transition類,我們必須實現UIViewControllerAnimatedTransitioning協議,最主要的是這幾個方法:
創建自定義Transition類
在App文件夾上右擊(或ctrl+左鍵),然後點擊New File。選擇iOSSourceCoca Touch Class 模板,將類名設置為BookOpeningTransition,繼承NSObject,語言Swift。然後點擊Next,Create。
打開BookOpeningTransition.swift,編輯代碼如下:
import UIKit

//1
class BookOpeningTransition: NSObject, UIViewControllerAnimatedTransitioning {

  // MARK: Stored properties
  var transforms = [UICollectionViewCell: CATransform3D]() //2
  var toViewBackgroundColor: UIColor? //3
  var isPush = true //4

  //5
  // MARK: UIViewControllerAnimatedTransitioning
  func transitionDuration(transitionContext: UIViewControllerContextTransitioning) -> NSTimeInterval {
    return 1
  }

  func animateTransition(transitionContext: UIViewControllerContextTransitioning) {

  }
}
以上代碼對應注釋中的編號,分別解釋如下:
聲明 BookOpeningTransition 類實現UIViewControllerAnimatedTransitioning 協議。 聲明一個 transforms 字典,鍵存儲UICollectionViewCell,值則存儲對應的CATransiform3D。這個字典保存在書打開後所有cell的翻頁動畫。 指定to視圖控制器的背景色,它將讓淡出淡入動畫看起來更加清楚。 布爾值isPush 用於標識當前動畫是Push動畫還是Pop動畫。 增加必須實現的 UIViewControllerAnimatedTransitioning 協議方法,以使編譯錯誤不再出現,稍後我們會實現這些方法。定義好需要的變量,接下來就是實現協議方法。
首先是transitionDuration(_:)方法:
if isPush {
  return 1
} else {
  return 1
}
transitionDuration(_:)方法返回了動畫播放時長。這裡,無論是Push動畫還是Pop動畫我們都設置為1秒。通過這個方法我們可以很方便地改變Push動畫或Pop動畫的時長。
然後,是第二個協議方法——animateTransition——這是最核心的部分!:]我們將這個方法分成兩部分來介紹:
實現一個助手方法,用於創建Push動畫所需的Transition對象。 實現一個助手方法,用於創建Pop動畫所需的Transition對象。創建Push動畫
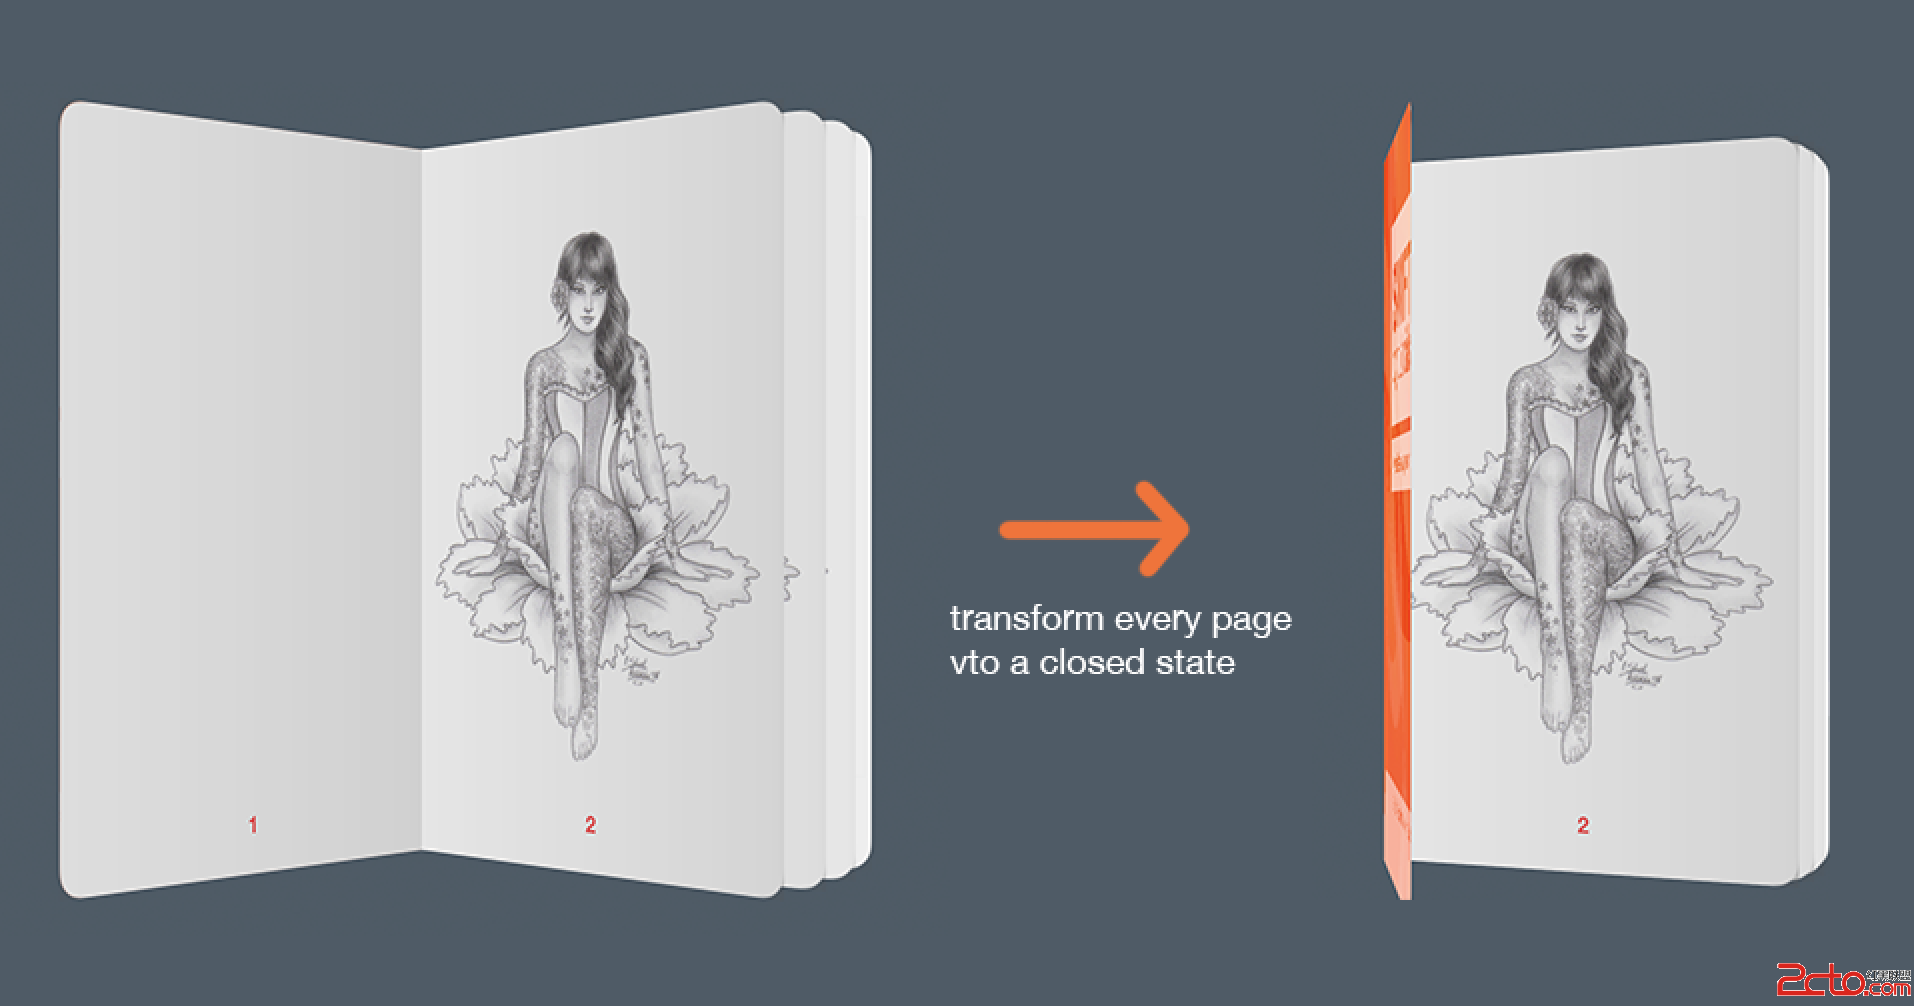
回想你在生活中打開一本書的樣子:
雖然看起來復雜,但我們只需要考慮兩個狀態,同時讓UIView的animateWithDuration方法根據這兩個狀態進行不同的處理:
狀態1,書處於合起狀態。 狀態2,書處於打開狀態;這就是我們在第一部分教程中實現的部分。首先,在實現animateTransition(:_)協議方法之前,我們來實現幾個助手方法。
仍然在BookOpeningTransition.swift中,編寫如下方法:
// MARK: Helper Methods
func makePerspectiveTransform() -> CATransform3D {
  var transform = CATransform3DIdentity
  transform.m34 = 1.0 / -2000
  return transform
}
這個方法返回了一個Transform對象,並在z軸上增加了一點立體感。在播放動畫時,我們將用到這個方法。
狀態 1 - 合起書
在makePerspectiveTransform方法後實現如下方法:
func closePageCell(cell : BookPageCell) {
// 1
var transform = self.makePerspectiveTransform()
// 2
if cell.layer.anchorPoint.x == 0 {
// 3
transform = CATransform3DRotate(transform, CGFloat(0), 0, 1, 0)
// 4
transform = CATransform3DTranslate(transform, -0.7 * cell.layer.bounds.width / 2, 0, 0)
// 5
transform = CATransform3DScale(transform, 0.7, 0.7, 1)
}
// 6
else {
// 7
transform = CATransform3DRotate(transform, CGFloat(-M_PI), 0, 1, 0)
// 8
transform = CATransform3DTranslate(transform, 0.7 * cell.layer.bounds.width / 2, 0, 0)
// 9
transform = CATransform3DScale(transform, 0.7, 0.7, 1)
}
//10
cell.layer.transform = transform
}
回想一下BookViewController,它是一個CollectionView,代表了書中的一頁。我們將每一頁和書脊對齊,以y軸為心進行旋轉實現翻頁效果。首先,書是合起(關閉)的。這個方法將每個cell(即書頁)放平並置於封面的下面。
這是動畫運行效果:
以上代碼解釋如下:
用前面創建的助手方法,生成一個Transform對象。 判斷cell是否是右側頁。 如果是,設置其角度為0,即放置為水平。 將它移動到封面下方並居中對齊。 將它縮放為70%。還記得我們前面將封面也縮放為70%嗎?這裡是同樣的意思。 如果cell不是右側頁,則就是左側頁。 設置左側頁的角度為180度。要將它水平放置,我們需要將它翻到書脊的右邊。 將它放到封面下方並居中對齊。 縮放70%。 最後,賦給cell的transform屬性。在上面的方法後添加如下方法:
func setStartPositionForPush(fromVC: BooksViewController, toVC: BookViewController) {
  // 1
  toViewBackgroundColor = fromVC.collectionView?.backgroundColor
  toVC.collectionView?.backgroundColor = nil

  //2
  fromVC.selectedCell()?.alpha = 0

  //3
  for cell in toVC.collectionView!.visibleCells() as! [BookPageCell] {
    //4
    transforms[cell] = cell.layer.transform
    //5
    closePageCell(cell)
    cell.updateShadowLayer()
    //6
    if let indexPath = toVC.collectionView?.indexPathForCell(cell) {
      if indexPath.row == 0 {
        cell.shadowLayer.opacity = 0
      }
    }
  }
}
setStartPositionForPush(_:toVC:)方法創建狀態1的Transition。這個動畫涉及到兩個ViewController:
fromVC,類型為BooksViewController,用於滾動浏覽圖書列表。
toVC,BookViewController類型,讓你可以翻閱選定的書。
以上代碼解釋如下:
保存BooksViewController的Cellection View的背景色,然後設置BookViewController的Collection View的背景色為nil。 隱藏封面。現在toVC將負責處理封面圖片的顯示。 遍歷書中所有書頁。 保存每一頁的當前Transform到transforms字典。 由於書一開始是合起的,我們將該頁轉換為合起狀態,然後更新陰影圖層。 最後,忽略封面圖片的陰影。

- ReactiveCocoa 4 如何運用冷熱信號
- iOS------教你如何APP怎樣加急審核
- iOS之如何啟動app時全屏顯示Default.png(圖片)
- iOS利用AFNetworking實現文件上傳的示例代碼
- iOS 使用 socket 實現即時通信示例(非第三方庫)
- ios swift3.0實現二維碼掃描、生成、識別示例代碼
- IOS 開發狀態欄隱藏的實現辦法
- IOS購物車界面實現效果示例
- iOS中UITableView Cell實現自定義單選功能
- iOS實現錄音轉碼MP3及轉碼BASE64上傳示例
- PrefixHeader.pch file not found 以及 Xcode 中如何添加pch文件
- AIR Native Extension for iOS 接入第三方sdk 如何實現 AppDelegate 生命周期
- iOS使用分類(category)實現有序字典
- iOS 利用runtime 實現全局字體的改變
- 類比Spring框架來實現OC中的依賴注入