如何實現iOS圖書動畫-第2部分(下)
狀態 2 - 打開書
現在,狀態1的動畫完成了,我們可以轉移到狀態2的處理中來。在這裡我們將一本合起的書轉換成一本打開的書。在setStartPositionForPush(_:toVC:)方法下添加如下方法:
func setEndPositionForPush(fromVC: BooksViewController, toVC: BookViewController) {
  //1
  for cell in fromVC.collectionView!.visibleCells() as! [BookCoverCell] {
    cell.alpha = 0
  }

  //2
  for cell in toVC.collectionView!.visibleCells() as! [BookPageCell] {
    cell.layer.transform = transforms[cell]!
    cell.updateShadowLayer(animated: true)
  }
}
上述代碼解釋如下:
隱藏所有書的封面,因為接下來我們要顯示所選圖書的內容。 在BookViewController中遍歷書中每一頁並讀取先前保存在transform數組中的的Transform。在從BooksViewController導航到BookViewController後,我們還需要進行一些清理工作。
在上面的方法之後加入如下方法:
func cleanupPush(fromVC: BooksViewController, toVC: BookViewController) {
  // Add background back to pushed view controller
  toVC.collectionView?.backgroundColor = toViewBackgroundColor
}
在Push完成時,我們將BookViewController的Collection View的背景色設回原來保存的顏色,隱藏位於它下面的內容。
實現打開書的動畫
現在我們已經實現了助手方法,接下來要實現Push動畫了!
在空的animateTransition(_:)方法中加入以下代碼:
//1
let container = transitionContext.containerView()
//2
if isPush {
  //3
  let fromVC = transitionContext.viewControllerForKey(UITransitionContextFromViewControllerKey) as! BooksViewController
  let toVC = transitionContext.viewControllerForKey(UITransitionContextToViewControllerKey) as! BookViewController
  //4
  container.addSubview(toVC.view)

  // Perform transition
  //5
  self.setStartPositionForPush(fromVC, toVC: toVC)

  UIView.animateWithDuration(self.transitionDuration(transitionContext), delay: 0.0, usingSpringWithDamping: 0.7, initialSpringVelocity: 0.7, options: nil, animations: {
    //6
    self.setEndPositionForPush(fromVC, toVC: toVC)
    }, completion: { finished in
      //7
      self.cleanupPush(fromVC, toVC: toVC)
      //8
      transitionContext.completeTransition(finished)
  })
} else {
  //POP
}
以上代碼解釋如下:
獲取Container View,Container View在兩個View Controller發生轉場時充當父視圖的角色。 判斷當前的轉場動作是否是一個Push動作。 如果是,分別獲取fromVC(BooksViewController)和toVC(BookViewController)。 將toVC(BookViewController)加到Container View。 設定Push動作的起止點,即toVC和fromVC。 開始動畫。從起始點(書合起的狀態)轉變到終點(書打開狀態)。 執行清理動作。 告訴系統,轉換完成。在Navigation Controller中應用Push動畫
現在我們已經創建好Push動畫,接下來就是將它應用到自定義的Navigation Controller中了。
打開BooksViewController.swift在類聲明中增加屬性:
var transition: BookOpeningTransition?
transition屬性用於保存Transition對象,通過它我們可以知道當前動畫是Push動畫還是Pop動畫。
然後在文件末尾的大括號之後加入一個擴展:
extension BooksViewController {
func animationControllerForPresentController(vc: UIViewController) -> UIViewControllerAnimatedTransitioning? {
  // 1
  var transition = BookOpeningTransition()
  // 2
  transition.isPush = true
  // 3
  self.transition = transition
  // 4
  return transition
  }
}
通過擴展,我們將一部分代碼分離出來。這裡,我們將和轉換動畫有關的方法放到了一起。上面的這個方法創建並返回了一個Transition對象。
以上代碼解釋如下:
現在打開CustomNavigationController.swift並將Push的if語句替換為:
if operation == .Push {
  if let vc = fromVC as? BooksViewController {
    return vc.animationControllerForPresentController(toVC)
  }
}
上述語句判斷當前Push的View Controller是不是一個BooksViewController,如果是,用我們創建的BookOpeningTransition呈現BookViewController。
編譯運行,選擇某本書,你將看到書緩緩由合起狀態打開:
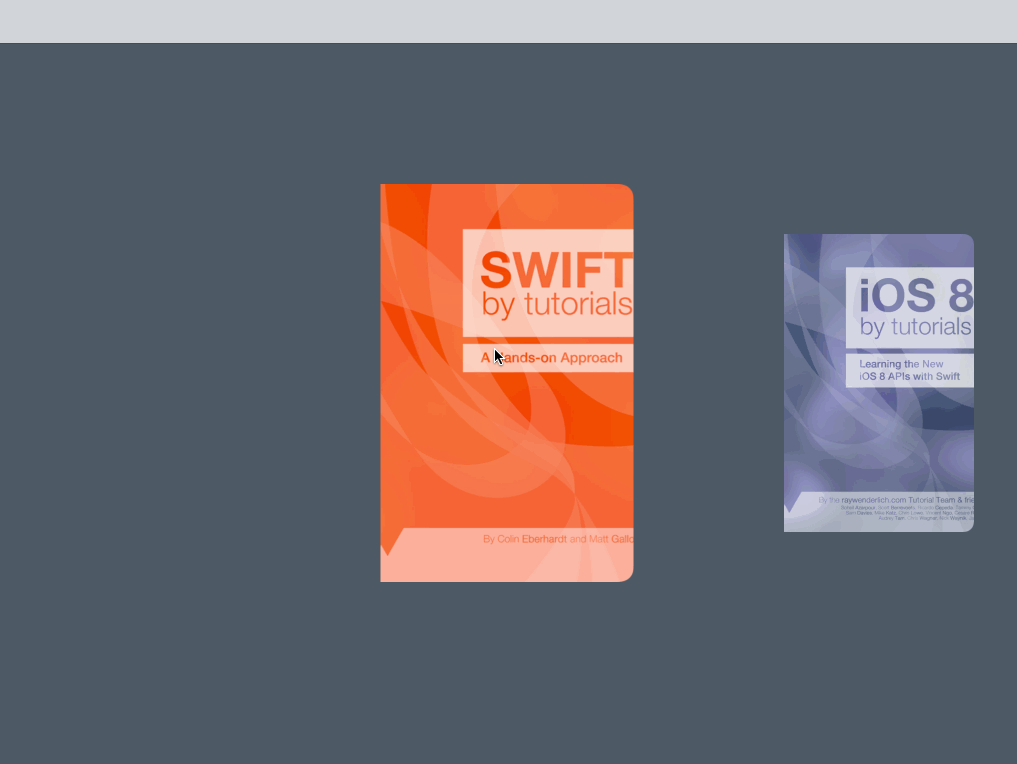
呃…我們的動畫效果呢?
書直接從合起狀態跳到了打開狀態,原因在於我們沒有加載cell(書頁)!
導航控制器從BooksViewController切換到BookViewController,這二者都是UICollecitonViewController。UICollectionViewCell沒有在主線程中加載,因此代碼一開始的時候以為cell的個數為0——這樣當然不會有動畫產生。
我們需要讓Collection View有足夠的時間去加載所有的Cell。
打開BooksViewController.swift將openBook(_:)方法替換為:
func openBook(book: Book?) {
  let vc = storyboard?.instantiateViewControllerWithIdentifier(BookViewController) as! BookViewController
  vc.book = selectedCell()?.book
  //1
  vc.view.snapshotViewAfterScreenUpdates(true)
  //2
  dispatch_async(dispatch_get_main_queue(), { () -> Void in
    self.navigationController?.pushViewController(vc, animated: true)
    return
  })
}
以上代碼解釋如下:
告訴BookViewController在動畫一開始之前截屏。 將Push BookViewController的動作放到主線程中進行,這樣就有時間去加載cell了。編譯、運行,這次你將看到正確的Push動畫了:
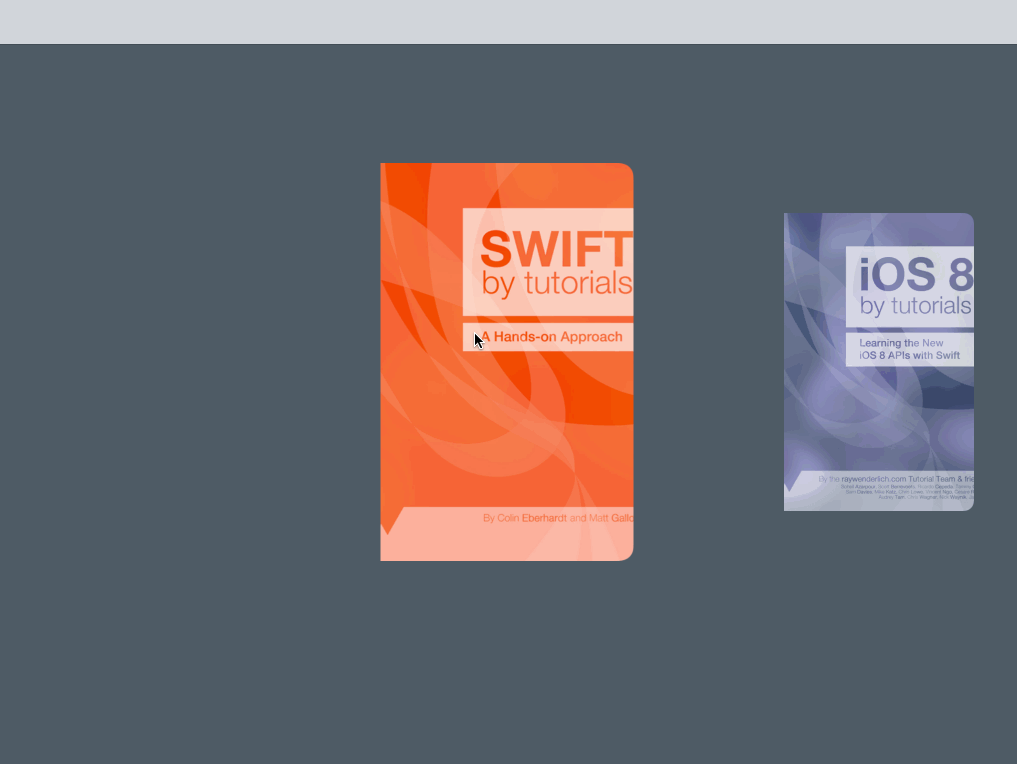
這樣看起來是不是好多啦?
現在,關於Push動畫的內容就到此結束,接下來,我們開始實現Pop動畫。
實現Pop動畫的助手方法
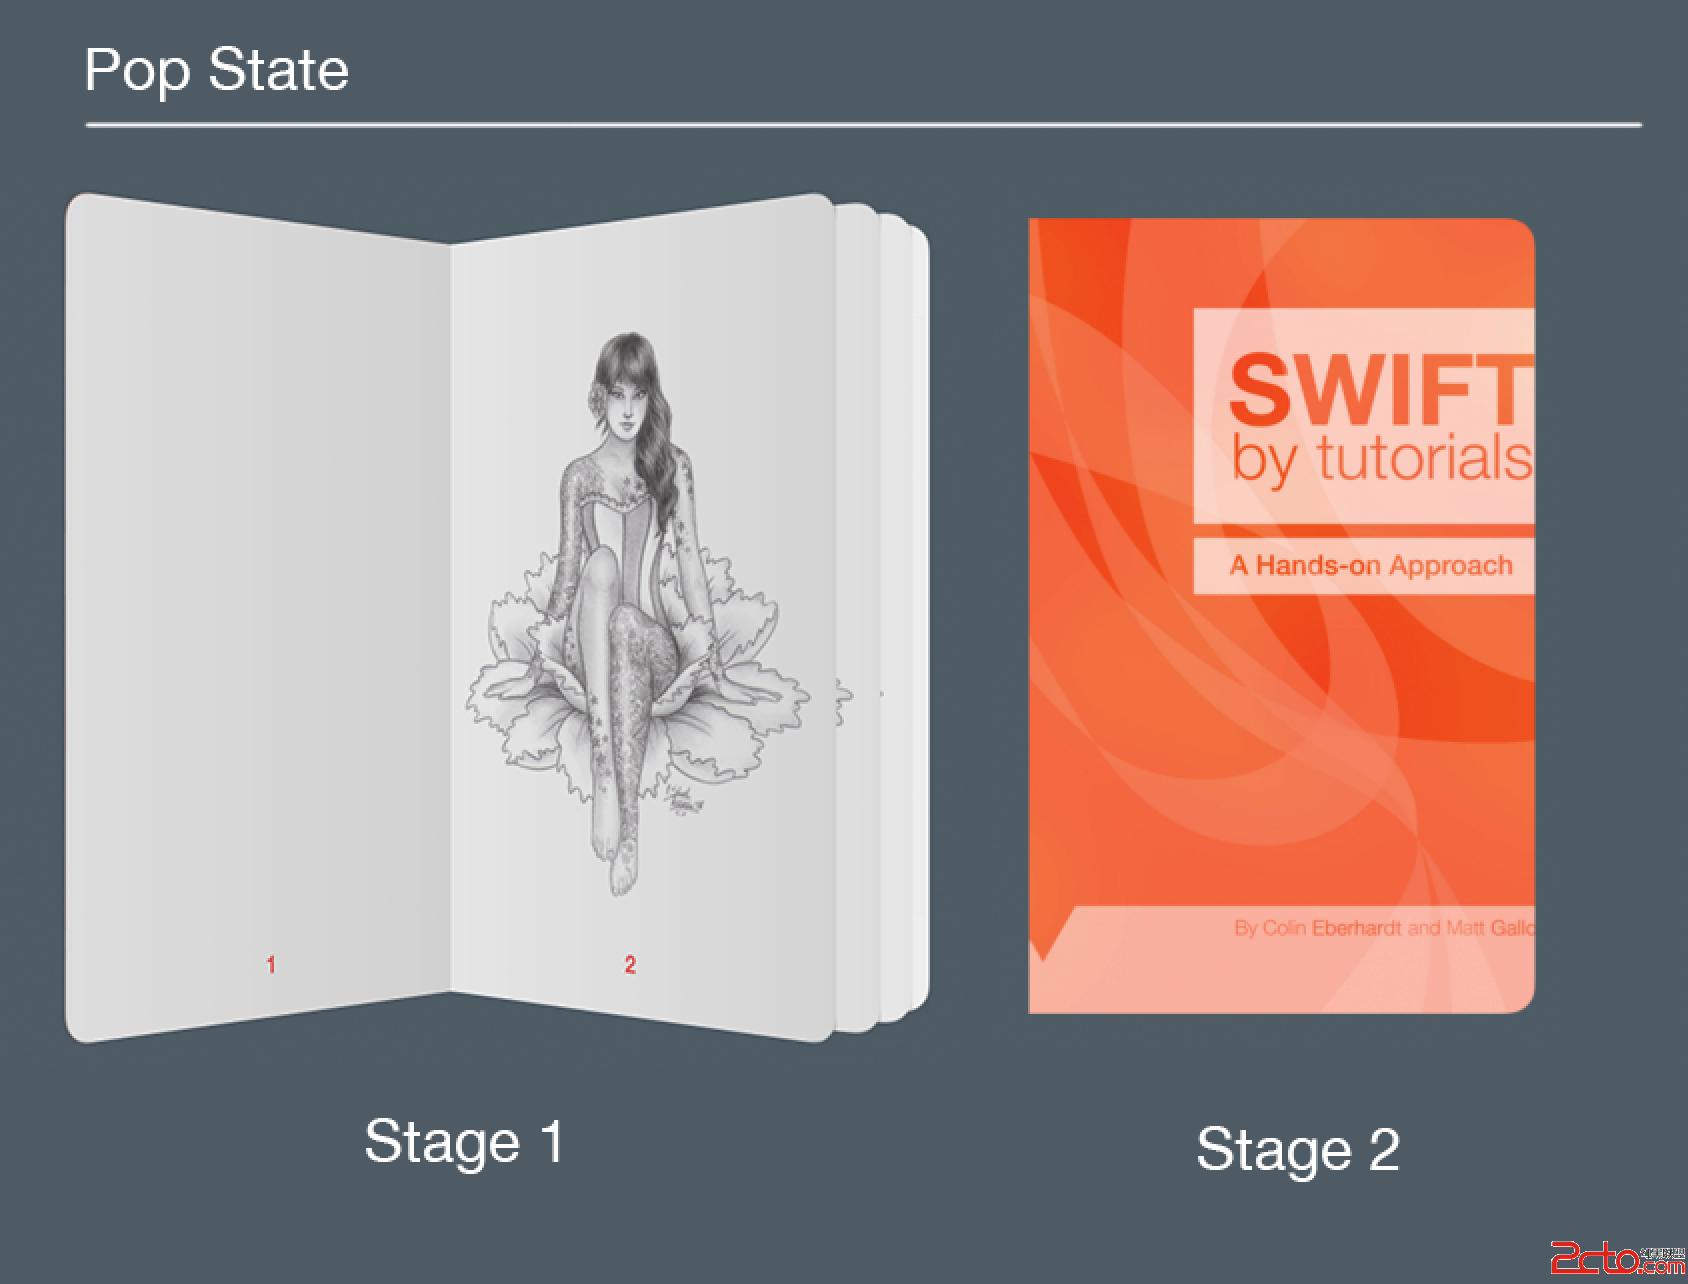
一個View Controller的Pop動作剛好和Push相反。狀態1是圖書打開的狀態,而狀態2則變成了書合起的狀態:
Open up BookOpeningTransition.swift and add the following code:
打開BookOpeningTransition.swift,加入以下方法:
// MARK: Pop methods
func setStartPositionForPop(fromVC: BookViewController, toVC: BooksViewController) {
  // Remove background from the pushed view controller
  toViewBackgroundColor = fromVC.collectionView?.backgroundColor
  fromVC.collectionView?.backgroundColor = nil
}
setStartPositionForPop(_:toVC)方法僅僅是保存BookViewController的背景色並將BooksViewController的Collection View的背景色刪除。注意,你不需要創建任何cell動畫,因為書在這個時候是打開狀態。
接著,在上面的方法後面加入這個方法:
func setEndPositionForPop(fromVC: BookViewController, toVC: BooksViewController) {
  //1
  let coverCell = toVC.selectedCell()
  //2
  for cell in toVC.collectionView!.visibleCells() as! [BookCoverCell] {
    if cell != coverCell {
      cell.alpha = 1
    }
  }
  //3
  for cell in fromVC.collectionView!.visibleCells() as! [BookPageCell] {
    closePageCell(cell)
  }
}
這個方法創建Pop動畫的起止點,即從打開變成合起:
獲取選擇的書的封面。 在合起狀態,在BooksViewController中遍歷私有書的封面,然後對所有對象進行一個漸入效果。 在BookViewController中遍歷當前圖書的所有頁,將所有cell轉變成合起狀態。現在新建如下方法:
func cleanupPop(fromVC: BookViewController, toVC: BooksViewController) {
  // Add background back to pushed view controller
  fromVC.collectionView?.backgroundColor = self.toViewBackgroundColor
  // Unhide the original book cover
  toVC.selectedCell()?.alpha = 1
}
這個方法在Pop動畫完成時執行清理動作:將BooksViewController的Collection View的背景色設回它開始的值並顯示封面。
在animateTransition(_:)方法裡面,找到注釋有“//POP”的else語句塊,添加如下代碼:
//1
let fromVC = transitionContext.viewControllerForKey(UITransitionContextFromViewControllerKey) as! BookViewController
let toVC = transitionContext.viewControllerForKey(UITransitionContextToViewControllerKey) as! BooksViewController

//2
container.insertSubview(toVC.view, belowSubview: fromVC.view)

//3
setStartPositionForPop(fromVC, toVC: toVC)
UIView.animateWithDuration(self.transitionDuration(transitionContext), animations: {
  //4
  self.setEndPositionForPop(fromVC, toVC: toVC)
}, completion: { finished in
  //5
  self.cleanupPop(fromVC, toVC: toVC)
  //6
  transitionContext.completeTransition(finished)
})
以上代碼解釋如下:
獲取動畫中涉及的兩個ViewController。現在,fromVC 是BookViewController (打開狀態),toVC是BooksViewController(合起狀態)。 向Container View中加入BooksViewController(在BookViewContorller的下方)。 setStartPositionForPop(_:toVC) 方法先保存背景色,再將背景色設為nil。 執行動畫,即從打開狀態切換到合起狀態。 動畫完成,執行清理動作。將背景色設回原來值,顯示封面。 通知動畫完成。在Navigation Controller中應用Pop動畫
現在需要創建Pop動畫,就如同我們在Push動畫所做一樣。
打開BooksViewController.swift,在animationControllerForPresentController(_:)方法後增加如下方法:
func animationControllerForDismissController(vc: UIViewController) -> UIViewControllerAnimatedTransitioning? {
  var transition = BookOpeningTransition()
  transition.isPush = false
  self.transition = transition
  return transition
}
這裡,我們創建了一個新的BookOpeningTransition對象,但不同的是isPush設置為false。
打開CustomNavigationController.swift,然後替換Pop部分的if語句為:
if operation == .Pop {
  if let vc = toVC as? BooksViewController {
    return vc.animationControllerForDismissController(vc)
  }
}
上述代碼返回一個Transition對象,並執行Pop動畫,合起書本。
編譯,運行程序,選擇一本書,查看它的打開和合起。如下圖所示:
創建互動式的Navigation Controller
打開和合起動畫搞定了——但我們還能更進一步!我們為什麼不用一個更直觀的捏放手勢來打開和合起書本呢?
打開BookOpeningTransition.swift,增加如下屬性定義:
// MARK: Interaction Controller
var interactionController: UIPercentDrivenInteractiveTransition?
然後打開CustomNavigationController.swift,加入下列代碼:
func navigationController(navigationController: UINavigationController, interactionControllerForAnimationController animationController: UIViewControllerAnimatedTransitioning) -> UIViewControllerInteractiveTransitioning? {
  if let animationController = animationController as? BookOpeningTransition {
    return animationController.interactionController
  }
  return nil
}
在這個方法中,我們從BookOpeningTransition對象獲得了一個interactionController。這樣導航控制器能夠跟蹤動畫進程以便用戶可以用捏放手勢打開和合起書。
打開BooksViewController.swift,在trnasitoin變量下增加如下屬性:
//1
var interactionController: UIPercentDrivenInteractiveTransition?
//2
var recognizer: UIGestureRecognizer? {
  didSet {
    if let recognizer = recognizer {
      collectionView?.addGestureRecognizer(recognizer)
    }
  }
}
這兩個屬性的作用分別是:
interactionController 是一個UIPercentDrivenInteractiveTransition類,它負責管理View Contorller之間轉場的自定義動畫。interactionController由一個Transition Animator生成,後者是一個實現了UIViewControllerAnimatorTransitioning協議的對象。而我們已經擁有了BookOpeningTransition——這就是一個實現了UIViewControllerAnimatorTransitioning的對象。interactionController能夠控制Push動畫和Pop動畫之間的進度。關於這個類的更多內容,請參考Apple官方文檔。 recognizer 是一個UIGestureRecognizer。我們用這個手勢識別器實現以捏放手勢開合書本。在BooksViewController擴展的animationControllerForPresentController(_:)方法中,transition.isPush=true一行下面,加入代碼:
transition.interactionController = interactionController
這句代碼讓CustomNavigationController知道要用哪個interaction controller。
在animationControllerForDismissController(_:)方法中transition.isPush=false一行下面加入同樣的代碼:
transition.interactionController = interactionController
在viewDidLoad()方法中增加代碼:
recognizer = UIPinchGestureRecognizer(target: self, action: handlePinch:)
這裡我們初始化了一個UIPinchGestureRecognizer,允許用戶在做出捏放手勢時調用handlePinch(_:)方法。
在viewDidLoad()方法下面實現這個方法:
// MARK: Gesture recognizer action
func handlePinch(recognizer: UIPinchGestureRecognizer) {
  switch recognizer.state {
    case .Began:
      //1
      interactionController = UIPercentDrivenInteractiveTransition()
      //2
      if recognizer.scale >= 1 {
        //3
        if recognizer.view == collectionView {
          //4
          var book = self.selectedCell()?.book
          //5
          self.openBook(book)
        }
      //6
      } else {
        //7
        navigationController?.popViewControllerAnimated(true)
      }
    case .Changed:
      //8
      if transition!.isPush {
        //9
        var progress = min(max(abs((recognizer.scale - 1)) / 5, 0), 1)
        //10
    interactionController?.updateInteractiveTransition(progress)
    //11
      } else {
        //12
    var progress = min(max(abs((1 - recognizer.scale)), 0), 1)
        //13
    interactionController?.updateInteractiveTransition(progress)
      }
    case .Ended:
      //14
      interactionController?.finishInteractiveTransition()
      //15
      interactionController = nil
    default:
      break
  }
}
對於UIPinchGestureRecognizer,我們要關注這3個狀態:開始狀態,這讓你知道捏放手勢何時開始;改變狀態,檢測捏放手勢的變化;結束狀態,讓你知道捏放手勢何時結束。
handlePinch(_:)方法代碼解釋如下:
開始狀態
1. 創建一個UIPercentDrivenInteractiveTransition 對象。
2. scale取決於捏合點之間的距離,判斷scale值是否大於或者等於1。
3. 如果是,判斷相關的View是否是一個Collection View。
4. 獲取正在被捏合的書。
5. 執行Push BookViewController的動畫,顯示書本中的書頁。
6. 如果 scale 小於 1…
7. …執行Pop BookViewController的動畫,顯示封面
改變狀態 – 捏合過程中
8. 判斷當前是否是Push動畫。
9. 如果正在Push一個BookViewConroller,計算捏放手勢的進度。該進度必然是0-1之間的數字。我們將原始值除以5以讓用戶擁有更好的控制感。否則用雙指打開的手勢打開一本書時,會突然跳到打開狀態。
10. 基於我們計算的進度,更新動畫進度。
11. 如果當前不是Push動畫,則它應該是Pop動畫。
12. 當雙指捏合合起一本書時,scale值必然是從1慢慢變到0。
13. 最後, 更新動畫進度。
結束狀態 – 手勢終止
14. 告訴系統,用戶交互式動畫完成。
15.將interaction controller 設置為 nil。
最後,我們需要實現“捏合以合起書本”的狀態。當然,我們必須將手勢識別器傳遞給BookViewController以便它會Pop。
打開BookViewController.swift,在book變量聲明下增加一個屬性:
var recognizer: UIGestureRecognizer? {
  didSet {
    if let recognizer = recognizer {
      collectionView?.addGestureRecognizer(recognizer)
    }
  }
}
當我們將手勢識別器傳遞給BookViewController時,它會被添加到Collection View,因此我們可以跟蹤到用戶的“關書”手勢。
然後需要在BooksViewController和BookViewController之間傳遞手勢識別器。
打開BookOpeningTransition.swift。在cleanUpPush(_:toVC)方法中,在設置背景色之後添加如下代碼:
// Pass the gesture recognizer
toVC.recognizer = fromVC.recognizer
當我們從BooksViewController Push到BookViewController時,將捏放手勢傳遞給BookViewController。這會導致捏放手勢自動添加到Collection View中。
當我們從BookViewController Pop回BooksViewController時,我們必須將捏放手勢又傳遞回去。
在cleanUpPop(_:toVC)方法中,在我設置背景色之後添加如下代碼:
// Pass the gesture recognizer
toVC.recognizer = fromVC.recognizer
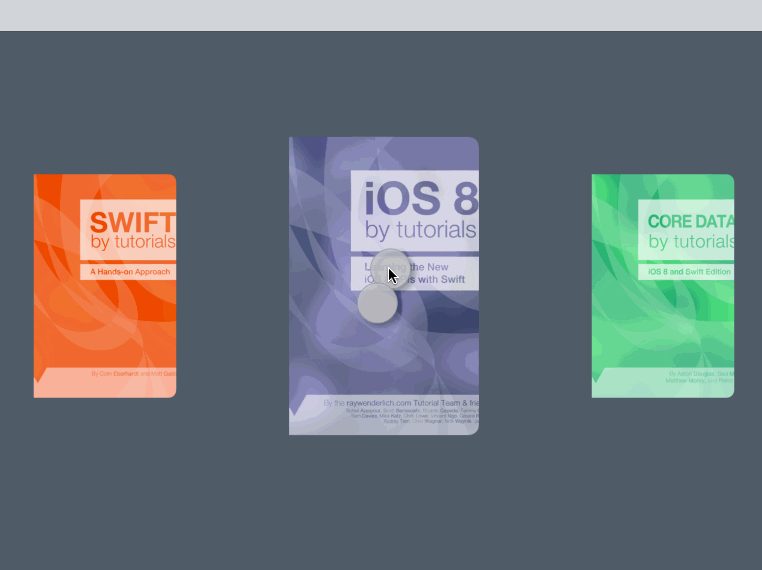
編譯、運行程序,選擇一本書,用捏放手勢打開和合起書:
捏放手勢是一種天然就適合用於對書本進行“開關”的手勢;它讓我們的界面顯得更加簡單。我們不再需要導航欄的Back按鈕——因此我們決定去掉它。
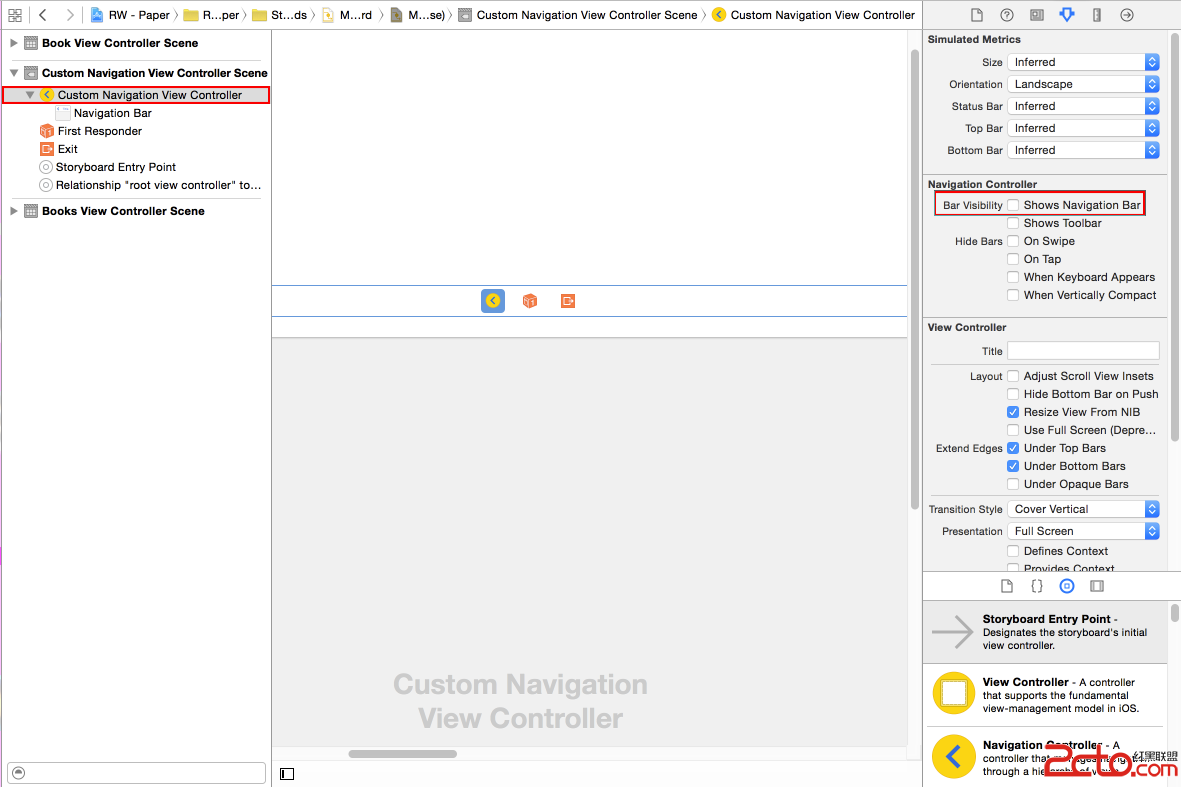
打開Main.storyboard,選擇Custom Navigation View Controller,打開屬性面板,在Navigation Controller一欄下面,取消Bar Visibility選項,如下所示:
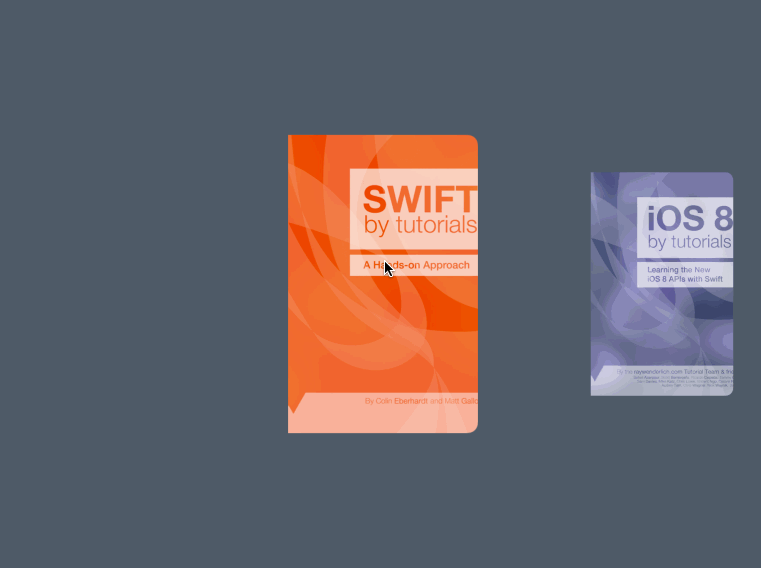
再次編譯運行程序:
接下來做什麼
你可以在這裡下載到上面所有步驟完成後的最終項目。
在本教程中,我們學習如何對Collection View進行自定義布局,讓App的用戶體驗更加自然、也更加有趣。我們還創建了自定義動畫,使用智能交互讓用戶以捏放手勢開合一本書。這個App在實現了所有基本功能的同時,讓程序顯得更加的人性化和與眾不同。
相比較之下,是默認的“淡入/淡出”動畫更簡單一些。它能節省你一部分開發時間。但是傑出的應用程序都應當有一些自己特有的地方,從而使它們能夠脫穎而出。
要知道,每個人都喜歡記住那些用起來非常有趣的App,在UI上能讓人感到興奮而同時又沒有犧牲功能的App。
希望你能喜歡本教程,再次感謝Attila Hegedüs提供了這個教程的示例項目。

- ReactiveCocoa 4 如何運用冷熱信號
- iOS------教你如何APP怎樣加急審核
- iOS之如何啟動app時全屏顯示Default.png(圖片)
- iOS利用AFNetworking實現文件上傳的示例代碼
- iOS 使用 socket 實現即時通信示例(非第三方庫)
- ios swift3.0實現二維碼掃描、生成、識別示例代碼
- IOS 開發狀態欄隱藏的實現辦法
- IOS購物車界面實現效果示例
- iOS中UITableView Cell實現自定義單選功能
- iOS實現錄音轉碼MP3及轉碼BASE64上傳示例
- PrefixHeader.pch file not found 以及 Xcode 中如何添加pch文件
- AIR Native Extension for iOS 接入第三方sdk 如何實現 AppDelegate 生命周期
- iOS使用分類(category)實現有序字典
- iOS 利用runtime 實現全局字體的改變
- 類比Spring框架來實現OC中的依賴注入