iOS開辟中一些手寫控件及其相干屬性的應用
手寫控件,frame,center和bounds屬性
1、手寫控件
1.手寫控件的步調
(1)應用響應的控件類創立控件對象
(2)設置該控件的各類屬性
(3)添加控件到視圖中
(4)假如是button等控件,還需斟酌控件的單擊事宜等
(5)留意:View Contollor和view的關系
2.留意點
在OC開辟中,Storyboard中的一切操作都可以經由過程代碼完成,法式員必定要闇練控制代碼結構界面的才能!
設置控件監聽辦法的示例代碼以下:
[btn addTarget:self action:@selector(click:) forControlEvents:UIControlEventTouchUpInside];
提醒:
1> addTarget辦法界說在UIControl類中,這意味著可以給一切繼續自UIControl類的對象添加監聽辦法
2> 監聽辦法的第一個參數就是對象自己
3> 監聽辦法的第二個參數是監聽控件的事宜
3.代碼示例
//1.應用類創立一個按鈕對象
// UIButton *headbtn=[[UIButton alloc] initWithFrame:CGRectMake(100 ,100, 100, 100)];
//設置按鈕對象為自界說型
UIButton *headbtn=[UIButton buttonWithType:UIButtonTypeCustom];
//2.設置對象的各項屬性
//(1)地位等通用屬性設置
headbtn.frame=CGRectMake(100, 100, 100, 100);
//(2)設置通俗狀況下按鈕的屬性
[headbtn setBackgroundImage:[UIImage imageNamed:@"i"] forState:UIControlStateNormal];
[headbtn setTitle:@"點我!" forState:UIControlStateNormal];
[headbtn setTitleColor:[UIColor redColor] forState:UIControlStateNormal];
//(3)設置高亮狀況下按鈕的屬性
[headbtn setBackgroundImage:[UIImage imageNamed:@"a"] forState:UIControlStateHighlighted];
[headbtn setTitle:@"還行吧~" forState:UIControlStateHighlighted];
[headbtn setTitleColor:[UIColor blueColor] forState:UIControlStateHighlighted];
//3.把對象添加到視圖中展示出來
[self.view addSubview:headbtn];
//留意點!
self.headImageView=headbtn;
2、frame,center和bounds屬性
1.frame、center和bounds屬性
frame:掌握地位和年夜小
center:掌握地位(中間點)
bounds:掌握年夜小(以本身的左上角為原點)
2.留意點
(1)經由過程以部屬性可以修正控件的地位
frame.origin
center
(2)經由過程以部屬性可以修正控件的尺寸
frame.size
bounds.size
3.代碼示例
一個掌握圖片高低閣下平移,縮放的法式(frame、center和bounds屬性)
//
// YYViewController.m
// 01-演習應用按鈕的frame和center屬性
//
// Created by apple on 14-5-21.
// Copyright (c) 2014年 itcase. All rights reserved.
//
#import "YYViewController.h"
//公有擴大
@interface YYViewController ()
@property(nonatomic,weak)IBOutlet UIButton *headImageView;
@end
@implementation YYViewController
//列舉類型,從1開端
typedef enum
{
ktopbtntag=1,
kdownbtntag,
krightbtntag,
kleftbtntag
}btntag;
//viewDidLoad是視圖加載完成後挪用的辦法,平日在此辦法中履行視圖掌握器的初始化任務
- (void)viewDidLoad
{
//在viewDidLoad辦法中,不要忘卻挪用父類的辦法完成
[super viewDidLoad];
//手寫控件代碼
//1、寫一個按鈕控件,下面有一張圖片
//1.應用類創立一個按鈕對象
// UIButton *headbtn=[[UIButton alloc] initWithFrame:CGRectMake(100 ,100, 100, 100)];
//設置按鈕對象為自界說型
UIButton *headbtn=[UIButton buttonWithType:UIButtonTypeCustom];
//2.設置對象的各項屬性
//(1)地位等通用屬性設置
headbtn.frame=CGRectMake(100, 100, 100, 100);
//(2)設置通俗狀況下按鈕的屬性
[headbtn setBackgroundImage:[UIImage imageNamed:@"i"] forState:UIControlStateNormal];
[headbtn setTitle:@"點我!" forState:UIControlStateNormal];
[headbtn setTitleColor:[UIColor redColor] forState:UIControlStateNormal];
//(3)設置高亮狀況下按鈕的屬性
[headbtn setBackgroundImage:[UIImage imageNamed:@"a"] forState:UIControlStateHighlighted];
[headbtn setTitle:@"還行吧~" forState:UIControlStateHighlighted];
[headbtn setTitleColor:[UIColor blueColor] forState:UIControlStateHighlighted];
//3.把對象添加到視圖中展示出來
[self.view addSubview:headbtn];
//留意點!
self.headImageView=headbtn;
//2、寫四個掌握圖片閣下高低挪動偏向的按鈕控件
/**================向上的按鈕=====================*/
//1.創立按鈕對象
UIButton *topbtn=[UIButton buttonWithType:UIButtonTypeCustom];
//2.設置對象的屬性
topbtn.frame=CGRectMake(100, 250, 40, 40);
[topbtn setBackgroundImage:[UIImage imageNamed:@"top_normal"] forState:UIControlStateNormal];
[topbtn setBackgroundImage:[UIImage imageNamed:@"top_highlighted"] forState:UIControlStateHighlighted];
[topbtn setTag:1];
//3.把控件添加到視圖中
[self.view addSubview:topbtn];
//4.按鈕的單擊掌握事宜
[topbtn addTarget:self action:@selector(Click:) forControlEvents:UIControlEventTouchUpInside];
/**================向下的按鈕=====================*/
//1.創立按鈕對象
UIButton *downbtn=[UIButton buttonWithType:UIButtonTypeCustom];
//2.設置對象的屬性
downbtn.frame=CGRectMake(100, 350, 40, 40);
[downbtn setBackgroundImage:[UIImage imageNamed:@"bottom_normal"] forState:UIControlStateNormal];
[downbtn setBackgroundImage:[UIImage imageNamed:@"bottom_highlighted"] forState:UIControlStateHighlighted];
[downbtn setTag:2];
//3.把控件添加到視圖中
[self.view addSubview:downbtn];
//4.按鈕的單擊掌握事宜
[downbtn addTarget:self action:@selector(Click:) forControlEvents:UIControlEventTouchUpInside];
/**================向左的按鈕=====================*/
//1.創立按鈕對象
UIButton *leftbtn=[UIButton buttonWithType:UIButtonTypeCustom];
//2.設置對象的屬性
leftbtn.frame=CGRectMake(50, 300, 40, 40);
[leftbtn setBackgroundImage:[UIImage imageNamed:@"left_normal"] forState:UIControlStateNormal];
[leftbtn setBackgroundImage:[UIImage imageNamed:@"left_highlighted"] forState:UIControlStateHighlighted];
[leftbtn setTag:4];
//3.把控件添加到視圖中
[self.view addSubview:leftbtn];
//4.按鈕的單擊掌握事宜
[leftbtn addTarget:self action:@selector(Click:) forControlEvents:UIControlEventTouchUpInside];
/**================向右的按鈕=====================*/
//1.創立按鈕對象
UIButton *rightbtn=[UIButton buttonWithType:UIButtonTypeCustom];
//2.設置對象的屬性
rightbtn.frame=CGRectMake(150, 300, 40, 40);
[rightbtn setBackgroundImage:[UIImage imageNamed:@"right_normal"] forState:UIControlStateNormal];
[rightbtn setBackgroundImage:[UIImage imageNamed:@"right_highlighted"] forState:UIControlStateHighlighted];
[rightbtn setTag:3];
//3.把控件添加到視圖中
[self.view addSubview:rightbtn];
//4.按鈕的單擊掌握事宜
[rightbtn addTarget:self action:@selector(Click:) forControlEvents:UIControlEventTouchUpInside];
//3、寫兩個縮放按鈕
/**================縮小的按鈕=====================*/
//1.創立對象
UIButton *plusbtn=[UIButton buttonWithType:UIButtonTypeCustom];
//2.設置屬性
plusbtn.frame=CGRectMake(75, 400, 40, 40);
[plusbtn setBackgroundImage:[UIImage imageNamed:@"plus_normal"] forState:UIControlStateNormal];
[plusbtn setBackgroundImage:[UIImage imageNamed:@"plus_highlighted"] forState:UIControlStateHighlighted];
[plusbtn setTag:1];
//3.添加到視圖
[self.view addSubview:plusbtn];
//4.單擊事宜
[plusbtn addTarget:self action:@selector(Zoom:) forControlEvents:UIControlEventTouchUpInside];
/**================減少的按鈕=====================*/
UIButton *minusbtn=[UIButton buttonWithType:UIButtonTypeCustom];
minusbtn.frame=CGRectMake(125, 400, 40, 40);
[minusbtn setBackgroundImage:[UIImage imageNamed:@"minus_normal"] forState:UIControlStateNormal];
[minusbtn setBackgroundImage:[UIImage imageNamed:@"minus_highlighted"] forState:UIControlStateHighlighted];
[minusbtn setTag:0];
[self.view addSubview:minusbtn];
[minusbtn addTarget:self action:@selector(Zoom:) forControlEvents:UIControlEventTouchUpInside];
}
//掌握偏向的多個按鈕挪用統一個辦法
-(void)Click:(UIButton *)button
{
//演習應用frame屬性
//CGRect frame=self.headImageView.frame;
/**留意,這裡假如掌握地位的兩個屬性frame和center同時應用的話,會湧現很好玩的後果,留意剖析*/
//演習應用center屬性
CGPoint center=self.headImageView.center;
switch (button.tag) {
case ktopbtntag:
center.y-=30;
break;
case kdownbtntag:
center.y+=30;
break;
case kleftbtntag:
//發明一個bug,之前的成績是由於少寫了break,形成了它們的次序履行,sorry
//center.x=center.x-30;
center.x-=50;
break;
case krightbtntag:
center.x+=50;
break;
}
// self.headImageView.frame=frame;
//首尾式設置動畫後果
[UIView beginAnimations:nil context:nil];
self.headImageView.center=center;
//設置時光
[UIView setAnimationDuration:2.0];
[UIView commitAnimations];
NSLog(@"挪動!");
}
-(void)Zoom:(UIButton *)btn
{
//應用frame,以本身的左上角(本身的原點)為原點
// CGRect frame=self.headImageView.frame;
// if (btn.tag) {
// frame.size.height+=30;
// frame.size.width+=30;
// }
// else
// {
// frame.size.width-=50;
// frame.size.height-=50;
// }
// self.headImageView.frame=frame;
//應用bounds,以中間點位原點停止縮放
CGRect bounds = self.headImageView.bounds;
if (btn.tag) {
bounds.size.height+=30;
bounds.size.width+=30;
}
else
{
bounds.size.height-=50;
bounds.size.width-=50;
}
//設置首尾動畫
[UIView beginAnimations:nil context:nil];
self.headImageView.bounds=bounds;
[UIView setAnimationDuration:2.0];
[UIView commitAnimations];
}
@end
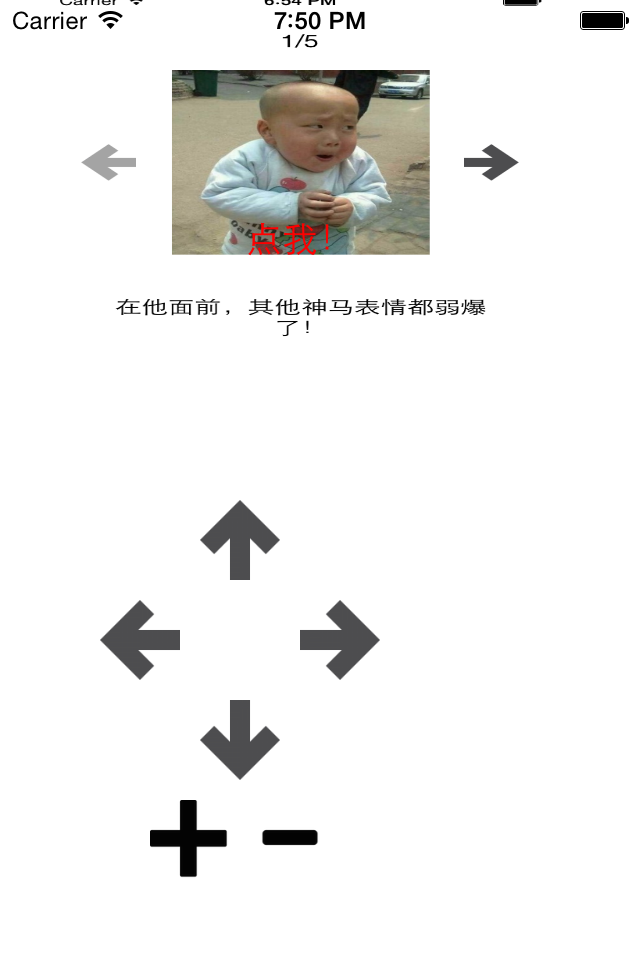
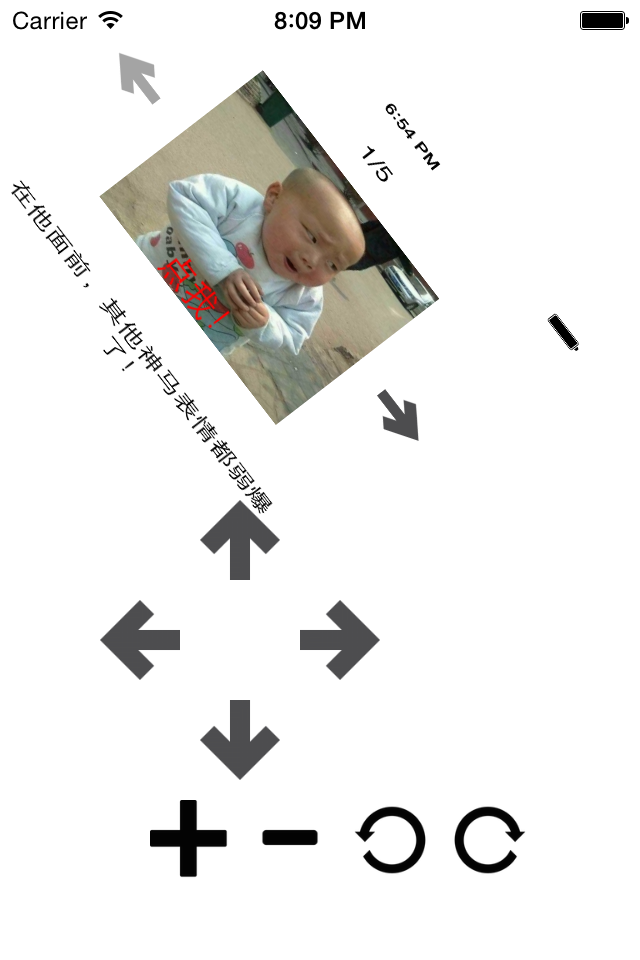
完成後果:
3、簡略的動畫後果
簡略引見首尾式動畫後果
(1)開端動畫
(2)設置動畫相干的時光等
(3)介入動畫的行為
(4)提交動畫
注:完成代碼參考下面的代碼
4、transframe屬性(形變)
1. transform屬性
在OC中,經由過程transform屬性可以修正對象的平移、縮放比例和扭轉角度
經常使用的創立transform構造體辦法分兩年夜類
(1) 創立“基於控件初始地位”的形變
CGAff.netransformMakeTranslation(平移)
CGAff.netransformMakeScale(縮放)
CGAffineTransformMakeRotation(扭轉)
(2) 創立“基於transform參數”的形變
CGAffineTransformTranslate
CGAffineTransformScale
CGAffineTransformRotate
彌補:
在OC中,一切跟角度相干的數值,都是弧度值,180° = M_PI
負數表現順時針扭轉
正數表現逆時針扭轉
提醒:因為transform屬性可以基於控件的上一次的狀況停止疊加形變,例如,先扭轉再平移。是以在現實動畫開辟中,當觸及地位、尺寸形變後果時,年夜多修正控件的transform屬性,而不是frame、bounds、center 。
2.代碼示例
//
// YYViewController.m
// 01-演習應用按鈕的frame和center屬性
//
// Created by apple on 14-5-21.
// Copyright (c) 2014年 itcase. All rights reserved.
//
#import "YYViewController.h"
//公有擴大
@interface YYViewController ()
@property(nonatomic,weak)IBOutlet UIButton *headImageView;
@end
@implementation YYViewController
//列舉類型,從1開端
//列舉類型有一個很年夜的感化,就是用來取代法式中的魔法數字
typedef enum
{
ktopbtntag=1,
kdownbtntag,
krightbtntag,
kleftbtntag
}btntag;
//viewDidLoad是視圖加載完成後挪用的辦法,平日在此辦法中履行視圖掌握器的初始化任務
- (void)viewDidLoad
{
//在viewDidLoad辦法中,不要忘卻挪用父類的辦法完成
[super viewDidLoad];
//手寫控件代碼
//1、寫一個按鈕控件,下面有一張圖片
//1.應用類創立一個按鈕對象
// UIButton *headbtn=[[UIButton alloc] initWithFrame:CGRectMake(100 ,100, 100, 100)];
//設置按鈕對象為自界說型
UIButton *headbtn=[UIButton buttonWithType:UIButtonTypeCustom];
//2.設置對象的各項屬性
//(1)地位等通用屬性設置
headbtn.frame=CGRectMake(100, 100, 100, 100);
//(2)設置通俗狀況下按鈕的屬性
[headbtn setBackgroundImage:[UIImage imageNamed:@"i"] forState:UIControlStateNormal];
[headbtn setTitle:@"點我!" forState:UIControlStateNormal];
[headbtn setTitleColor:[UIColor redColor] forState:UIControlStateNormal];
//(3)設置高亮狀況下按鈕的屬性
[headbtn setBackgroundImage:[UIImage imageNamed:@"a"] forState:UIControlStateHighlighted];
[headbtn setTitle:@"還行吧~" forState:UIControlStateHighlighted];
[headbtn setTitleColor:[UIColor blueColor] forState:UIControlStateHighlighted];
//3.把對象添加到視圖中展示出來
[self.view addSubview:headbtn];
//留意點!
self.headImageView=headbtn;
//2、寫四個掌握圖片閣下高低挪動偏向的按鈕控件
/**================向上的按鈕=====================*/
//1.創立按鈕對象
UIButton *topbtn=[UIButton buttonWithType:UIButtonTypeCustom];
//2.設置對象的屬性
topbtn.frame=CGRectMake(100, 250, 40, 40);
[topbtn setBackgroundImage:[UIImage imageNamed:@"top_normal"] forState:UIControlStateNormal];
[topbtn setBackgroundImage:[UIImage imageNamed:@"top_highlighted"] forState:UIControlStateHighlighted];
[topbtn setTag:1];
//3.把控件添加到視圖中
[self.view addSubview:topbtn];
//4.按鈕的單擊掌握事宜
[topbtn addTarget:self action:@selector(Click:) forControlEvents:UIControlEventTouchUpInside];
/**================向下的按鈕=====================*/
//1.創立按鈕對象
UIButton *downbtn=[UIButton buttonWithType:UIButtonTypeCustom];
//2.設置對象的屬性
downbtn.frame=CGRectMake(100, 350, 40, 40);
[downbtn setBackgroundImage:[UIImage imageNamed:@"bottom_normal"] forState:UIControlStateNormal];
[downbtn setBackgroundImage:[UIImage imageNamed:@"bottom_highlighted"] forState:UIControlStateHighlighted];
[downbtn setTag:2];
//3.把控件添加到視圖中
[self.view addSubview:downbtn];
//4.按鈕的單擊掌握事宜
[downbtn addTarget:self action:@selector(Click:) forControlEvents:UIControlEventTouchUpInside];
/**================向左的按鈕=====================*/
//1.創立按鈕對象
UIButton *leftbtn=[UIButton buttonWithType:UIButtonTypeCustom];
//2.設置對象的屬性
leftbtn.frame=CGRectMake(50, 300, 40, 40);
[leftbtn setBackgroundImage:[UIImage imageNamed:@"left_normal"] forState:UIControlStateNormal];
[leftbtn setBackgroundImage:[UIImage imageNamed:@"left_highlighted"] forState:UIControlStateHighlighted];
[leftbtn setTag:4];
//3.把控件添加到視圖中
[self.view addSubview:leftbtn];
//4.按鈕的單擊掌握事宜
[leftbtn addTarget:self action:@selector(Click:) forControlEvents:UIControlEventTouchUpInside];
/**================向右的按鈕=====================*/
//1.創立按鈕對象
UIButton *rightbtn=[UIButton buttonWithType:UIButtonTypeCustom];
//2.設置對象的屬性
rightbtn.frame=CGRectMake(150, 300, 40, 40);
[rightbtn setBackgroundImage:[UIImage imageNamed:@"right_normal"] forState:UIControlStateNormal];
[rightbtn setBackgroundImage:[UIImage imageNamed:@"right_highlighted"] forState:UIControlStateHighlighted];
[rightbtn setTag:3];
//3.把控件添加到視圖中
[self.view addSubview:rightbtn];
//4.按鈕的單擊掌握事宜
[rightbtn addTarget:self action:@selector(Click:) forControlEvents:UIControlEventTouchUpInside];
//3、寫兩個縮放按鈕
/**================縮小的按鈕=====================*/
//1.創立對象
UIButton *plusbtn=[UIButton buttonWithType:UIButtonTypeCustom];
//2.設置屬性
plusbtn.frame=CGRectMake(75, 400, 40, 40);
[plusbtn setBackgroundImage:[UIImage imageNamed:@"plus_normal"] forState:UIControlStateNormal];
[plusbtn setBackgroundImage:[UIImage imageNamed:@"plus_highlighted"] forState:UIControlStateHighlighted];
[plusbtn setTag:1];
//3.添加到視圖
[self.view addSubview:plusbtn];
//4.單擊事宜
[plusbtn addTarget:self action:@selector(Zoom:) forControlEvents:UIControlEventTouchUpInside];
/**================減少的按鈕=====================*/
UIButton *minusbtn=[UIButton buttonWithType:UIButtonTypeCustom];
minusbtn.frame=CGRectMake(125, 400, 40, 40);
[minusbtn setBackgroundImage:[UIImage imageNamed:@"minus_normal"] forState:UIControlStateNormal];
[minusbtn setBackgroundImage:[UIImage imageNamed:@"minus_highlighted"] forState:UIControlStateHighlighted];
[minusbtn setTag:0];
[self.view addSubview:minusbtn];
[minusbtn addTarget:self action:@selector(Zoom:) forControlEvents:UIControlEventTouchUpInside];
/**================向左扭轉按鈕=====================*/
UIButton *leftrotatebtn=[UIButton buttonWithType:UIButtonTypeCustom];
[leftrotatebtn setFrame:CGRectMake(175, 400, 40, 40)];
[leftrotatebtn setBackgroundImage:[UIImage imageNamed:@"left_rotate_normal"] forState:UIControlStateNormal];
[leftrotatebtn setBackgroundImage:[UIImage imageNamed:@"left_rotate_highlighted"] forState:UIControlStateHighlighted];
[leftrotatebtn setTag:1];
[self.view addSubview:leftrotatebtn];
[leftrotatebtn addTarget:self action:@selector(Rotate:) forControlEvents:UIControlEventTouchUpInside];
/**================向右扭轉按鈕=====================*/
UIButton *rightrotatebtn=[UIButton buttonWithType:UIButtonTypeCustom];
[rightrotatebtn setFrame:CGRectMake(225, 400, 40, 40)];
[rightrotatebtn setBackgroundImage:[UIImage imageNamed:@"right_rotate_normal"] forState:UIControlStateNormal];
[rightrotatebtn setBackgroundImage:[UIImage imageNamed:@"right_rotate_highlighted"] forState:UIControlStateHighlighted];
[rightbtn setTag:0];
[self.view addSubview:rightrotatebtn];
[rightrotatebtn addTarget:self action:@selector(Rotate:) forControlEvents:UIControlEventTouchUpInside];
}
//掌握偏向的多個按鈕挪用統一個辦法
-(void)Click:(UIButton *)button
{
//演習應用frame屬性
//CGRect frame=self.headImageView.frame;
/**留意,這裡假如掌握地位的兩個屬性frame和center同時應用的話,會湧現很好玩的後果,留意剖析*/
//演習應用center屬性
CGPoint center=self.headImageView.center;
switch (button.tag) {
case ktopbtntag:
center.y-=30;
break;
case kdownbtntag:
center.y+=30;
break;
case kleftbtntag:
//發明一個bug,之前的成績是由於少寫了break,形成了它們的次序履行,sorry
//center.x=center.x-30;
center.x-=50;
break;
case krightbtntag:
center.x+=50;
break;
}
// self.headImageView.frame=frame;
//首尾式設置動畫後果
[UIView beginAnimations:nil context:nil];
self.headImageView.center=center;
//設置時光
[UIView setAnimationDuration:2.0];
[UIView commitAnimations];
NSLog(@"挪動!");
}
-(void)Zoom:(UIButton *)btn
{
//應用bounds,以中間點位原點停止縮放
CGRect bounds = self.headImageView.bounds;
if (btn.tag) {
bounds.size.height+=30;
bounds.size.width+=30;
}
else
{
bounds.size.height-=50;
bounds.size.width-=50;
}
//設置首尾動畫
[UIView beginAnimations:nil context:nil];
self.headImageView.bounds=bounds;
[UIView setAnimationDuration:2.0];
[UIView commitAnimations];
}
-(void)Rotate:(UIButton *)rotate
{
//位移(不累加)
//self.headImageView.transform=CGAffineTransformMakeTranslation(50, 200);
//縮放
//self.headImageView.transform=CGAffineTransformMakeScale(1.2, 10);
//在原本的基本上位移(是累加的)
//self.headImageView.transform=CGAffineTransformTranslate(self.headImageView.transform, 50, 50);
//在原本的基本長進行縮放
//self.headImageView.transform=CGAffineTransformScale(self.headImageView.transform, 1.5, 1.6);
//在原本的基本長進行扭轉
if (rotate.tag) {
//扭轉角度為1/pi,逆時針
self.headImageView.transform=CGAffineTransformRotate(self.headImageView.transform, -M_1_PI);
}
else
{
//扭轉的角度為pi/2,順時針
self.headImageView.transform=CGAffineTransformRotate(self.headImageView.transform, M_PI_2);
}
}
@end
完成後果:
3.viewDidLoad
viewDidLoad是視圖加載完成後挪用的辦法,平日在此辦法中履行視圖掌握器的初始化任務
在viewDidLoad辦法中,必定不要忘卻挪用父類的辦法完成
[super viewDidLoad];
【iOS開辟中一些手寫控件及其相干屬性的應用】的相關資料介紹到這裡,希望對您有所幫助! 提示:不會對讀者因本文所帶來的任何損失負責。如果您支持就請把本站添加至收藏夾哦!