解析iOS運用的UI開辟中懶加載和xib的簡略應用辦法
懶加載
1.懶加載根本
懶加載——也稱為延遲加載,即在須要的時刻才加載(效力低,占用內存小)。所謂懶加載,寫的是其get辦法.
留意:假如是懶加載的話則必定要留意先斷定能否曾經有了,假如沒有那末再去停止實例化
2.應用懶加載的利益:
(1)不用將創立對象的代碼全體寫在viewDidLoad辦法中,代碼的可讀性更強
(2)每一個控件的getter辦法平分別擔任各自的實例化處置,代碼彼此之間的自力性強,松耦合
3.代碼示例
//
// YYViewController.m
// 03-圖片閱讀器初步
//
// Created by apple on 14-5-21.
// Copyright (c) 2014年 itcase. All rights reserved.
//
#import "YYViewController.h"
#define POTOIMGW 200
#define POTOIMGH 300
#define POTOIMGX 60
#define POTOIMGY 50
@interface YYViewController ()
@property(nonatomic,strong)UILabel *firstlab;
@property(nonatomic,strong)UILabel *lastlab;
@property(nonatomic,strong)UIImageView *icon;
@property(nonatomic,strong)UIButton *leftbtn;
@property(nonatomic,strong)UIButton *rightbtn;
@property(nonatomic,strong)NSArray *array;
@property(nonatomic ,assign)int i;
-(void)change;
@end
@implementation YYViewController
- (void)viewDidLoad
{
[super viewDidLoad];
[self change];
}
-(void)change
{
[self.firstlab setText:[NSString stringWithFormat:@"%d/5",self.i+1]];
//先get再set
self.icon.image=[UIImage imageNamed:self.array[self.i][@"name"]];
self.lastlab.text=self.array[self.i][@"desc"];
self.leftbtn.enabled=(self.i!=0);
self.rightbtn.enabled=(self.i!=4);
}
//延遲加載
/**1.圖片的序號標簽*/
-(UILabel *)firstlab
{
//斷定能否曾經有了,若沒有,則停止實例化
if (!_firstlab) {
_firstlab=[[UILabel alloc]initWithFrame:CGRectMake(20, 10, 300, 30)];
[_firstlab setTextAlignment:NSTextAlignmentCenter];
[self.view addSubview:_firstlab];
}
return _firstlab;
}
/**2.圖片控件的延遲加載*/
-(UIImageView *)icon
{
//斷定能否曾經有了,若沒有,則停止實例化
if (!_icon) {
_icon=[[UIImageView alloc]initWithFrame:CGRectMake(POTOIMGX, POTOIMGY, POTOIMGW, POTOIMGH)];
UIImage *image=[UIImage imageNamed:@"biaoqingdi"];
_icon.image=image;
[self.view addSubview:_icon];
}
return _icon;
}
/**3.描寫控件的延遲加載*/
-(UILabel *)lastlab
{
//斷定能否曾經有了,若沒有,則停止實例化
if (!_lastlab) {
_lastlab=[[UILabel alloc]initWithFrame:CGRectMake(20, 400, 300, 30)];
[_lastlab setTextAlignment:NSTextAlignmentCenter];
[self.view addSubview:_lastlab];
}
return _lastlab;
}
/**4.左鍵按鈕的延遲加載*/
-(UIButton *)leftbtn
{
//斷定能否曾經有了,若沒有,則停止實例化
if (!_leftbtn) {
_leftbtn=[UIButton buttonWithType:UIButtonTypeCustom];
_leftbtn.frame=CGRectMake(0, self.view.center.y, 40, 40);
[_leftbtn setBackgroundImage:[UIImage imageNamed:@"left_normal"] forState:UIControlStateNormal];
[_leftbtn setBackgroundImage:[UIImage imageNamed:@"left_highlighted"] forState:UIControlStateHighlighted];
[self.view addSubview:_leftbtn];
[_leftbtn addTarget:self action:@selector(leftclick:) forControlEvents:UIControlEventTouchUpInside];
}
return _leftbtn;
}
/**5.右鍵按鈕的延遲加載*/
-(UIButton *)rightbtn
{
if (!_rightbtn) {
_rightbtn=[UIButton buttonWithType:UIButtonTypeCustom];
_rightbtn.frame=CGRectMake(POTOIMGX+POTOIMGW+10, self.view.center.y, 40, 40);
[_rightbtn setBackgroundImage:[UIImage imageNamed:@"right_normal"] forState:UIControlStateNormal];
[_rightbtn setBackgroundImage:[UIImage imageNamed:@"right_highlighted"] forState:UIControlStateHighlighted];
[self.view addSubview:_rightbtn];
[_rightbtn addTarget:self action:@selector(rightclick:) forControlEvents:UIControlEventTouchUpInside];
}
return _rightbtn;
}
//array的get辦法
-(NSArray *)array
{
if (_array==nil) {
NSString *path=[[NSBundle mainBundle] pathForResource:@"data" ofType:@"plist"];
_array=[[NSArray alloc]initWithContentsOfFile:path];
}
return _array;
}
-(void)rightclick:(UIButton *)btn
{
self.i++;
[self change];
}
-(void)leftclick:(UIButton *)btn
{
self.i--;
[self change];
}
@end
xib的簡略應用
1、簡略引見
xib和storyboard的比擬,一個輕量級一個分量級。
配合點:
都用來描寫軟件界面
都用Interface Builder對象來編纂
分歧點:
Xib是輕量級的,用來描寫部分的UI界面
Storyboard是分量級的,用來描寫全部軟件的多個界面,而且能展現多個界面之間的跳轉關系
2、xib的簡略應用
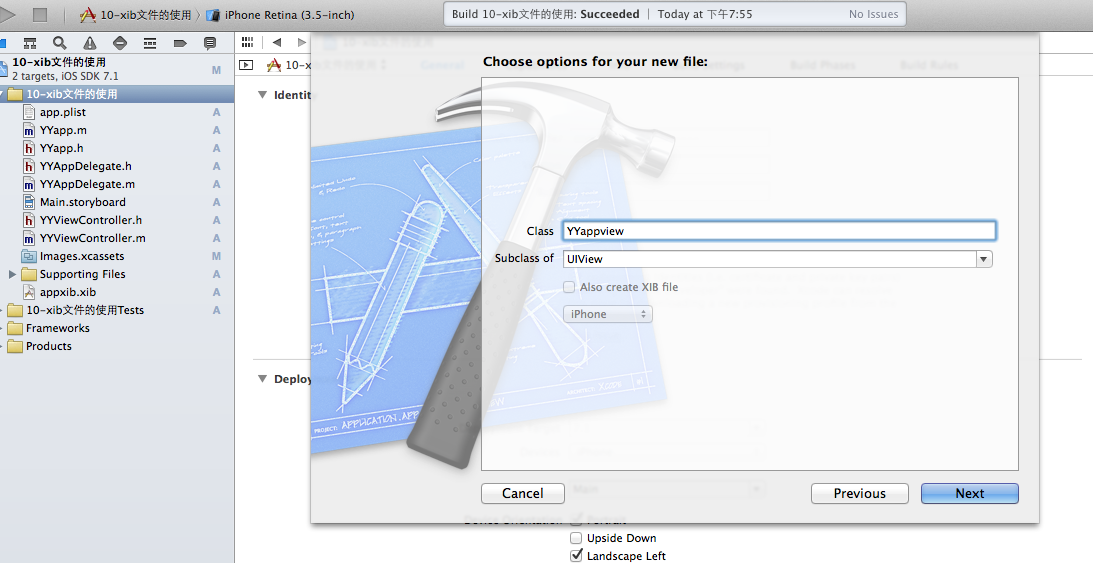
1.樹立xib文件

樹立的xib文件定名為appxib.xib

2.對xib停止設置
依據法式的須要,這裡把view調劑為自在結構
樹立view模子(設置長寬等參數)
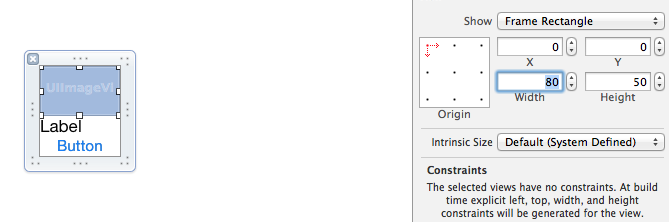
調劑結構和外部的控件

完成後的單個view

3.應用xib文件的代碼示例
YYViewController.m文件代碼以下:
//
// YYViewController.m
// 10-xib文件的應用
//
// Created by apple on 14-5-24.
// Copyright (c) 2014年 itcase. All rights reserved.
//
#import "YYViewController.h"
#import "YYapp.h"
@interface YYViewController ()
@property(nonatomic,strong)NSArray *app;
@end
@implementation YYViewController
//1.加載數據信息
-(NSArray *)app
{
if (!_app) {
NSString *path=[[NSBundle mainBundle]pathForResource:@"app.plist" ofType:nil];
NSArray *temparray=[NSArray arrayWithContentsOfFile:path];
//字典轉模子
NSMutableArray *arrayM=[NSMutableArray array ];
for (NSDictionary *dict in temparray) {
[arrayM addObject:[YYapp appWithDict:dict]];
}
_app=arrayM;
}
return _app;
}
//創立界面原型
- (void)viewDidLoad
{
[super viewDidLoad];
NSLog(@"%d",self.app.count);
//九宮格結構
int totalloc=3;
CGFloat appviewW=80;
CGFloat appviewH=90;
CGFloat margin=(self.view.frame.size.width-totalloc*appviewW)/(totalloc+1);
int count=self.app.count;
for (int i=0; i<count; i++) {
int row=i/totalloc;
int loc=i%totalloc;
CGFloat appviewX=margin + (margin +appviewW)*loc;
CGFloat appviewY=margin + (margin +appviewH)*row;
YYapp *app=self.app[i];
//拿出xib視圖
NSArray *apparray= [[NSBundle mainBundle]loadNibNamed:@"appxib" owner:nil options:nil];
UIView *appview=[apparray firstObject];
//加載視圖
appview.frame=CGRectMake(appviewX, appviewY, appviewW, appviewH);
UIImageView *appviewImg=(UIImageView *)[appview viewWithtag:1];
appviewImg.image=app.image;
UILabel *appviewlab=(UILabel *)[appview viewWithtag:2];
appviewlab.text=app.name;
UIButton *appviewbtn=(UIButton *)[appview viewWithtag:3];
[appviewbtn addTarget:self action:@selector(appviewbtnClick:) forControlEvents:UIControlEventTouchUpInside];
appviewbtn.tag=i;
[self.view addSubview:appview];
}
}
/**按鈕的點擊事宜*/
-(void)appviewbtnClick:(UIButton *)btn
{
YYapp *apps=self.app[btn.tag];
UILabel *showlab=[[UILabel alloc]initWithFrame:CGRectMake(60, 450, 200, 20)];
[showlab setText:[NSString stringWithFormat: @"%@下載勝利",apps.name]];
[showlab setBackgroundColor:[UIColor lightGrayColor]];
[self.view addSubview:showlab];
showlab.alpha=1.0;
//簡略的動畫後果
[UIView animateWithDuration:2.0 animations:^{
showlab.alpha=0;
} completion:^(BOOL finished) {
[showlab removeFromSuperview];
}];
}
@end
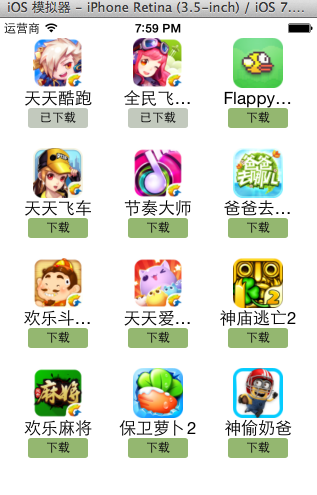
運轉後果:
3、對xib停止連線示例
1.連線示例
新建一個xib對應的視圖類,繼續自Uiview
在xib界面右上角與新建的視圖類停止聯系關系
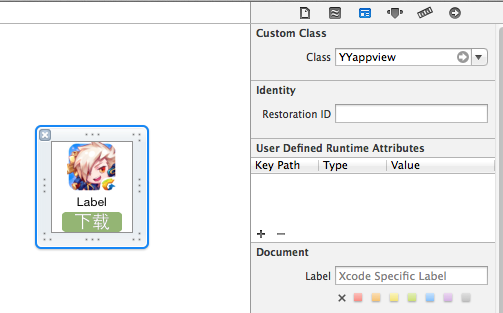
把xib和視圖類停止連線
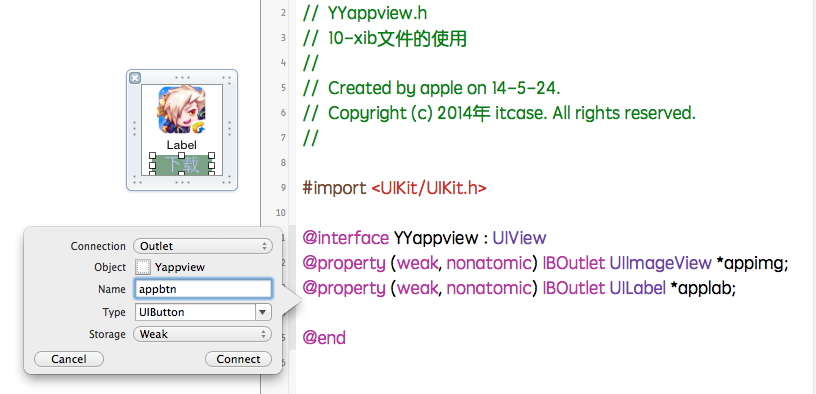
留意:在應用中把weak改成為強援用。不然...
2.連線後的代碼示例
YYViewController.m文件代碼以下:
//
// YYViewController.m
// 10-xib文件的應用
//
// Created by apple on 14-5-24.
// Copyright (c) 2014年 itcase. All rights reserved.
//
#import "YYViewController.h"
#import "YYapp.h"
#import "YYappview.h"
@interface YYViewController ()
@property(nonatomic,strong)NSArray *app;
@end
@implementation YYViewController
//1.加載數據信息
-(NSArray *)app
{
if (!_app) {
NSString *path=[[NSBundle mainBundle]pathForResource:@"app.plist" ofType:nil];
NSArray *temparray=[NSArray arrayWithContentsOfFile:path];
//字典轉模子
NSMutableArray *arrayM=[NSMutableArray array ];
for (NSDictionary *dict in temparray) {
[arrayM addObject:[YYapp appWithDict:dict]];
}
_app=arrayM;
}
return _app;
}
//創立界面原型
- (void)viewDidLoad
{
[super viewDidLoad];
NSLog(@"%d",self.app.count);
//九宮格結構
int totalloc=3;
CGFloat appviewW=80;
CGFloat appviewH=90;
CGFloat margin=(self.view.frame.size.width-totalloc*appviewW)/(totalloc+1);
int count=self.app.count;
for (int i=0; i<count; i++) {
int row=i/totalloc;
int loc=i%totalloc;
CGFloat appviewX=margin + (margin +appviewW)*loc;
CGFloat appviewY=margin + (margin +appviewH)*row;
YYapp *app=self.app[i];
//拿出xib視圖
NSArray *apparray= [[NSBundle mainBundle]loadNibNamed:@"appxib" owner:nil options:nil];
//留意這裡的類型名!
//UIView *appview=[apparray firstObject];
YYappview *appview=[apparray firstObject];
//加載視圖
appview.frame=CGRectMake(appviewX, appviewY, appviewW, appviewH);
[self.view addSubview:appview];
appview.appimg.image=app.image;
appview.applab.text=app.name;
appview.appbtn.tag=i;
[ appview.appbtn addTarget:self action:@selector(appviewbtnClick:) forControlEvents:UIControlEventTouchUpInside];
}
}
/**按鈕的點擊事宜*/
-(void)appviewbtnClick:(UIButton *)btn
{
YYapp *apps=self.app[btn.tag];
UILabel *showlab=[[UILabel alloc]initWithFrame:CGRectMake(60, 450, 200, 20)];
[showlab setText:[NSString stringWithFormat: @"%@下載勝利",apps.name]];
[showlab setBackgroundColor:[UIColor lightGrayColor]];
[self.view addSubview:showlab];
showlab.alpha=1.0;
//簡略的動畫後果
[UIView animateWithDuration:2.0 animations:^{
showlab.alpha=0;
} completion:^(BOOL finished) {
[showlab removeFromSuperview];
}];
}
@end
YYappview.h文件代碼(曾經連線)
#import <UIKit/UIKit.h>
@interface YYappview : UIView
@property (strong, nonatomic) IBOutlet UIImageView *appimg;
@property (strong, nonatomic) IBOutlet UILabel *applab;
@property (strong, nonatomic) IBOutlet UIButton *appbtn;
@end
【解析iOS運用的UI開辟中懶加載和xib的簡略應用辦法】的相關資料介紹到這裡,希望對您有所幫助! 提示:不會對讀者因本文所帶來的任何損失負責。如果您支持就請把本站添加至收藏夾哦!

- iOS7文件夾中存放文件夾
- iPhone4S 5.0.1完美越獄必裝軟件AppSync教程
- iOS開發——為iOS工程創建模擬器包,用於其它電腦上iOS模擬器的運行測試(Creating an iOS Simulator Build)
- iOS如何徹底去除APP STORE圖標右上角的更新提示數字
- 蘋果iPhone6單手模式怎麼開啟
- 嚇壞有木有,蘋果iPhone升級iOS9後微博微信變英文
- 《禅與Objective-C編程藝術》讀書筆記(二)
- iOS8 beta1 降級至 iOS 7.1.1 詳細圖文教程
- iOS 數組越界 Crash處理經驗
- 蘋果iOS10.3 Beta1曝光:新增影院模式,1月10號發布