iOS開發中UIImageView控件的常用操作整理
UIImageView,顧名思義,是用來放置圖片的。使用Interface Builder設計界面時,當然可以直接將控件拖進去並設置相關屬性,這就不說了,這裡講的是用代碼。
1、創建一個UIImageView:
創建一個UIImageView對象有五種方法:
復制代碼 代碼如下:
UIImageView *imageView1 = [[UIImageView alloc] init]; UIImageView *imageView2 = [[UIImageView alloc] initWithFrame:(CGRect)]; UIImageView *imageView3 = [[UIImageView alloc] initWithImage:(UIImage *)]; UIImageView *imageView4 = [[UIImageView alloc] initWithImage:(UIImage *) highlightedImage:(UIImage *)]; UIImageView *imageView5 = [[UIImageView alloc] initWithCoder:(NSCoder *)];
比較常用的是前邊三個。至於第四個,當這個ImageView的highlighted屬性是YES時,顯示的就是參數highlightedImage,一般情況下顯示的是第一個參數UIImage。
2、frame與bounds屬性:
上述創建一個UIImageView的方法中,第二個方法是在創建時就設定位置和大小。
當之後想改變位置時,可以重新設定frame屬性:
復制代碼 代碼如下:
imageView.frame = CGRectMake(CGFloat x, CGFloat y, CGFloat width, CGFloat heigth);
注意到UIImageView還有一個bounds屬性
復制代碼 代碼如下:
imageView.bounds = CGRectMake(CGFloat x, CGFloat y, CGFloat width, CGFloat heigth);
那麼這個屬性跟frame有什麼區別呢?
我的理解是,frame設置其位置和大小,而bounds只能設置其大小,其參數中的x、y不起作用即便是之前沒有設定frame屬性,控件最終的位置也不是bounds所設定的參數。bounds實現的是將UIImageView控件以原來的中心為中心進行縮放。例如有如下代碼:
復制代碼 代碼如下:
imageView.frame = CGRectMake(0, 0, 320, 460); imageView.bounds = CGRectMake(100, 100, 160, 230);
執行之後,這個imageView的位置和大小是(80, 115, 160, 230)。
3、contentMode屬性:
這個屬性是用來設置圖片的顯示方式,如居中、居右,是否縮放等,有以下幾個常量可供設定:
復制代碼 代碼如下:
UIViewContentModeScaleToFill UIViewContentModeScaleAspectFit UIViewContentModeScaleAspectFill UIViewContentModeRedraw UIViewContentModeCenter UIViewContentModeTop UIViewContentModeBottom UIViewContentModeLeft UIViewContentModeRight UIViewContentModeTopLeft UIViewContentModeTopRight UIViewContentModeBottomLeft UIViewContentModeBottomRight
注意以上幾個常量,凡是沒有帶Scale的,當圖片尺寸超過 ImageView尺寸時,只有部分顯示在ImageView中。UIViewContentModeScaleToFill屬性會導致圖片變形。UIViewContentModeScaleAspectFit會保證圖片比例不變,而且全部顯示在ImageView中,這意味著ImageView會有部分空白。UIViewContentModeScaleAspectFill也會證圖片比例不變,但是是填充整個ImageView的,可能只有部分圖片顯示出來。
前三個效果如下圖:
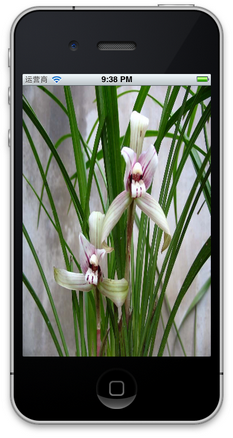
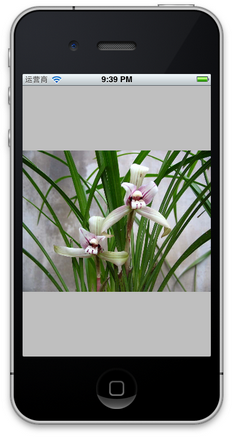
UIViewContentModeScaleToFill、UIViewContentModeScaleAspectFit、UIViewContentModeScaleAspectFill
4、更改位置
更改一個UIImageView的位置,可以
4.1 直接修改其frame屬性
4.2 修改其center屬性:
復制代碼 代碼如下:
imageView.center = CGPointMake(CGFloat x, CGFloat y);
center屬性指的就是這個ImageView的中間點。
4.3 使用transform屬性
復制代碼 代碼如下:
imageView.transform = CGAffineTransformMakeTranslation(CGFloat dx, CGFloat dy);
其中dx與dy表示想要往x或者y方向移動多少,而不是移動到多少。
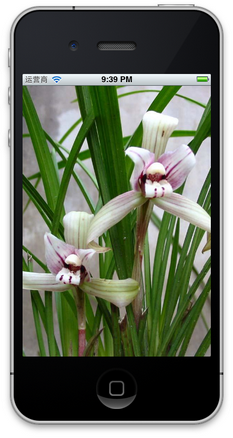
5、旋轉圖像
復制代碼 代碼如下:
imageView.transform = CGAffineTransformMakeRotation(CGFloat angle);
要注意它是按照順時針方向旋轉的,而且旋轉中心是原始ImageView的中心,也就是center屬性表示的位置。
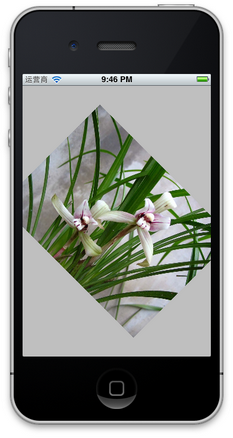
這個方法的參數angle的單位是弧度,而不是我們最常用的度數,所以可以寫一個宏定義:
復制代碼 代碼如下:
#define degreesToRadians(x) (M_PI*(x)/180.0)
用於將度數轉化成弧度。下圖是旋轉45度的情況:

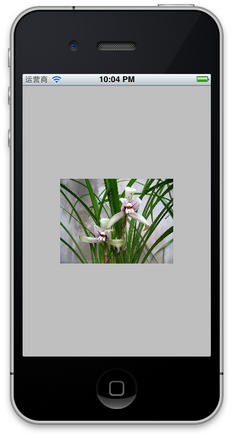
6、縮放圖像
還是使用transform屬性:
復制代碼 代碼如下:
imageView.transform = CGAffineTransformMakeScale(CGFloat scale_w, CGFloat scale_h);
其中,CGFloat scale_w與CGFloat scale_h分別表示將原來的寬度和高度縮放到多少倍,下圖是縮放到原來的0.6倍的示意圖:

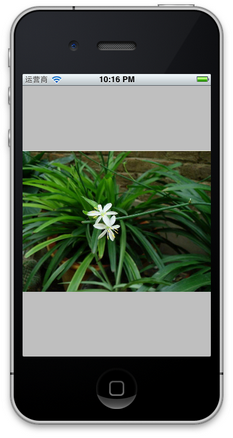
7、播放一系列圖片
復制代碼 代碼如下:
imageView.animationImages = imagesArray; // 設定所有的圖片在多少秒內播放完畢 imageView.animationDuration = [imagesArray count]; // 不重復播放多少遍,0表示無數遍 imageView.animationRepeatCount = 0; // 開始播放 [imageView startAnimating];
其中,imagesArray是一些列圖片的數組。如下圖:


8、為圖片添加單擊事件:
復制代碼 代碼如下:
imageView.userInteractionEnabled = YES; UITapGestureRecognizer *singleTap = [[UITapGestureRecognizer alloc] initWithTarget:self action:@selector(tapImageView:)]; [imageView addGestureRecognizer:singleTap];
一定要先將userInteractionEnabled置為YES,這樣才能響應單擊事件。
9、tag參數
一個視圖通常都只有一個父視圖,多個子視圖,在開發中可以通過使用子視圖的tag來取出對應的子視圖。方法為Viewwithtag:
提示點:在xib中如果想要通過tag參數獲取對應的控件(屬性),不要把tag的參數設置為0,因為xib中所有的對象默認tag都為0,設置為0取不到對象。
10、ImageView中添加按鈕
(1)ImageView和Button的比較
Button按鈕的內部可以放置多張圖片(4),而ImageView中只能放置一張圖片。
(2)說明:
ImageView只能顯示一張圖片,我們知道所有的ui控件都繼承自UIView,所有的視圖都是容器,容易意味著還能往裡邊加東西。那麼能否在ImageView中加上按鈕呢?
(3)在ImageView中添加按鈕的操作
通常有兩種方式創建控件,一是直接在storyboard或xib界面設計器上拖拽,另一種方式是使用手寫代碼的方式創建。
在界面設計器上面拖拽的無法在ImageView中添加按鈕,那麼我們嘗試一下手寫代碼。
代碼如下:
復制代碼 代碼如下:
#import "YYViewController.h"
@interface YYViewController ()
@end
復制代碼 代碼如下:
@implementation YYViewController
- (void)viewDidLoad
{
[super viewDidLoad];
// UIImageView默認不允許用戶交互
UIImageView *imageView = [[UIImageView alloc] initWithFrame:CGRectMake(0, 20, 100, 100)];
[self.view addSubview:imageView];
imageView.backgroundColor = [UIColor redColor];
imageView.userInteractionEnabled = YES;
UIButton *btn = [UIButton buttonWithType:UIButtonTypeContactAdd];
[imageView addSubview:btn];
[btn addTarget:self action:@selector(click) forControlEvents:UIControlEventTouchUpInside];
}
- (void)click
{
NSLog(@"摸我了");
}
@end
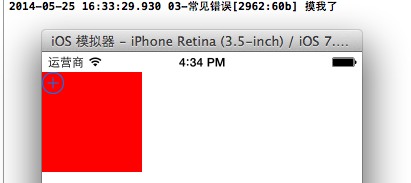
(4)執行效果(添加+按鈕後,點擊):
(5)注意點:
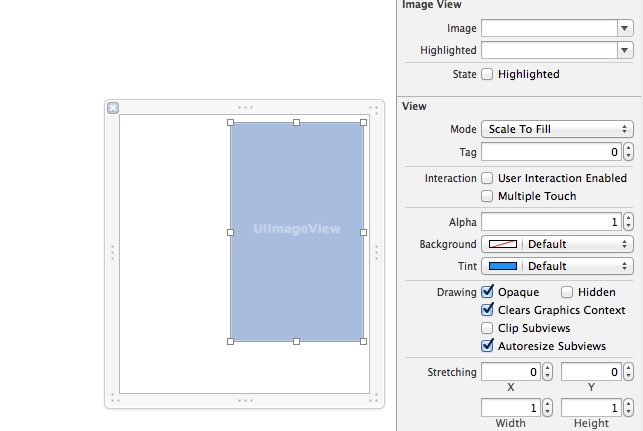
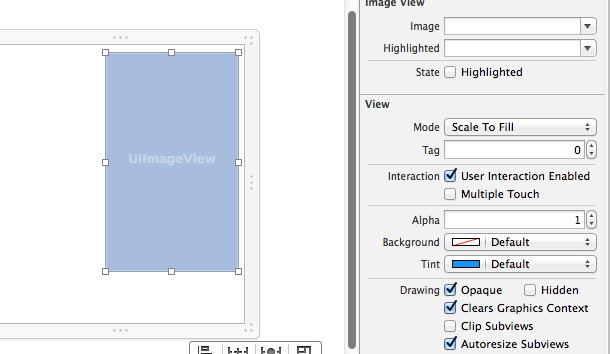
在上面代碼中imageView.userInteractionEnabled = YES;的作用是,設置imageView為允許用戶交互的。
imageView默認的是不允許用戶交互的,這個可以通過在界面設計器中查看imageView的屬性邊欄查看。
請注意默認狀態的屬性
11、其他設置
復制代碼 代碼如下:
imageView.hidden = YES或者NO; // 隱藏或者顯示圖片 imageView.alpha = (CGFloat) al; // 設置透明度 imageView.highlightedImage = (UIImage *)hightlightedImage; // 設置高亮時顯示的圖片 imageView.image = (UIImage *)image; // 設置正常顯示的圖片 [imageView sizeToFit]; // 將圖片尺寸調整為與內容圖片相同
- 上一頁:iOS開發之事件傳遞響應鏈
- 下一頁:IOS封裝自定義布局的方法