iOS中線程以及GET和POST請求的一些知識
編輯:IOS開發綜合
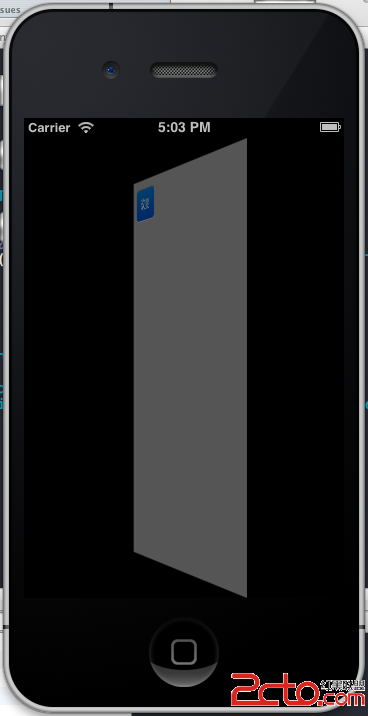
12-23:任意點擊屏幕內的三點以確定一個三角形
1、其中一個drawRect方法:-(void)drawRect:(CGRect)rect
{
//根據圖形獲取上下文
CGContextRef context = UIGraphicsGetCurrentContext();
//初始化數組
CGPoint addLines[]=
{
firstPoint,secondPoint,thirdPoint,firstPoint,
};
//開始畫線條
CGContextAddLines(context, addLines, sizeof(addLines)/sizeof(addLines[0]));
//閉合路徑
CGContextStrokePath(context);
}
第二個方法touchEnded:
//通過觸摸方法進行操作
-(void)touchesEnded:(NSSet *)touches withEvent:(UIEvent *)event
{
//觸摸產生對象
UITouch *touch = [touches anyObject];
//當前觸摸點
CGPoint point = [touch locationInView:self];
[pointArray addObject:[NSValue valueWithCGPoint:point]];
//只存儲3個觸摸點
if (pointArray.count > 3) {
[pointArray removeObjectAtIndex:0];
}
if (pointArray.count == 3) {
firstPoint = [[pointArray objectAtIndex:0]CGPointValue];
secondPoint = [[pointArray objectAtIndex:1]CGPointValue];
thirdPoint = [[pointArray objectAtIndex:2]CGPointValue];
}
//關鍵方法,重新加載drawRect方法
[self setNeedsDisplay];
}
12-24關於線程的一些知識:
iOS有三種多線程編程的技術,分別是:
1、NSThread
2、Cocoa NSOperation (iOS多線程編程之NSOperation和NSOperationQueue的使用)
3、GCD 全稱:Grand Central Dispatch( iOS多線程編程之Grand Central Dispatch(GCD)介紹和使用)
這三種編程方式從上到下,抽象度層次是從低到高的,抽象度越高的使用越簡單,也是Apple最推薦使用的。
一、NSThread:
優點:NSThread 比其他兩個輕量級
缺點:需要自己管理線程的生命周期,線程同步。線程同步對數據的加鎖會有一定的系統開銷
二、Cocoa operation
優點:不需要關心線程管理,數據同步的事情,可以把精力放在自己需要執行的操作上。
Cocoa operation 相關的類是 NSOperation ,NSOperationQueue。NSOperation是個抽象類,使用它必須用它的子類,可以實現它或者使用它定義好的兩個子類:NSInvocationOperation 和 NSBlockOperation。創建NSOperation子類的對象,把對象添加到NSOperationQueue隊列裡執行。
三、Grand Central Dispatch (GCD)是Apple開發的一個多核編程的解決方法。在iOS4.0開始之後才能使用。GCD是一個替代諸如NSThread, NSOperationQueue, NSInvocationOperation等技術的很高效和強大的技術。現在的iOS系統都升級到6了,所以不用擔心該技術不能使用。
NSThread 有兩種直接創建方式:
- (id)initWithTarget:(id)target selector:(SEL)selector object:(id)argument
+ (void)detachNewThreadSelector:(SEL)aSelector toTarget:(id)aTarget withObject:(id)anArgument
第一個是實例方法,第二個是類方法
其中:
selector :線程執行的方法,這個selector只能有一個參數,而且不能有返回值。
target :selector消息發送的對象
argument:傳輸給target的唯一參數,也可以是nil
第一種方式會直接創建線程並且開始運行線程,第二種方式是先創建線程對象,然後再運行線程操作,在運行線程操作前可以設置線程的優先級等線程信息
注意線程鎖的使用:兩種使用方法1、NSLock *theLock; [theLock lock]; [theLock unlock];2、NSCondition* ticketsCondition ; [ticketsCondition lock] 。——>保證了數據的准確性
使用 NSOperation的方式有兩種,
一種是用定義好的兩個子類:
NSInvocationOperation 和 NSBlockOperation。
另一種是繼承NSOperation
NSInvocationOperation例子:
和前面一篇博文一樣,我們實現一個下載圖片的例子。新建一個Single View app,拖放一個ImageView控件到xib界面。
實現代碼如下:
[cpp] view plaincopy
#import "ViewController.h"
#define kURL @"http://avatar.csdn.net/2/C/D/1_totogo2010.jpg"
@interface ViewController ()
@end
@implementation ViewController
- (void)viewDidLoad
{
[super viewDidLoad];
NSInvocationOperation *operation = [[NSInvocationOperation alloc]initWithTarget:self
selector:@selector(downloadImage:)
object:kURL];
NSOperationQueue *queue = [[NSOperationQueue alloc]init];
[queue addOperation:operation];
// Do any additional setup after loading the view, typically from a nib.
}
-(void)downloadImage:(NSString *)url{
NSLog(@"url:%@", url);
NSURL *nsUrl = [NSURL URLWithString:url];
NSData *data = [[NSData alloc]initWithContentsOfURL:nsUrl];
UIImage * image = [[UIImage alloc]initWithData:data];
[self performSelectorOnMainThread:@selector(updateUI:) withObject:image waitUntilDone:YES];
}
-(void)updateUI:(UIImage*) image{
self.imageView.image = image;
}
viewDidLoad方法裡可以看到我們用NSInvocationOperation建了一個後台線程,並且放到NSOperationQueue中。後台線程執行downloadImage方法。
downloadImage 方法處理下載圖片的邏輯。下載完成後用performSelectorOnMainThread執行主線程updateUI方法。
updateUI 並把下載的圖片顯示到圖片控件中。
如何控制線程池中的線程數?
隊列裡可以加入很多個NSOperation, 可以把NSOperationQueue看作一個線程池,可往線程池中添加操作(NSOperation)到隊列中。線程池中的線程可看作消費者,從隊列中取走操作,並執行它。
通過下面的代碼設置:
[queue setMaxConcurrentOperationCount:5];
線程池中的線程數,也就是並發操作數。默認情況下是-1,-1表示沒有限制,這樣會同時運行隊列中的全部的操作。
12-25關於網絡監測的一些知識
在AppDelegate中聲明屬性
@property (retain, nonatomic) Reachability *hostReach;
在點M文件中加入以下代碼:
//將selector方法添加到消息中心,實現全局監測
[[NSNotificationCenter defaultCenter]addObserver:self selector:@selector(reachablityChanged:) name:kReachabilityChangedNotification object:nil];
//初始化hostReach
self.hostReach=[[Reachability reachabilityWithHostName:@"www.baidu.com"]retain];
//開始監測
[self.hostReach startNotifier];
//網絡狀態監測
- (void)reachablityChanged:(NSNotification *)note{
Reachability *pReachAbili=[note object];
//斷言語句,實現容錯保護
NSParameterAssert([pReachAbili isKindOfClass:[pReachAbili class]]);
NSString *p3G=@"當前網絡為2G或3G網絡";
NSString *pWF=@"當前網絡為WIFI網絡";
NSString *pNo=@"無網絡,請檢查網絡設置";
switch ([pReachAbili currentReachabilityStatus]) {
case NotReachable:
[self AlertViewShow:pNo];
break;
case ReachableViaWiFi:
[self AlertViewShow:pWF];
break;
case ReachableViaWWAN:
[self AlertViewShow:p3G];
break;
default:
[self AlertViewShow:@"error"];
break;
}
}
//警告框
- (void)AlertViewShow:(NSString *)mes{
UIAlertView *pAlert=[[UIAlertView alloc]initWithTitle:@"通知" message:mes delegate:self cancelButtonTitle:@"OK" otherButtonTitles: nil];
[pAlert show];
[pAlert release];
}
關鍵:在空視圖文件中導入類Reachability的.h和.m文件(類中聲明了一些屬性和方法)
12-26的一些知識總結
同步請求(用的比較少)和異步請求:(同步有時會阻礙主線程,異步一般不會,故:一般選異步請求)
創建同步請求和異步請求相關代碼:
// //創建URL (同步請求)
// NSURL *pURL=[NSURL URLWithString:URL];
// //創建一個請求
// NSURLRequest *pRequest=[NSURLRequest requestWithURL:pURL cachePolicy:NSURLRequestUseProtocolCachePolicy timeoutInterval:60];
//
// //建立鏈接
// NSError *pError=nil;
// NSURLResponse *pResponse=nil;
//
// //向服務器發起請求(同步請求,發起之後線程會一直等待服務器響應,直到超出最大響應時間)
// NSData *pData=[NSURLConnection sendSynchronousRequest:pRequest returningResponse:&pResponse error:&pError];
//
// NSLog(@"pData=%@",pData);
// NSLog(@"pError=%@",[pError localizedDescription]);
//異步請求:通過委托回調方法完成數據的獲取
//獲取url網絡資源路徑
NSURL *pURL1=[NSURL URLWithString:URL];
//根據URL創建請求
NSURLRequest *pRequest1=[NSURLRequest requestWithURL:pURL1 cachePolicy:NSURLRequestUseProtocolCachePolicy timeoutInterval:60];
// 與同步的區別點:發起請求,通過委托模式回調完成數據獲取
[NSURLConnection connectionWithRequest:pRequest1 delegate:self];
【注意:異步請求所回調的四個方法:1、didReceiveResponse 2、didReceiveData 3、connectionDidFinishLoading 4、didFailWithError (開始響應,開始接受數據,接受完成,接受失敗及原因)
GET請求和POST請求
兩者創建的相關代碼:
// //GET請求
//
// //將textfield值賦給字符串
// NSString *pStr=self.TextField.text;
// //將其拼接成字符串
// NSString *strUrl=[@"http://webservice.webxml.com.cn/webservices/qqOnlineWebService.asmx/qqCheckOnline?qqCode="stringByAppendingFormat:@"%@",pStr];
// //轉換為URL
// NSURL *pURL=[NSURL URLWithString:strUrl];
// //創建請求
// NSURLRequest *pRequest=[NSURLRequest requestWithURL:pURL cachePolicy:NSURLRequestUseProtocolCachePolicy timeoutInterval:60];
// //向服務器發起請求
// [NSURLConnection connectionWithRequest:pRequest delegate:self];
//post請求
//第一個區別點(不帶參數,參數附件在body體裡
NSString *postStr1=@"http://webservice.webxml.com.cn/webservices/qqOnlineWebService.asmx/qqCheckOnline";
//轉化為url
NSURL *postUrl=[NSURL URLWithString:postStr1];
//第二個區別點(請求為NSMutableURLRequest)
NSMutableURLRequest *postRequest=[NSMutableURLRequest requestWithURL:postUrl cachePolicy:NSURLRequestUseProtocolCachePolicy timeoutInterval:60];
//將參數做成一個字符串
NSString *postStr2=[NSString stringWithFormat:@"qqCode=%@",self.TextField.text];
//轉換為NSData類型
NSData *postData=[postStr2 dataUsingEncoding:NSUTF8StringEncoding];
//第三個區別點(將參數作為Body體)
[postRequest setHTTPBody:postData];
//第四區別點(必須手動聲明當前的請求方式是POST請求)
[postRequest setHTTPMethod:@"POST"];
//向服務器發起請求
[NSURLConnection connectionWithRequest:postRequest delegate:self];
其中兩者區別點已經注釋,注意兩者使用的都是異步請求,因此注意回調異步請求的四個方法:
#pragma mark NSURLConnection datadelegate
//1、服務器開始響應
- (void)connection:(NSURLConnection *)connection didReceiveResponse:(NSURLResponse *)response{
NSLog(@"服務器響應");
_resultStr=[[NSMutableString alloc]init];
}
//2、服務器返回數據,客戶端開始接受(data為返回的數據)
- (void)connection:(NSURLConnection *)connection didReceiveData:(NSData *)data{
NSLog(@"接收服務器返回數據");
// NSLog(@"data=%@",data);
//將data通過UTF8的編碼方式轉化為字符串
NSString *pStr=[[NSString alloc]initWithData:data encoding:NSUTF8StringEncoding];
// NSLog(@"%@",pStr);
//放到存儲結果的字符串中
[_resultStr appendString:pStr];
NSLog(@"__resultStr=%@",_resultStr);
}
//3、數據接收完畢回調的方法
- (void)connectionDidFinishLoading:(NSURLConnection *)connection{
NSLog(@"接收數據完成");
//初始化字符串pTempStr,並將_resultStr字符串的第78位的一個字符 賦給pTempStr
NSString *pTempStr=[_resultStr substringWithRange:NSMakeRange(78, 1)];
NSLog(@"%@",pTempStr);
//以pTempStr為實際參數調用result方法
[self result:pTempStr];
}
//4、接收數據失敗時回調的方法
- (void)connection:(NSURLConnection *)connection didFailWithError:(NSError *)error{
NSLog(@"error:%@",[error localizedDescription]);
}
//分析結果方法
- (void)result:(NSString *)str{
if (NSOrderedSame==[str compare:@"Y"]) {
NSLog(@"在線");
self.jieguo.text=@"該QQ在線";
}else if (NSOrderedSame==[str compare:@"N"]){
NSLog(@"離線");
self.jieguo.text=@"該QQ離線";
}else if (NSOrderedSame==[str compare:@"V"]){
NSLog(@"超出免費用戶數量");
self.jieguo.text=@"超出免費用戶數量";
}else if (NSOrderedSame==[str compare:@"A"]){
NSLog(@"商業用戶驗證失敗");
self.jieguo.text=@"商業用戶驗證失敗";
}else if (NSOrderedSame==[str compare:@"E"]){
NSLog(@"QQ號碼錯誤");
self.jieguo.text=@"QQ號碼錯誤";
}
}
以上是QQ在線查詢工具的代碼,其中包括了異步請求、GET請求以及POST請求(GET請求注釋過了)

相關文章
+