iOS_7_scrollView大圖縮放
編輯:IOS開發綜合
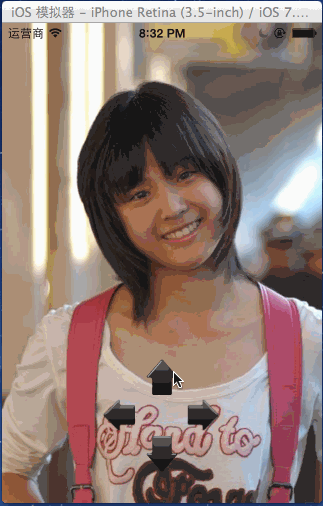
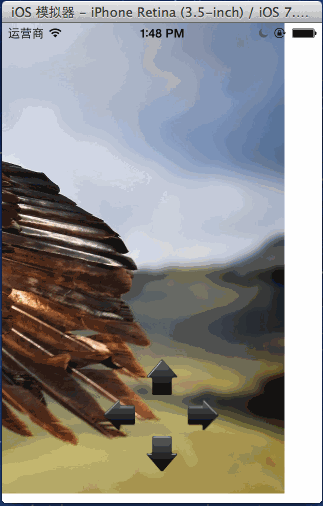
最終效果圖:
BeyondViewController.h
// // BeyondViewController.h // 7_scrollView大圖展示 // // Created by beyond on 14-7-24. // Copyright (c) 2014年 com.beyond. All rights reserved. // #import@interface BeyondViewController : UIViewController - (IBAction)upBtnClick:(id)sender; @end
BeyondViewController.m
// // BeyondViewController.m // 7_scrollView大圖展示 // // Created by beyond on 14-7-24. // Copyright (c) 2014年 com.beyond. All rights reserved. // #import "BeyondViewController.h" @interface BeyondViewController (){ UIScrollView *_scrollView; // 要縮放的是內部的哪一個控件 UIImageView *_imgView; } @end @implementation BeyondViewController - (void)viewDidLoad { [super viewDidLoad]; // UIImageView // 1,類方法創建控件 // UIImageView *imgView = [[UIImageView alloc]init]; // 2,控件細節 // NSString *imgName = [NSString stringWithFormat:@"HD.jpg"]; // imgView.image = [UIImage imageNamed:imgName]; // CGFloat imgW = imgView.image.size.width; // CGFloat imgH = imgView.image.size.height; // imgView.frame = CGRectMake(0, 0, imgW, imgH); // 或者快速創建,一句頂上面的6句代碼 _imgView = [[UIImageView alloc]initWithImage:[UIImage imageNamed:@"HD.jpg"]]; // 1,實例化UIScrollView _scrollView = [[UIScrollView alloc]init]; // 2,設置scrollView的可視大小,內容大小,等屬性 // _scrollView.frame = CGRectMake(0, 0, 320, 480); _scrollView.frame = self.view.bounds; _scrollView.contentSize = _imgView.image.size; // 這個最重要,是滾動區域 _scrollView.showsHorizontalScrollIndicator = NO; _scrollView.showsVerticalScrollIndicator = NO; _scrollView.bouncesZoom = NO; _scrollView.bounces = YES; // scrollView.contentOffset是個點,x(左)和y(上),值是scrollView裡面的大圖片拖拽的位移,相對於scrollView的顯示窗口的最左上角 // 上左下右 逆時針 到邊界之後,回不去了,多出來的距離 // scrollView.contentInset = UIEdgeInsetsMake(5, 10, 20, 40); // 3,將imgeView添加到scrollView [_scrollView addSubview:_imgView]; // 4,將scrollView添加到self.view // [self.view addSubview:_scrollView]; // 小bug解決,界面上的按鈕被完全遮擋了 [self.view insertSubview:_scrollView atIndex:0]; /* 4.scrollView實現縮放(捏合手勢)四步曲 1,設置代理 為 當前控制器 2,代理 尊守 協議 3,代理 實現 協議中的方法 viewForZoomingInScrollView,告訴scrollView要縮放的是它內部的哪一個控件 4,scrollView設置最大最小縮放比 即可 */ _scrollView.delegate = self; _scrollView.minimumZoomScale = 0.3; _scrollView.maximumZoomScale = 2.0; } // 代理 實現 協議中的方法,告訴scrollView要縮放的是它內部的哪一個控件 -(UIView *)viewForZoomingInScrollView:(UIScrollView *)scrollView { return _imgView; } - (IBAction)upBtnClick:(id)sender { // scrollView.contentOffset是個點,x(左)和y(上),值是scrollView裡面的大圖片拖拽的位移,相對於scrollView的顯示窗口的最左上角 [UIView animateWithDuration:0.3 animations:^{ // 以下三步為OC標准代碼,因為OC中不允許直接修該對象中結構體屬性的成員的值,要通過中間的臨時結構體變量 CGPoint offset = _scrollView.contentOffset; if (offset.y + 80 >= _scrollView.contentSize.height - _scrollView.frame.size.height) { return; } offset.y += 80; _scrollView.contentOffset = offset; }]; } @end
scrollView的contentOffset
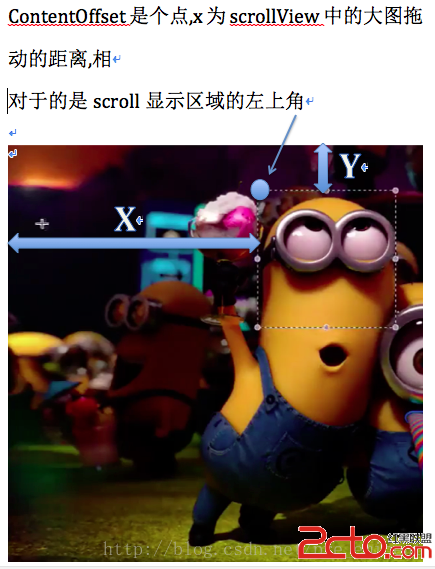
scrollView原理是通過拖拽其內部的大圖片


相關文章
+