iOS中,在UIAcitionSheet中添加UIPickerView實例
編輯:IOS開發綜合
——J!nl!n
佛祖鎮樓,希望每個人開心快樂幸福。
因項目需要,涉及到日期選擇器和地區聯動選擇器。考慮到使用開源庫的資源不是特別劃算,於是決定自己重寫一下iOS系統自身的控件。真正意義上本質也並不是重寫,只是在UIAcitionSheet添加部分布局使用UIPickerFView填充。代碼比較精簡,但是有些地方顯得很臃腫,後續隨著時間的推移和技術的積累,進一步對其進行優化。此次日志只做記錄,博客也會更新收集。
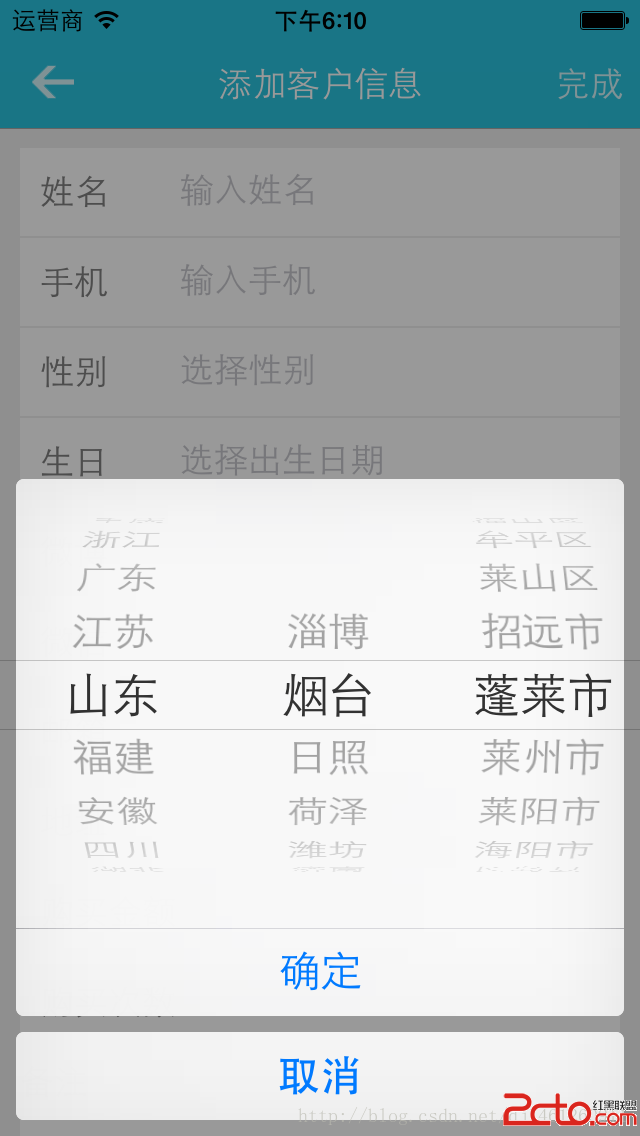
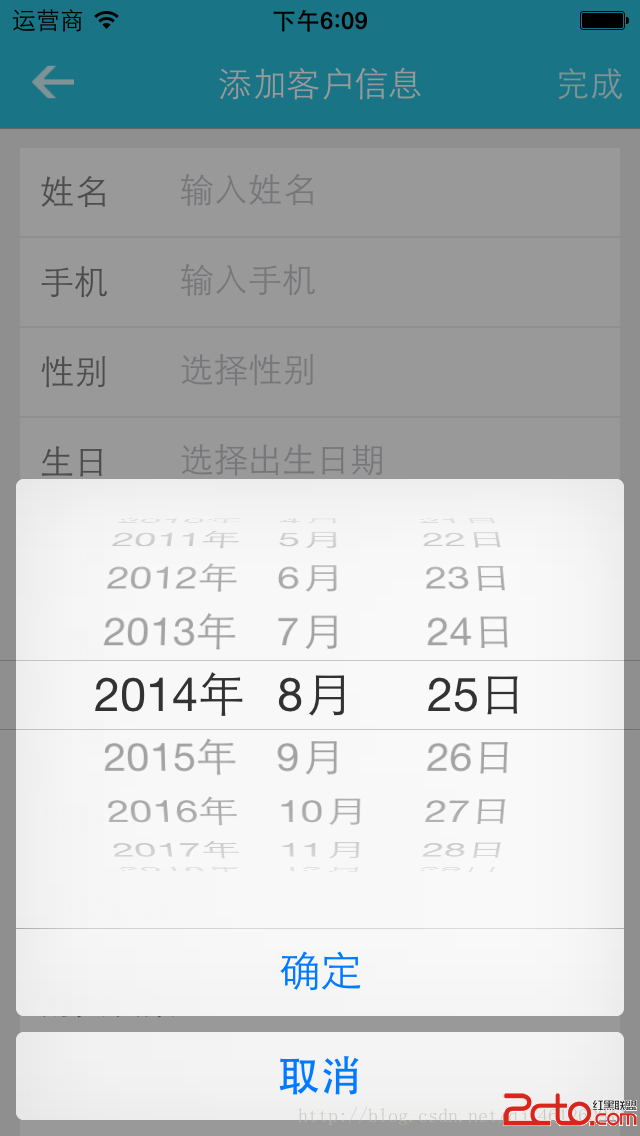
首先來看下一下效果圖,如下:
在這裡,使用到了系統自帶的UIActionSheet,熟悉iOS開發的人應該都知道。UIActionSheet是一個底部彈出的選擇按鈕項控件,可以添加多項,並為每項添加點擊事件。它的初始化代碼為:
NSString *title = UIDeviceOrientationIsLandscape([UIDevice currentDevice].orientation) ? @


 ;
UIActionSheet *actionSheet = [[UIActionSheet alloc] initWithTitle:title
                                                         delegate:self
                                                cancelButtonTitle:@取消
                                           destructiveButtonTitle:nil
                                                otherButtonTitles:@確定,nil];
我們可以看到這裡初始化了一個NSString,然後根據屏幕的橫豎屏選擇使用三目運算符指定填充字符串。這裡只用字符 換行符作為字符使得UIActionSheet的頂部出現一段空的布局以提供UIDatePicker和UIPickerView使用。
actionSheet.userInteractionEnabled = YES;
actionSheet.backgroundColor = [UIColor clearColor];
datePicker = [[UIDatePicker alloc] init];
datePicker.tag = 1000;
datePicker.datePickerMode = UIDatePickerModeDate;
[actionSheet addSubview:datePicker];
[actionSheet showInView:self.view];
actionSheet.tag = 100;
上述代碼設置UIActionSheet可交互,背景為白色,必須設置背景色,否則可能部分機型會出現 顯示字符。然後初始化UIDatePicker並綁定tag以提供後面方法調用。緊接著設置日期格式,當然也可以是指日期時間格式。最好通過UIActionSheet的addSubView方法添加到之前我們用換行符占位的布局上,並且使用showInView顯示在最上面,同樣給UIActionSheet設置一個tag值標記。
以上是添加日期選擇器的實現。
同理 ,地區聯動也是一樣的實現。不過相對比較復雜。這裡不做詳細介紹了。直接貼出實現部分。
#pragma mark - 調用地區聯動方法
- (void)showAreaPickerView{
    // 加載plist文件,初始化三個NSArray對象,然後做一些非法的事情,你懂的
    provinces = [[NSArray alloc] initWithContentsOfFile:[[NSBundle mainBundle] pathForResource:@area.plist ofType:nil]];
    cities = [[provinces objectAtIndex:0] objectForKey:@cities];
    state = [[provinces objectAtIndex:0] objectForKey:@state];
    NSString *title = UIDeviceOrientationIsLandscape([UIDevice currentDevice].orientation) ? @


 : @


 ;
    UIActionSheet *actionSheet = [[UIActionSheet alloc] initWithTitle:title
                                                             delegate:self
                                                    cancelButtonTitle:@取消
                                               destructiveButtonTitle:nil
                                                    otherButtonTitles:@確定,nil];
    actionSheet.userInteractionEnabled = YES;
    actionSheet.backgroundColor = [UIColor clearColor];
    areaPicker = [[UIPickerView alloc] init];
    areaPicker.dataSource = self;
    areaPicker.delegate = self;

    [actionSheet addSubview:areaPicker];
    [actionSheet showInView:self.view];
    actionSheet.tag = 200;
}
接下來是UIPickerViewDataSource數據源方法和UIPickerViewDelegate代理方法。部分地方仍然可以精簡。
// UIPickerViewDataSource中定義的方法,該方法的返回值決定改控件包含多少列
- (NSInteger)numberOfComponentsInPickerView:(UIPickerView *)pickerView
{
    return 3; // 返回3 表明什麼呢?這個如果你不知道,你就別干了、、、表明該控件只包含3列,3列也就夠了啊
}
// UIPickerViewDataSource中定義的方法,該方法的返回值決定該控件指定列包含多少哥列表項
- (NSInteger)pickerView:(UIPickerView *)pickerView numberOfRowsInComponent:(NSInteger)component
{
    // 如果是第一列,返回provinces的個數
    // 也就是provinces包含多少個元素,大天朝有多少個省份裡面就有多少個
    if (component == 0) {
        return provinces.count;
    } else if(component == 1){
        // 如果是第二列,返回cities的個數
        return cities.count;
    } else {
        return areas.count;
    }
}
// UIPickerViewDelegate中定義的方法,該方法返回NSString將作為UIPickerView中指定列和列表項上顯示的標題
- (NSString *)pickerView:(UIPickerView *)pickerView titleForRow:(NSInteger)row forComponent:(NSInteger)component
{
    // 如果是第一列,返回provinces中row索引出得元素
    switch (component) {
        case 0:
            return [[provinces objectAtIndex:row] objectForKey:@state];
            break;
        case 1:
            return [[cities objectAtIndex:row] objectForKey:@city];
            break;
        case 2:
            return [areas objectAtIndex:row];
            break;
        default:
            return @;
            break;
    }
}
// 當用戶選中UIPickerViewDataSource中指定列和列表項時激發該方法
- (void)pickerView:(UIPickerView *)pickerView didSelectRow:(NSInteger)row inComponent:(NSInteger)component
{
    switch (component) {
        case 0:
            cities = [[provinces objectAtIndex:row] objectForKey:@cities];
            [self.areaPicker selectRow:0 inComponent:1 animated:YES];
            [self.areaPicker reloadComponent:1];

            areas = [[cities objectAtIndex:0] objectForKey:@areas];
            [self.areaPicker selectRow:0 inComponent:2 animated:YES];
            [self.areaPicker reloadComponent:2];

            state = [[provinces objectAtIndex:row] objectForKey:@state];
            city = [[cities objectAtIndex:0] objectForKey:@city];
            if ([areas count] > 0) {
                district = [areas objectAtIndex:0];
            } else{
                district = @;
            }
            break;
        case 1:
            areas = [[cities objectAtIndex:row] objectForKey:@areas];
            [self.areaPicker selectRow:0 inComponent:2 animated:YES];
            [self.areaPicker reloadComponent:2];

            city = [[cities objectAtIndex:row] objectForKey:@city];
            if ([areas count] > 0) {
                district = [areas objectAtIndex:0];
            } else{
                district = @;
            }
            break;
        case 2:
            if ([areas count] > 0) {
                district = [areas objectAtIndex:row];
            } else{
                district = @;
            }
            break;
    }
}
具體邏輯實現可能有一些小細節處理的不好,但實際使用還是很棒的。這裡就不貼動態gif圖了。 本篇到此為止。

相關文章
+