iOS UITableView一些基礎知識
打開UIViewController.h
//
// RootViewController.h
// Lesson09TableView
//
// Created by Dubai on 14-9-26.
// Copyright (c) 2014年 Dubai All rights reserved.
//
#import
//遵循一下代理
@interface RootViewController :
UIViewController
@end
打開 UIViewController.m為:
//
// RootViewController.m
// Lesson09TableView
//
// Created by Dubai on 14-9-26.
// Copyright (c) 2014年 Dubai All rights reserved.
//
#import "RootViewController.h"
@interface RootViewController ()
@end
@implementation RootViewController
- (id)initWithNibName:(NSString *)nibNameOrNil bundle:(NSBundle *)nibBundleOrNil
{
self = [super initWithNibName:nibNameOrNil bundle:nibBundleOrNil];
if (self) {
// Custom initialization
}
return self;
}
- (void)viewDidLoad
{
[super viewDidLoad];
// Do any additional setup after loading the view.
UITableView *tableView = [[UITableView alloc] initWithFrame:self.view.bounds style:(UITableViewStyleGrouped)];
[self.view addSubview:tableView];
[tableView release];
//屬性
tableView.rowHeight = 90;//行高
tableView.separatorColor = [UIColor redColor];//行隔性顏色
//tableView.separatorStyle = UITableViewScrollPositionNone;//分割線 消失
//tableView.separatorStyle = UITableViewScrollPositionBottom;
//tableView.separatorStyle = UITableViewRowAnimationRight;
tableView.dataSource = self;//設置數據源的代理(必須實現)
tableView.delegate = self;//負責控制的代理對象
}
//設置分區,可選實現,因為tableview默認有一個分區(數據源代理)
- (NSInteger)numberOfSectionsInTableView:(UITableView *)tableView
{
return 4;
}
//設置每個分區的行數,必須實現(數據源)
- (NSInteger)tableView:(UITableView *)tableView numberOfRowsInSection:(NSInteger)section
{
return 5;
}
//設置每行要顯示的內容,每行所在位置會放值一個tabelViewcell,每行要顯示的數據,設置在cell上必須實現
- (UITableViewCell *)tableView:(UITableView *)tableView cellForRowAtIndexPath:(NSIndexPath *)indexPath
{
//當某行移出屏幕時,tableView會將這行顯示的cell,移動到重用集合中儲存,這行就咩有cell顯示任何數據.
//因此,只要某行要進入屏幕顯示,必須執行這個代理方法.設置這行要顯示的cell;
NSLog(@"row= %ld",indexPath.row);
//indexPath包含兩個屬性 section和 row 即分區和行數
//section 和row 的索引都從0開始.每個分區中的row的索引都是從0開始
UITableViewCell *cell = [[UITableViewCell alloc] initWithStyle:(UITableViewCellStyleDefault) reuseIdentifier:@"cell"];
//cell的樣式 是用來影響3個視圖的位置
//cell.imageView.image = [UIImage imageNamed:@"ha.png"];
//cell.detailTextLabel 直接用 不用創建(不能改變大小)
cell.textLabel.text = [NSString stringWithFormat:@" section:%ld row:%ld",indexPath.section,indexPath.row];//在第幾個分區 第幾行
cell.detailTextLabel.text = @". . . .";//當是default時不顯示(可以修改cell樣式 來顯示)
//cell.accessoryType = UITableViewCellAccessoryDetailDisclosureButton;//輔助視圖
cell.accessoryType = UITableViewCellAccessoryCheckmark;
//cell.accessoryType = UITableViewCellAccessoryDisclosureIndicator;
//只讓第一行顯示checkmark
if (indexPath.row == 0) {
//如果是第一行就顯示為checkmark
cell.accessoryType = UITableViewCellAccessoryCheckmark;
}else{
cell.accessoryType = UITableViewCellAccessoryNone;
}
return cell;
// //重用
//
// //先從重用隊列中獲取可以被重用的cell對象,
//
// static NSString *indentifier = @"cell";//標示
// UITableViewCell *cell = [tableView dequeueReusableCellWithIdentifier:indentifier];
// //如果重用隊列中沒有可以使用的cell,必須自己創建.
// if (cell == nil) {
// cell = [[[UITableViewCell alloc] initWithStyle:(UITableViewCellStyleSubtitle) reuseIdentifier:indentifier] autorelease];
// NSLog(@"創建的新的cell對象");//只許創建對象
//
//// cell.textLabel.text = [NSString stringWithFormat:@"%ld",indexPath.row];
//
// }
// //重用在這裡
// //設置當前要使用的cell,可能放置在任何一行
// cell.textLabel.text = [NSString stringWithFormat:@"%ld",indexPath.row];
// //cell.textLabel.text = [NSString stringWithFormat:@"%ld",indexPath.section];
// cell.detailTextLabel.text = [NSString stringWithFormat:@"nihao"];//顯示不顯示跟上面的cell創建時的subtitle有關
// return cell;
}
//給每個分區設置頭部標題
- (NSString *)tableView:(UITableView *)tableView titleForHeaderInSection:(NSInteger)section
{
return [NSString stringWithFormat:@"%ld",section + 1];
}
//給所有的副標題右側的.
- (NSArray *)sectionIndexTitlesForTableView:(UITableView *)tableView
{
return @[@"1",@"2",@"3"];
}
////設置行高
//- (CGFloat)tableView:(UITableView *)tableView heightForRowAtIndexPath:(NSIndexPath *)indexPath
//{
// if (indexPath.section == 0) {
// return 20;
// }if (indexPath.section == 1) {
// return 60;
// }if (indexPath.section == 2) {
// return 40;
// }if (indexPath.section == 3) {
// return 100;
// }return 2;
//
//
//}
//
//檢測cell被選中的第幾個分區第幾行
- (void)tableView:(UITableView *)tableView didSelectRowAtIndexPath:(NSIndexPath *)indexPath
{
NSLog(@"分區 %ld,行數:%ld",indexPath.section+1,indexPath.row );
}
- (void)didReceiveMemoryWarning
{
[super didReceiveMemoryWarning];
// Dispose of any resources that can be recreated.
}
/*
#pragma mark - Navigation
// In a storyboard-based application, you will often want to do a little preparation before navigation
- (void)prepareForSegue:(UIStoryboardSegue *)segue sender:(id)sender
{
// Get the new view controller using [segue destinationViewController].
// Pass the selected object to the new view controller.
}
*/
@end
如圖:
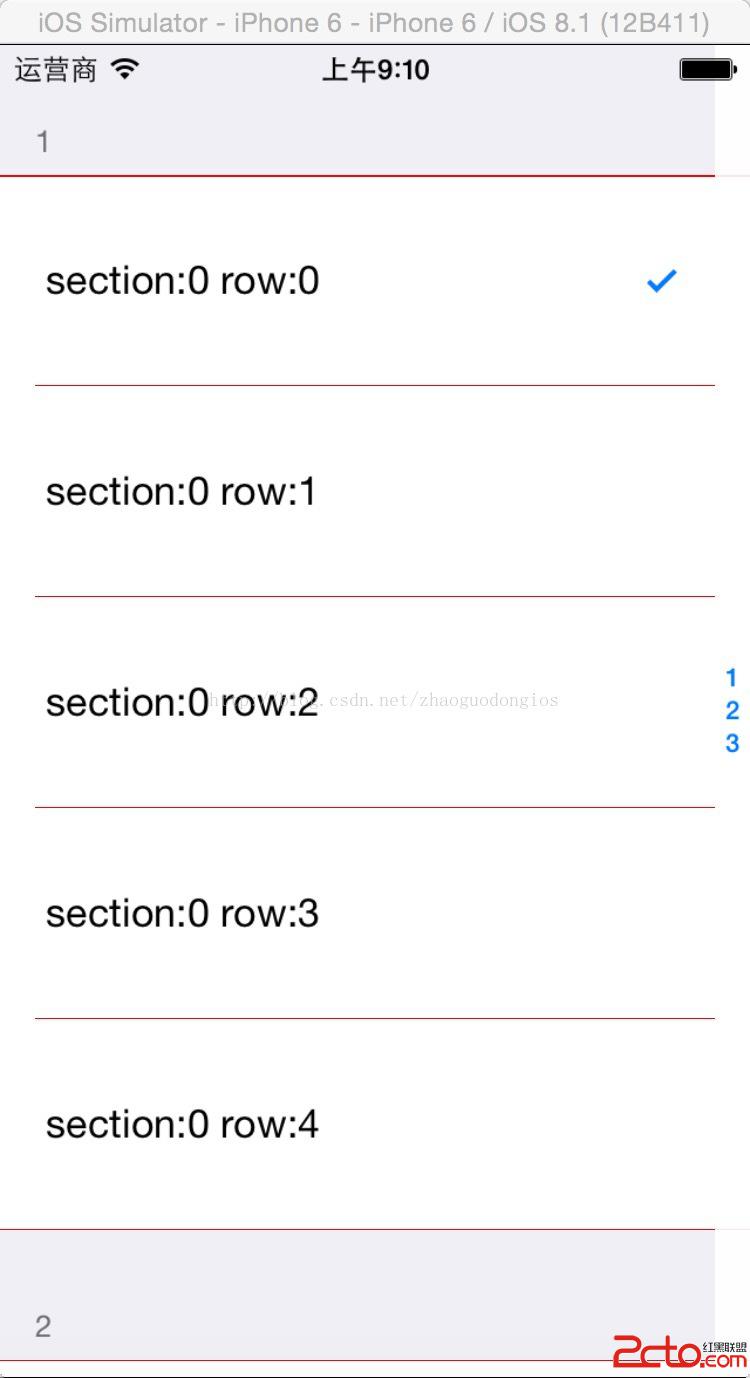
一些UItableView的復雜用處與難點以後我會給大家整理一下!