iOS項目開發實戰——學會使用TableView列表控件(四)plist讀取與Section顯示
編輯:IOS開發綜合
文本將會實現把數據存儲到plist文件中,然後在程序中進行讀取,在TableView控件中根據不同的類別顯示Section。有關TableView 的其他實現,請參考《iOS項目開發實戰——學會使用TableView列表控件(一)》《iOS項目開發實戰——學會使用TableView列表控件(二)》《iOS項目開發實戰——學會使用TableView列表控件(三)了解Section》。
(1)新建一個Property List文件,這個也就是plist文件。我取名為data.plist。輸入內容如下:
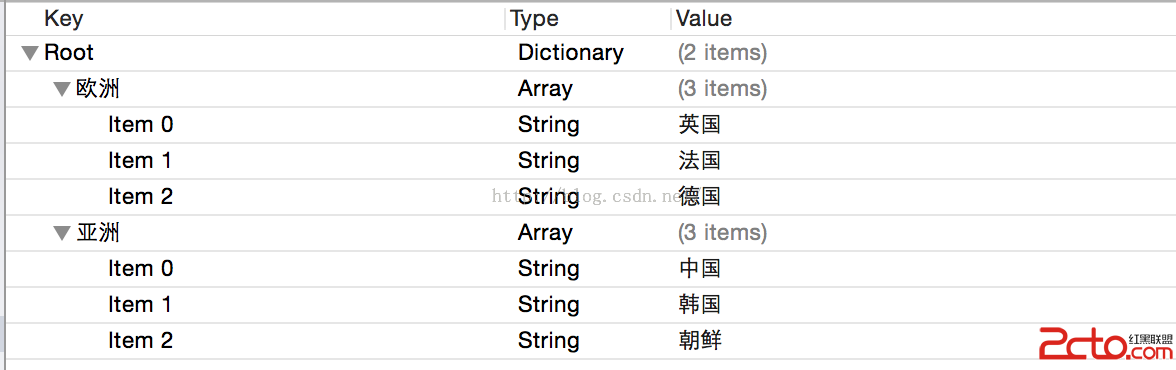 .
.
(2)代碼中實現如下:
import UIKit

class ViewController: UIViewController ,UITableViewDataSource{

  var data:NSDictionary!

  override func viewDidLoad() {
    super.viewDidLoad()


    data = NSDictionary(contentsOfURL: NSBundle.mainBundle().URLForResource(data, withExtension: plist)!)


  }


  func tableView(tableView: UITableView, cellForRowAtIndexPath indexPath: NSIndexPath) -> UITableViewCell {

    var cell = tableView.dequeueReusableCellWithIdentifier(cell) as! UITableViewCell

    var title = cell.viewWithTag(101) as! UILabel
    title.text = (data.allValues[indexPath.section] as! NSArray).objectAtIndex(indexPath.row) as? String

    return cell

  }


  func tableView(tableView: UITableView, numberOfRowsInSection section: Int) -> Int {

    return (data.allValues[section] as! NSArray).count
  }

  func numberOfSectionsInTableView(tableView: UITableView) -> Int {

    return data.count
  }

  func tableView(tableView: UITableView, titleForHeaderInSection section: Int) -> String? {

    return data.allKeys[section] as? String
  }

}
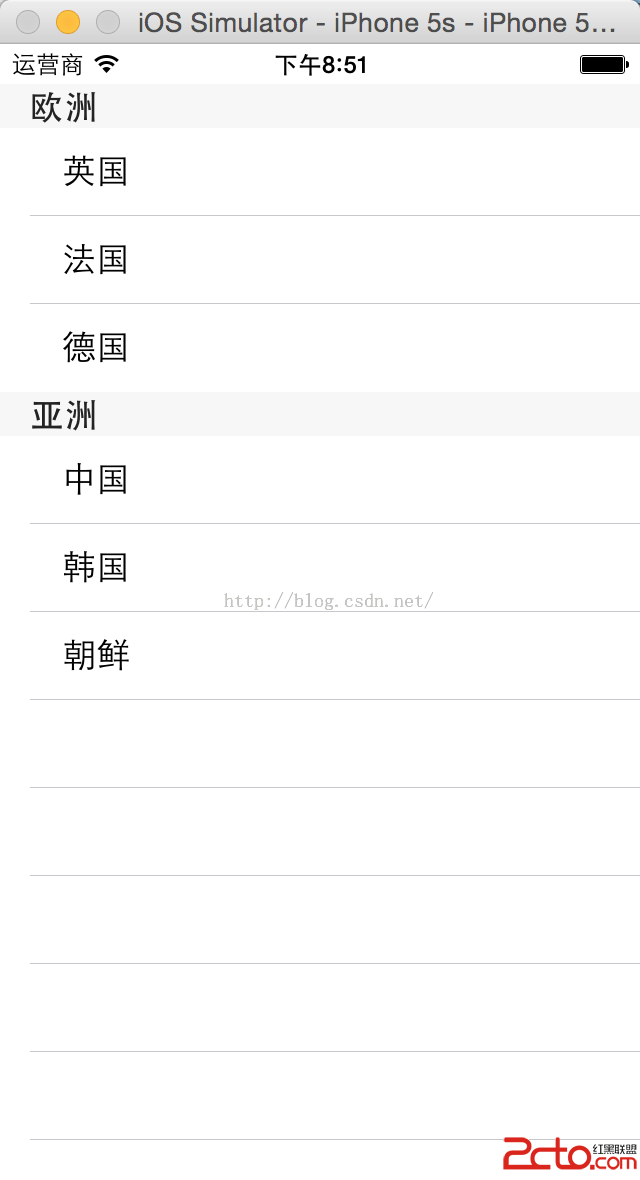
(3)最後的實現效果如下:

相關文章
+