6個iOS圖片文本設計小技巧
原文:6 Hacks For Creating a Stunning User Interface
設計師們似乎擁有著我們這些開發者所沒有的“魔力”,他們知道如何讓一個應用的界面看起來非常得舒適,以至於有時讓我們有了迫不及待將其復現的沖動。
然而,幾天過去了,我們仍然還停留在設計稿的第一個界面,寫下大段大段的代碼,可是界面卻不是我們想要的那個樣子,這無疑是非常讓人惱火的一件事情。
好消息是設計師們的“魔力”並不是我們想象中的那麼神奇,有一些關於設計的小技巧。只要掌握了它們,我們就能夠以最小的代價讓用戶界面變得好看起來。
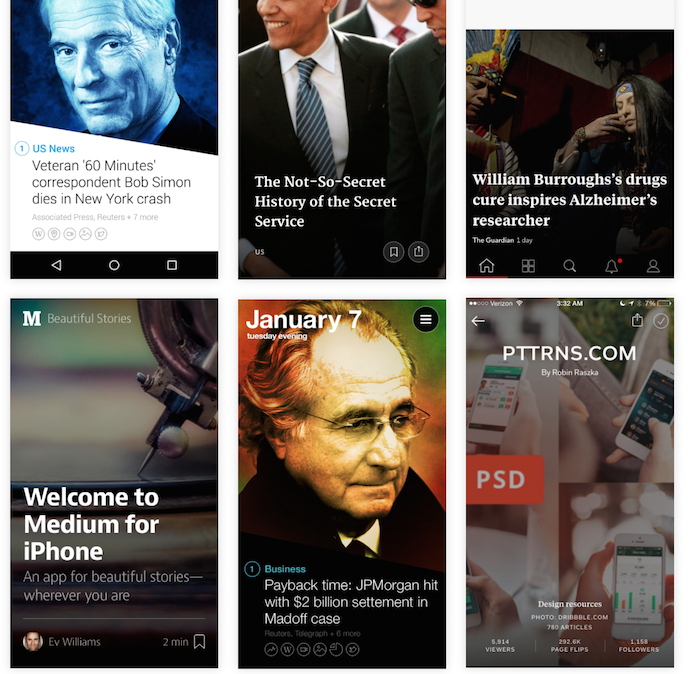
今天,我將會給大家展示其中的一些小技巧,我更樂意將它們稱之為“圖片標記技巧”,大意就是如何在一幅圖片上放文字會更加好看。我們在我們的[iOS模板]中使用了這些技巧,這也是我們為何能夠搭建出色用戶界面的訣竅之一。
這些設計理念也可以用在表視圖單元格(Table View Cell)和集合視圖(Collection View)當中。
我們並不能直接將文字扔到圖片上面,然後指望它Duang地一下出現那個Feel。不過,跟隨以下6條小技巧就能夠實現我們的目的了:
1:加文字
嗯,我不會忘記我說過,直接將文字扔到圖片上面並不能讓它變得號看起來。不過有些時候我們或許會走狗屎運,就像下圖這個例子一樣。這種設計看起來很贊,是因為標題比其他文字元素要顯得更大一些。
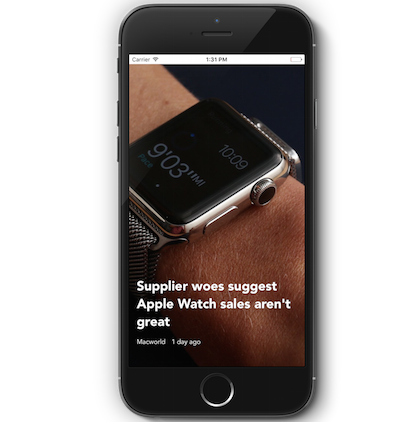
並且,這種效果一般只會發生在文字在圖片的深色部分上面。如果不是這種情況,那麼就會像下面這個例子一樣。現在我們換了一個有其他封面的文章,啊偶,GG。
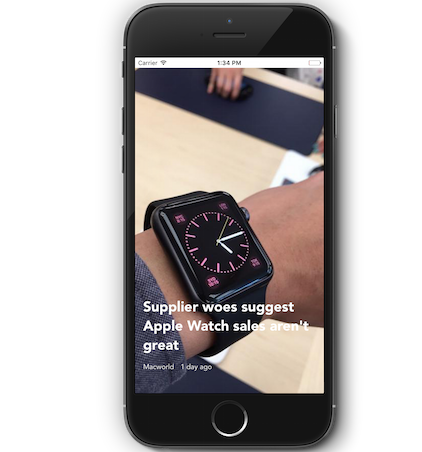
好吧,怎麼辦?
2:加圖片遮罩
我們可以直接在圖片上加一個遮罩,技巧就是通過這個遮罩讓圖片變得更暗、更透明,或者直接刷上顏色,就像Yahoo新聞做的那樣。
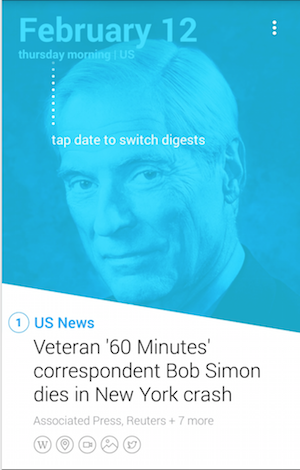
好的,在這個例子中,由於底色是藍色,文字顏色是白色,所以看起來效果很贊。
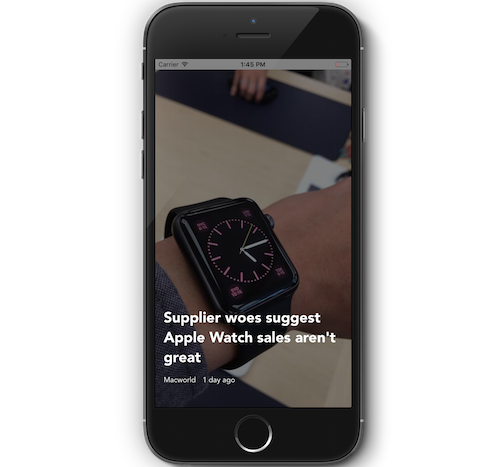
下面這個例子是我們目前正在制作的項目截圖,接下來就是我們實現這個效果的代碼:
func addFullOverlay(){

        let overlayView = UIView(frame: CGRectZero)

        overlayView.translatesAutoresizingMaskIntoConstraints = false

        overlayView.backgroundColor = UIColor(red: 0, green: 0, blue: 0, alpha: 0.5)

        self.view.insertSubview(overlayView, aboveSubview: coverImageView)


        let topConstraint = NSLayoutConstraint(item: overlayView, attribute: .Top, relatedBy: .Equal, toItem: self.view, attribute: .Top, multiplier: 1, constant: 0)

        let leftConstraint = NSLayoutConstraint(item: overlayView, attribute: .Left, relatedBy: .Equal, toItem: self.view, attribute: .Left, multiplier: 1, constant: 0)

        let rightConstraint = NSLayoutConstraint(item: overlayView, attribute: .Right, relatedBy: .Equal, toItem: self.view, attribute: .Right, multiplier: 1, constant: 0)

        let bottomConstraint = NSLayoutConstraint(item: overlayView, attribute: .Bottom, relatedBy: .Equal, toItem: self.view, attribute: .Bottom, multiplier: 1, constant: 0)

        view.addConstraints([topConstraint, leftConstraint, rightConstraint, bottomConstraint])

    }
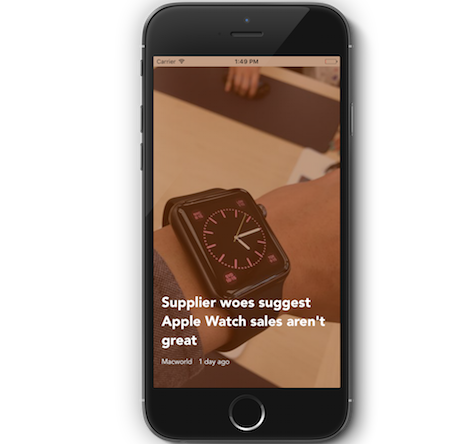
不過這個效果不是很理想,因為圖片現在的顏色很陰暗,文字就特別突兀,不過這個效果或許就是您追求的效果。通過給遮罩添加一下著色,我們就可以像instagram那樣,給圖片加個“濾鏡”的效果,就像下圖所展示的那樣。
我們只需給這個半透明的遮罩加上顏色就可以了:
overlayView.backgroundColor = UIColor(red: 0.5, green: 0.2, blue: 0, alpha: 0.5)
3:加文字背景
某些人並不喜歡遮罩這個做法,因為他們可能想讓圖片保持“原汁原味”。這樣的話,我們就要使用這個技巧了,就如“Funny or Die”所做的那樣。
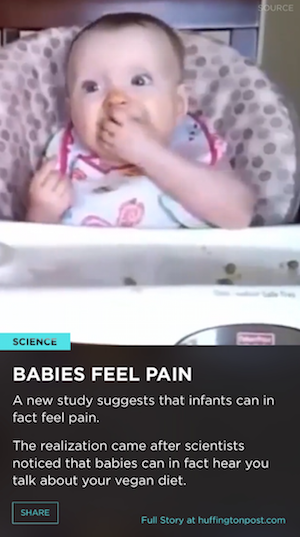
那我們的項目來距離,我們可以給文字加上背景。通過文本的`NSAttributed`屬性,我們可以輕易地完成這項操作。
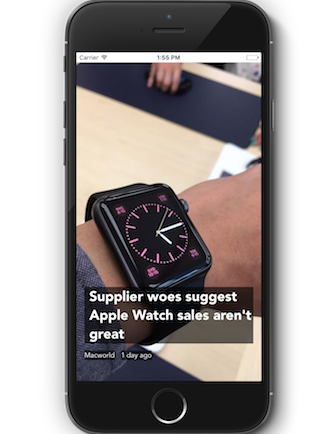
實現這項效果的代碼如下:
func addBackgroundColorToText() {

    let style = NSMutableParagraphStyle.defaultParagraphStyle().mutableCopy() as! NSMutableParagraphStyle

    style.firstLineHeadIndent = 10.0
    style.headIndent = 10
    style.tailIndent = 0

    let attributes = [NSParagraphStyleAttributeName : style]
    let attributedTitleText = NSAttributedString(string: "Supplier woes suggest Apple Watch sales aren't great", attributes: attributes)

    titleLabel.attributedText = attributedTitleText

    let textbackgroundColor = UIColor(red: 0, green: 0, blue: 0, alpha: 0.6)
    titleLabel.backgroundColor = textbackgroundColor
    authorLabel.backgroundColor = textbackgroundColor
    dateLabel.backgroundColor = textbackgroundColor
}
4:加有顏色的背景
呃,和上面那個效果類似,如果您不喜歡黑色的話,那麼可以更換文字背景的顏色,這樣就有了“有顏色的文字背景”。至於如何實現這個效果,就留給您去嘗試了O(∩_∩)O~。關鍵在於找到圖片的主色,然後將其設置為背景顏色。
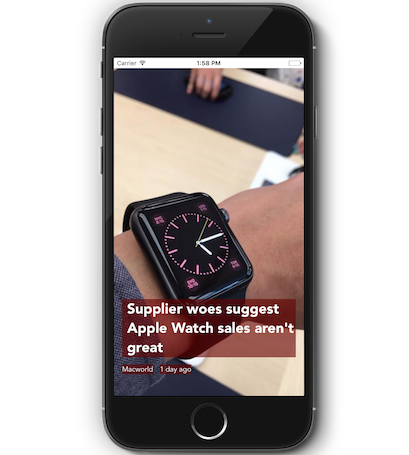
5:加毛玻璃
這是我最喜歡的效果,沒有之一。通過iOS 8提供的`UIVisualEffectView`類,我們可以輕松地實現這個效果。我們在Newsstand例程中使用了這項效果。通過將文本下方的圖片加上毛玻璃效果,可以讓文字變得更加易讀。
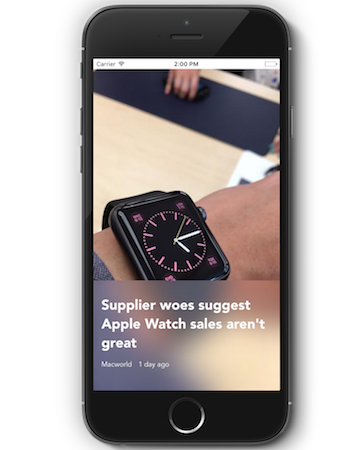
以下是實現這個效果的代碼:
func addBlurView(){

    let effect = UIBlurEffect(style: .Light)

    let overlayView = UIVisualEffectView(effect: effect)

    overlayView.translatesAutoresizingMaskIntoConstraints = false

    self.view.insertSubview(overlayView, aboveSubview: coverImageView)

    let topConstraint = NSLayoutConstraint(item: overlayView, attribute: .Top, relatedBy: .Equal, toItem: self.titleLabel, attribute: .Top, multiplier: 1, constant: -30)

    let leftConstraint = NSLayoutConstraint(item: overlayView, attribute: .Left, relatedBy: .Equal, toItem: self.view, attribute: .Left, multiplier: 1, constant: 0)

    let rightConstraint = NSLayoutConstraint(item: overlayView, attribute: .Right, relatedBy: .Equal, toItem: self.view, attribute: .Right, multiplier: 1, constant: 0)

    let bottomConstraint = NSLayoutConstraint(item: overlayView, attribute: .Bottom, relatedBy: .Equal, toItem: self.view, attribute: .Bottom, multiplier: 1, constant: 0)

    view.addConstraints([topConstraint, leftConstraint, rightConstraint, bottomConstraint])
}
6:加暗色漸變
這是我第二喜歡的效果,有些時候甚至比毛玻璃還要好看一些。
這個效果是通過在文本下方加上一個“暗色漸變”(gradient fade)的圖層,顏色從半透明的黑色漸變到不透明的黑色,看起來效果很贊。
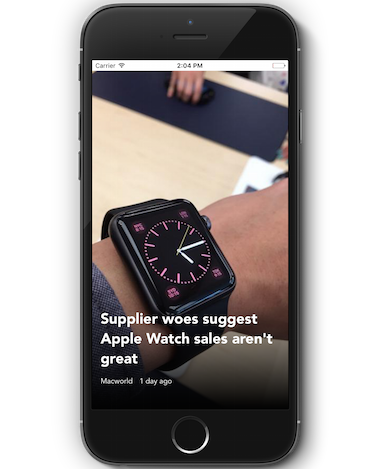
這個效果用在了很多應用上面,比如說Flipboard以及許多博客應用上發。我們也可以發現在Hotel Tonight應用中也應用了這個效果。
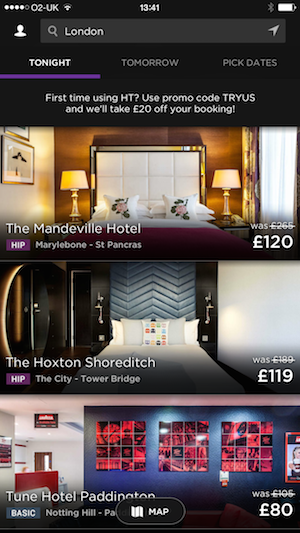
要實現這個效果,您可以使用以下代碼:
func addGradientOverlay(){

    self.view.insertSubview(gradientView, aboveSubview: coverImageView)

    gradientLayer.frame = gradientView.bounds

    let opaqueBlackColor = UIColor(red: 0, green: 0, blue: 0, alpha: 1.0).CGColor
    let transparentBlackColor = UIColor(red: 0, green: 0, blue: 0, alpha: 0.0).CGColor
    gradientLayer.colors = [transparentBlackColor, opaqueBlackColor]

    gradientView.layer.insertSublayer(gradientLayer, atIndex: 0)

    gradientView.translatesAutoresizingMaskIntoConstraints = false

    self.view.insertSubview(gradientView, aboveSubview: coverImageView)

    let topConstraint = NSLayoutConstraint(item: gradientView, attribute: .Top, relatedBy: .Equal, toItem: self.titleLabel, attribute: .Top, multiplier: 1, constant: -60)

    let leftConstraint = NSLayoutConstraint(item: gradientView, attribute: .Left, relatedBy: .Equal, toItem: self.view, attribute: .Left, multiplier: 1, constant: 0)

    let rightConstraint = NSLayoutConstraint(item: gradientView, attribute: .Right, relatedBy: .Equal, toItem: self.view, attribute: .Right, multiplier: 1, constant: 0)

    let bottomConstraint = NSLayoutConstraint(item: gradientView, attribute: .Bottom, relatedBy: .Equal, toItem: self.view, attribute: .Bottom, multiplier: 1, constant: 0)

    view.addConstraints([topConstraint, leftConstraint, rightConstraint, bottomConstraint])
}
下載示例項目
是不是很喜歡這些效果呢?現在您已經知道如何實現,那麼就可以在您的應用中使用它們了。點擊此處來下載示例項目,這樣可以看到所有已實現的效果。
關於更多設計技巧相關的內容,可以參閱Medium網站上的文章。如果您有更好的想法,請與我聯系。
- 源碼(2.2):Coretext文本選擇簡易閱讀器,類似twitter的導航欄
- Xcode中的Info.plist字段列表詳解
- iOS 實現類似nike+、香蕉打卡的轉場動畫效果
- [iOS 交互]淺析餓了麼
- iOS開發仿《喵播》之快速集成tableView頭部縮放視圖
- 利用Mob實現免費短信驗證碼
- iOS XMPP協議的服務端Tigase
- iPhone 6和iPhone 6 plus的AV Foundation框架特性
- 源碼推薦(0708B):拼圖游戲( 閒暇之余用swift寫的100多行代碼的小游戲 ),UICollectionView
- 源碼推薦(7.30):石頭剪刀布游戲Watch App,類網易新聞滾動導航欄


