使用AppleDoc自動生成項目文檔(XCode8)
編輯:IOS開發基礎
總體效果及語法
AppleDoc可以根據項目中的注釋自動生成類似於Apple官方文檔的文檔文件,大致的效果類似於這樣:
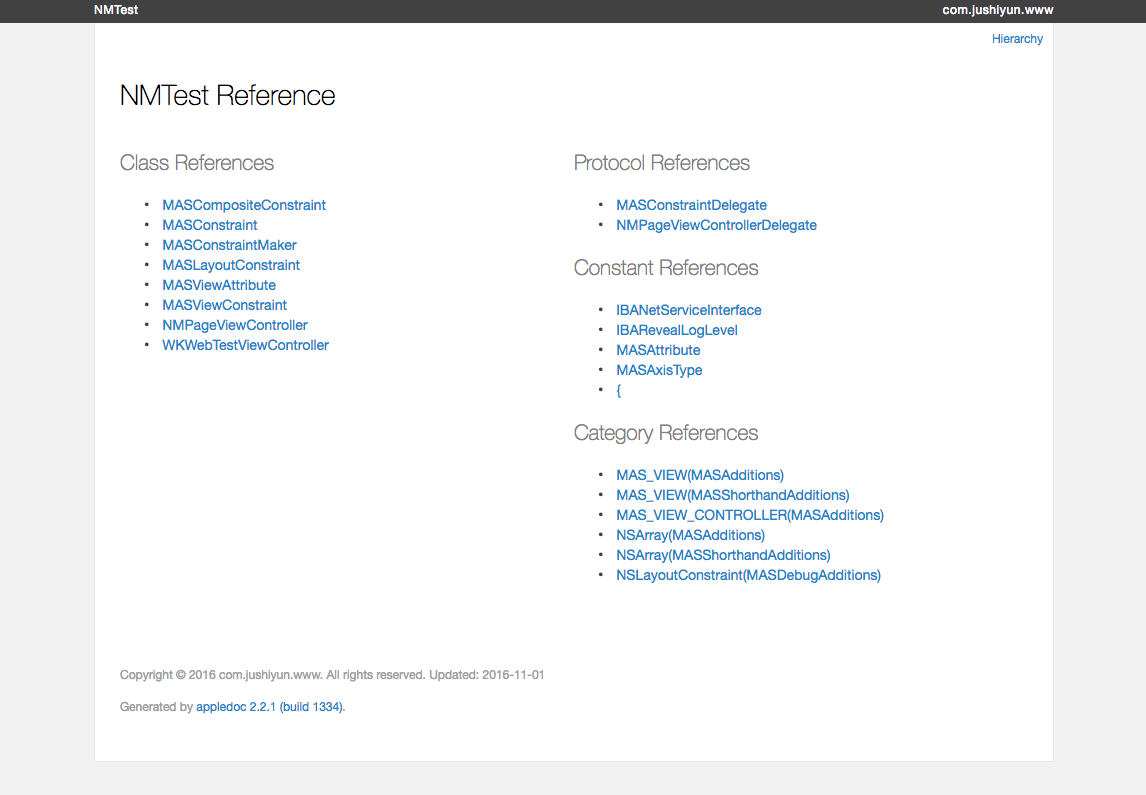
文檔總目錄
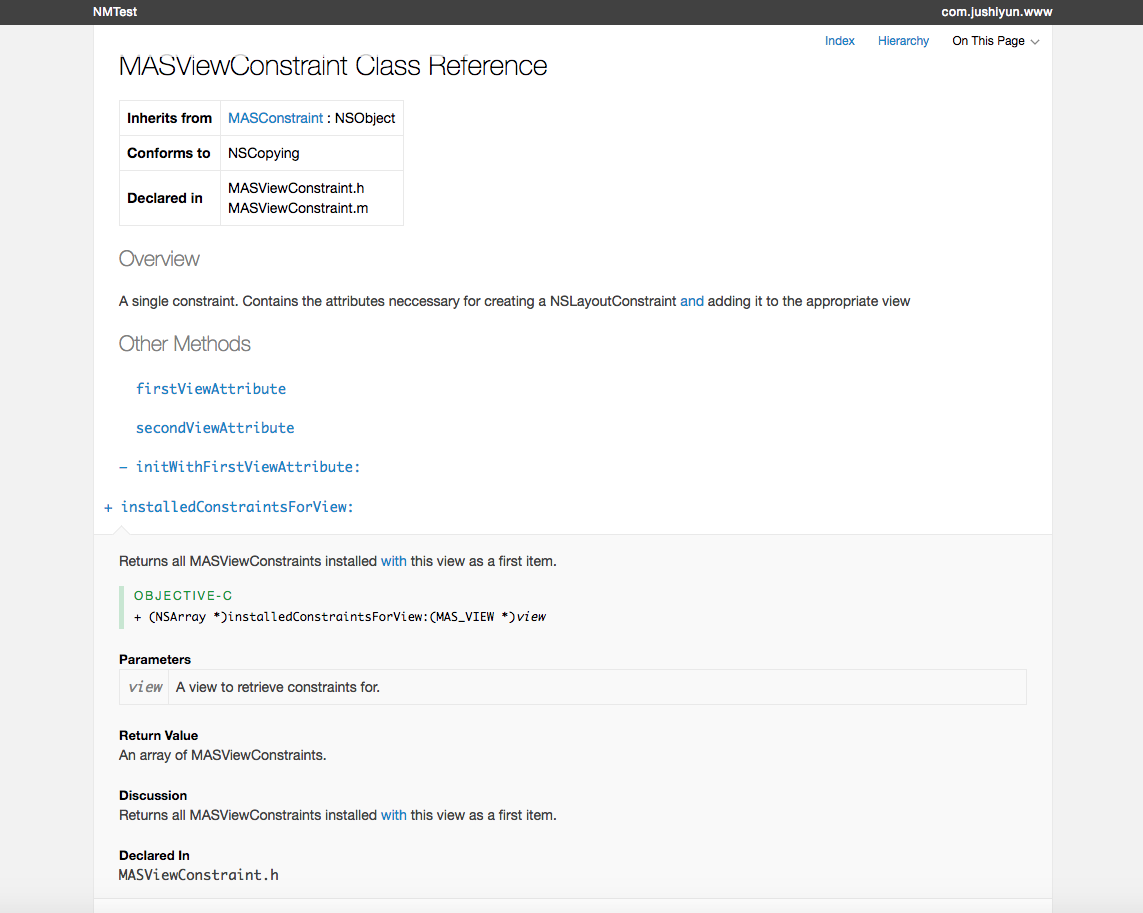
展開樣式
效果看上去還算不錯,但是AppleDoc還是有一些限制的,就是要在代碼中加上注釋,而且只支持/**/、///、//等格式,不支持#pragma mark - WKNavigationDelegate。
appledoc 支持的注釋類型
/// 這是單行注釋。
/** 這也是單行注釋 */
/*! 同樣是單行注釋 */
/** 這也是單行注釋,
*  第二行會接上第一行。
*/
/** 第一行是類的簡介
在簡介的下面,就是類的詳細介紹了。
沒有間隔換行會被消除,就像Html那樣。
下面是常用的markdown語法
- - -
無序列表: (每行以 '*'、'-'、'+' 開頭):
* this is the first line
* this is the second line
* this is the third line
有序列表: (每行以 1.2.3、a.b.c 開頭):
a. this is the first line
b. this is the secode line
多級列表:
* this is the first line
  a. this is line a
  b. this is line b
* this is the second line
  1. this in line 1
  2. this is line 2
標題:
# This is an H1
## This is an H2
### This is an H3
#### This is an h4
##### This is an h5
###### This is an H6
鏈接:
普通URL直接寫上,appledoc會自動翻譯成鏈接: http://    blog.ibireme.com
[這個](http://example.net/) 鏈接會隱藏實際URL.
表格:
| header1 | header2 | header3 |
|---------|:-------:|--------:|
| normal  |  center |  right  |
| cell    | cell    | cell    |
引用:
這裡會引用到方法 `someMethod:`,這裡會引用到類 `YYColor`
這裡會引用到一個代碼塊
   void CMYK2RGB(float c, float m, float y, float k,
                  float *r, float *g, float *b) {
       *r = (1 - c) * (1 - k);
       *g = (1 - m) * (1 - k);
       *b = (1 - y) * (1 - k);
   }
@since iOS5.0
*/
@interface AppledocExample : NSObject
///這裡是屬性的說明
@property (nonatomic, strong) NSString *name;
/**
@brief 這裡是方法的簡介。該Tag不能放到類注釋裡。
@exception UIColorException 這裡是方法拋出異常的說明
@see YYColor
@see someMethod:
@warning 這裡是警告,會顯示成藍色的框框
@bug 這裡是bug,會顯示成黃色的框框
@param red   這裡是參數說明1
@param green 這裡是參數說明2
@param blue   這裡是參數說明3
@return  這裡是返回值說明
*/
- (UIColor *)initWithRed:(int)red green:(int)green blue:(int)blue;
- (void)someMethod:(NSString *)str;
@end
Github鏈接:https://github.com/tomaz/appledoc
安裝
git clone git://github.com/tomaz/appledoc.git
cd ./appledoc
sudo sh install-appledoc.sh
完成後可以用appledoc --version驗證下。

驗證
使用
首先cd到你的項目文件夾下。
跑一下下面的命令,默認會編譯出docset並安裝進Xcode。
appledoc --project-name 你的項目名稱 --project-company 你的公司名稱 ./
然後你的項目文件夾中就會出現這樣一個文件
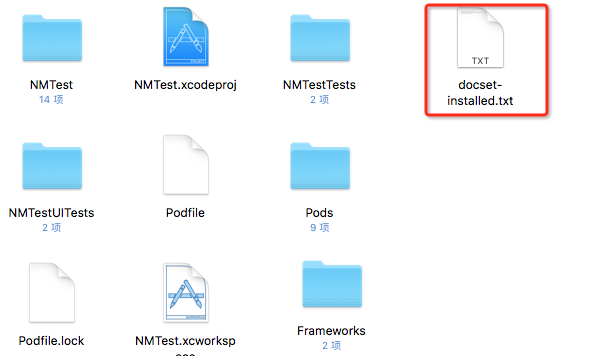
文件
其次將appledoc集成到我們自己的工程中
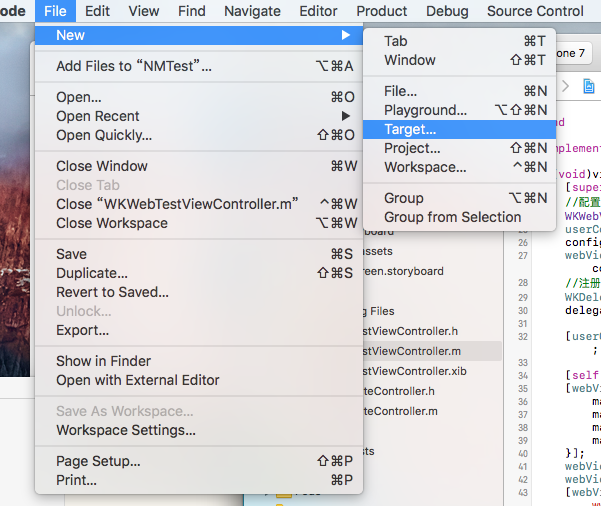
集成
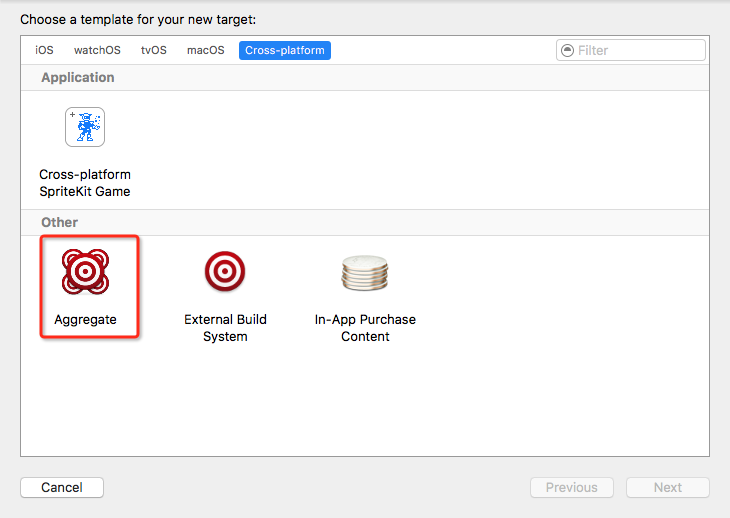
集成
下一步將下方腳本黏貼到runScript
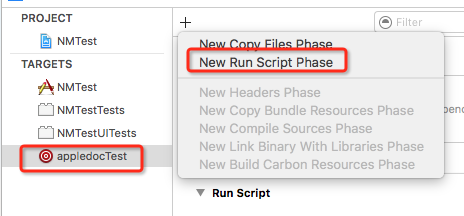
集成
#appledoc Xcode script
# Start constants
company="ACME";
companyID="com.ACME";
companyURL="http://ACME.com";
target="iphoneos";
#target="macosx";
outputPath="~/help";
# End constants
/usr/local/bin/appledoc \
--project-name "${PROJECT_NAME}" \
--project-company "${company}" \
--company-id "${companyID}" \
--docset-atom-filename "${company}.atom" \
--docset-feed-url "${companyURL}/${company}/%DOCSETATOMFILENAME" \
--docset-package-url "${companyURL}/${company}/%DOCSETPACKAGEFILENAME" \
--docset-fallback-url "${companyURL}/${company}" \
--output "${outputPath}" \
--publish-docset \
--docset-platform-family "${target}" \
--logformat xcode \
--keep-intermediate-files \
--no-repeat-first-par \
--no-warn-invalid-crossref \
--exit-threshold 2 \
"${PROJECT_DIR}"
最後選擇這個target編譯下就好了

編譯
ps:如果這一步有出錯,就退出xcode再編譯一次就好了。
生成的目錄包就在剛才的docset-installed.txt中

結果
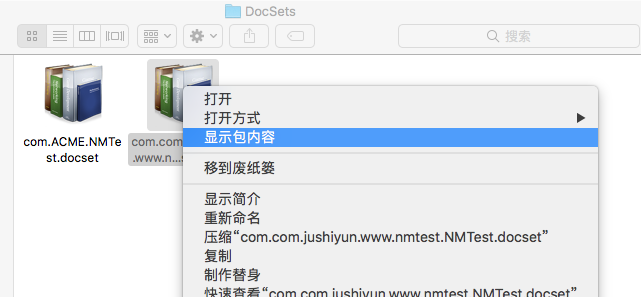
結果
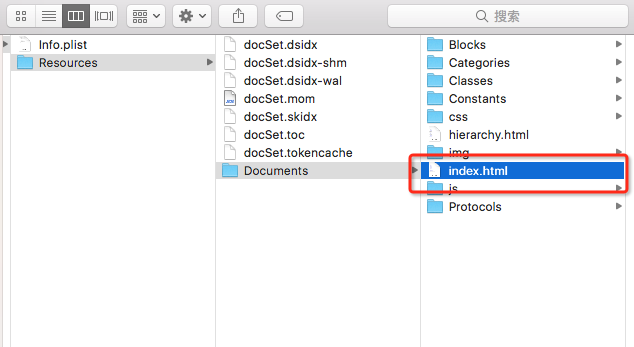
結果
好了,以上就是全部過程,還是挺方便的。
總結
能夠根據注釋自動生成類似於apple官方文檔的功能固然很強大,但是對開發人員來說,還是直接看自己的注釋來的實在方便。
不過,如果需要給CTO或者老板一份代碼報告的話,用這個工具還是很方便(裝X)的。O(∩_∩)O
相關文章
+- iOS開源一個簡略的訂餐app UI框架
- 史上最具體的CocoaPods裝置教程(圖文)
- 值得珍藏的iOS開辟經常使用代碼塊
- iOS卒業設計之氣象預告App
- 2016 cocoapods的裝置和應用辦法和版本進級碰到的成績
- iOS10 App適配權限 Push Notifications 字體Frame 碰到的成績
- 針對iOS10新增Api的具體研討
- iOS開辟之(APNS)長途推送完成代碼 附證書與真機調試
- iOS突變圓環扭轉動畫CAShapeLayer CAGradientLayer
- iOS仿簡書、淘寶等App的View彈出後果
- iOS 開辟經常使用宏總結
- iOS App通訊之local socket示例
- Mac下獲得AppStore裝置包文件途徑
- iOS App之間的通訊 local socket
- iOS逆向工程應用LLDB的USB銜接調試第三方App


