UICollectionView基本使用詳解(OC)
概述
UICollectionView是從iOS6開始引入使用的,目前應用非常廣泛,很牛逼!老外的博客也是這麼說的(傳送門)

## 與UITableView的初步比較
- UITableView應該是大家最熟悉的控件了,UICollectionView的使用與之類似,但又有所區別,如下介紹。
相同點: - 1.都是通過datasource和delegate驅動的(datasource和delegate官方文檔傳送),因此在使用的時候必須實現數據源與代理協議方法;
- 2.性能上都實現了循環利用的優化。
不同點
- 1.UITableView的cell是系統自動布局好的,不需要我們布局。但UICollectionView的cell是需要我們自己布局的。所以我們在創建UICollectionView的時候必須傳遞一個布局參數,系統提供並實現了一個布局樣式:流水布局
(UICollectionViewFlowLayout)(流水布局官方文檔傳送)。注:蘋果關於FlowLayout的解析
- 2.UITableViewController的
self.view == self.tableview;,但UICollectionViewController的self.view != self.collectionView; - 3.UITableView的滾動方式只能是垂直方向, UICollectionView既可以垂直滾動,也可以水平滾動;
- 4.UICollectionView的cell只能通過注冊來確定重用標識符。
結論: 換句話說,UITableView的布局是UICollectionView的flow layout布局的一種特殊情況,類比於同矩形與正方形的關系
## 下面簡單介紹幾個基本用法(難度從低到高)
1. UICollectionView普通用法(FlowLayout布局)
- 上面我們提到了UICollectionView與UITableView的用法非常類似,下面就讓我們完全根據創建UITableView的方式來創建一個UICollectionView
(請讀者類比UITableView的創建方式,實現數據源,代理等,這裡就只提到與之不同的方面,詳細代碼可參考示例Demo)。 - 報錯了,提示缺少布局參數,如下:
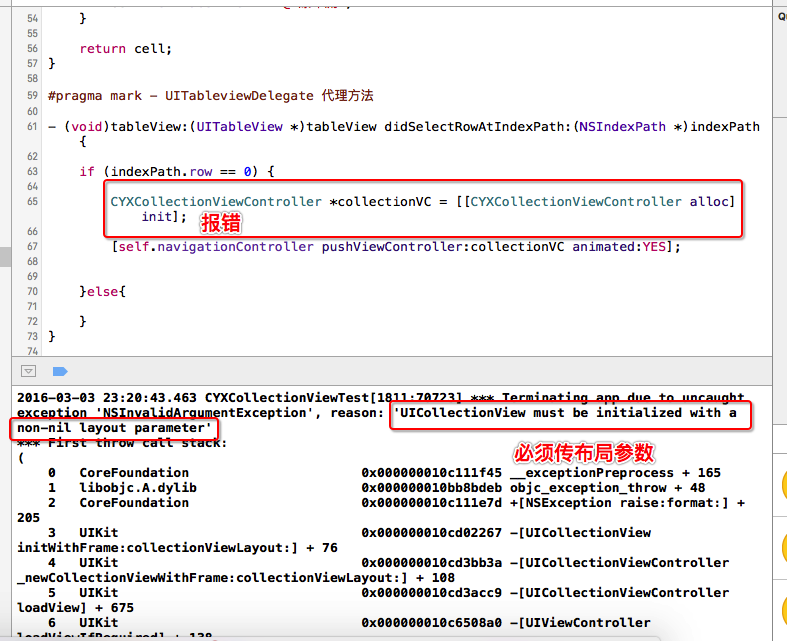
解決報錯,我們可以傳FlowLayout參數方式,也可以重寫內部init方法。我們這裡采用重寫init方法,傳遞布局參數。這樣更加體現了封裝的思想,把傳遞布局參數封裝在
CYXNormalCollectionViewController內,對外只提供統一的外部方法:init方法,代碼如下:- (instancetype)init{ // 設置流水布局 UICollectionViewFlowLayout *layout = [[UICollectionViewFlowLayout alloc]init]; // UICollectionViewFlowLayout流水布局的內部成員屬性有以下: /** @property (nonatomic) CGFloat minimumLineSpacing; @property (nonatomic) CGFloat minimumInteritemSpacing; @property (nonatomic) CGSize itemSize; @property (nonatomic) CGSize estimatedItemSize NS_AVAILABLE_IOS(8_0); // defaults to CGSizeZero - setting a non-zero size enables cells that self-size via -preferredLayoutAttributesFittingAttributes: @property (nonatomic) UICollectionViewScrollDirection scrollDirection; // default is UICollectionViewScrollDirectionVertical @property (nonatomic) CGSize headerReferenceSize; @property (nonatomic) CGSize footerReferenceSize; @property (nonatomic) UIEdgeInsets sectionInset; */ // 定義大小 layout.itemSize = CGSizeMake(100, 100); // 設置最小行間距 layout.minimumLineSpacing = 2; // 設置垂直間距 layout.minimumInteritemSpacing = 2; // 設置滾動方向(默認垂直滾動) layout.scrollDirection = UICollectionViewScrollDirectionHorizontal; return [self initWithCollectionViewLayout:layout]; }這裡我們使用xib自定義cell,通過xib注冊cell的代碼如下
// 通過xib注冊
  [self.collectionView registerNib:[UINib nibWithNibName:NSStringFromClass([CYXNormalCell class]) bundle:nil] forCellWithReuseIdentifier:reuseIdentifier];
初步效果圖如下(這裡就不詳細實現了,剩下請讀者參考UITableView的用法(請點這裡))

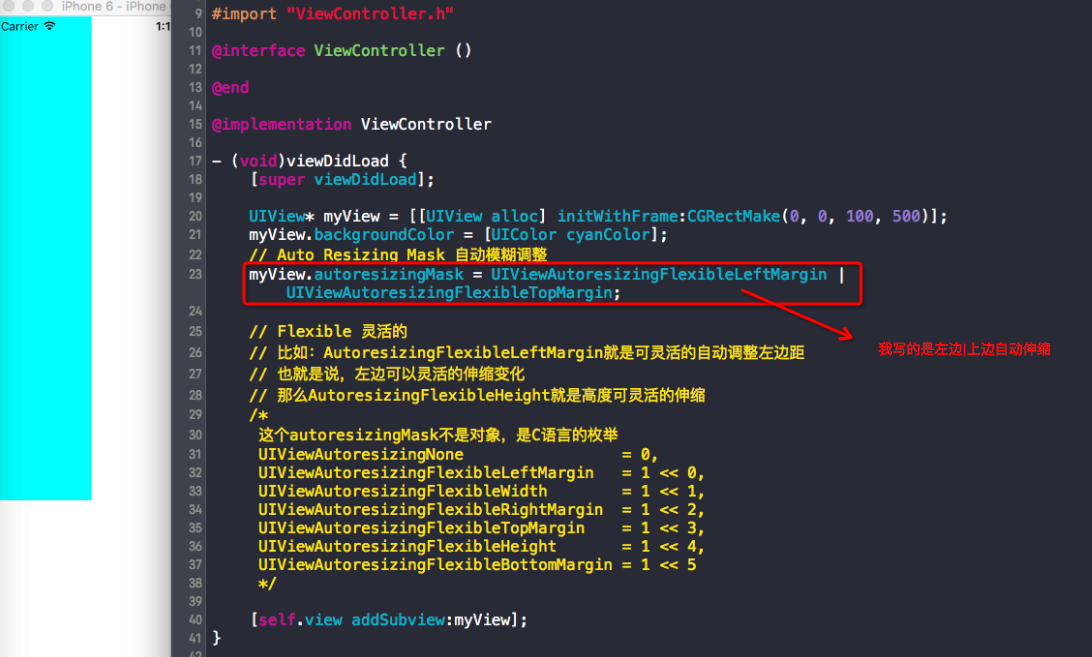
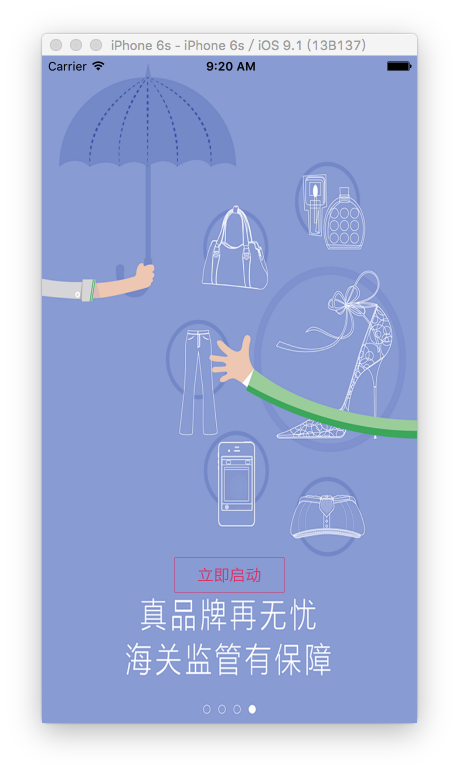
2. 新手引導頁制作
- 簡述
- 新手引導頁,幾乎是每個應用都有的,目的為了告訴用戶應用的亮點,達到吸引用戶的作用。
- 利用UICollectionView的優勢(循環利用)實現新手引導頁,既簡單又高效,何樂而不為呢。
- 實現思路:
1.把UICollectionView的每個cell的尺寸設置為跟屏幕一樣大;
layout.itemSize = [UIScreen mainScreen].bounds.size;2.設置為水平滾動方向,設置水平間距為0.
// 設置間距
layout.minimumLineSpacing = 0;
layout.minimumInteritemSpacing = 0;
// 設置滾動方向(默認垂直滾動)
layout.scrollDirection = UICollectionViewScrollDirectionHorizontal;
3.開啟分頁滾動模式
// 開啟分頁
self.collectionView.pagingEnabled = YES;
// 隱藏水平滾動條
self.collectionView.showsHorizontalScrollIndicator = NO;
// 取消彈簧效果
self.collectionView.bounces = NO;
以下是效果圖:
3. 圖片循環輪播器
- 請參考我之前的文章(內附代碼)《iOS上機題(附個人見解)》
4. 帶特效的圖片浏覽器(自定義布局/上)
以下內容分為兩小節:
1> Github例子分析
2> 自己實現一個小Demo
(1)Github例子分析
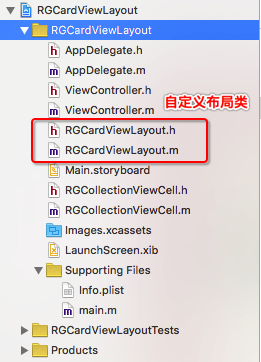
- 我們經常在Github上看到一些關於CollectionView的cell切換的炫酷效果,下面我們來分析一下Github上的這個卡片切換帶3D動畫Demo(RGCardViewLayout)<地址請點>
- 下面是效果圖
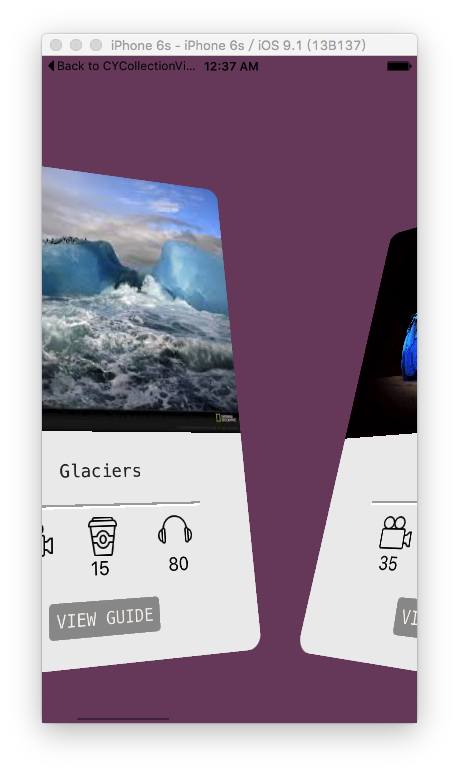
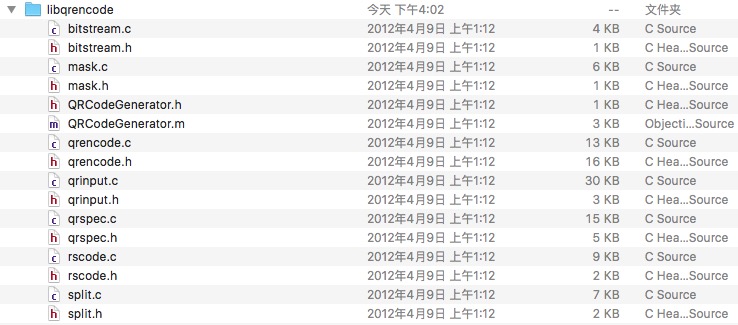
- 目錄結構分析:目錄結構一目了然,關鍵在於有一個自動布局類(如圖所示),這個類繼承自UICollectionViewFlowLayout(我們可以猜到他使用的是默認的流水布局),並重寫了
- (void)prepareLayout、- (NSArray *)layoutAttributesForElementsInRect:(CGRect)rect等方法。我們試著把這個類裡面的重載方法都注釋掉,得到的效果跟普通用法的效果一樣(這裡就不截圖了)。由此可見,作者肯定在這些方法內做了個性化的設置。
- 關鍵源碼分析:
- 首先我們看到,作者在
- (void)prepareLayout方法內做了對collectionView的初始化布局操作。因此我們可以斷定重寫此方法是用做初始化的(讀者可以嘗試修改,改變效果)。
- (void)prepareLayout
    {
       [super prepareLayout];
       [self setupLayout]; // 初始化布局
    }
- (void)setupLayout
    {
        CGFloat inset  = self.collectionView.bounds.size.width * (6/64.0f);
        inset = floor(inset);

        self.itemSize = CGSizeMake(self.collectionView.bounds.size.width - (2 *inset), self.collectionView.bounds.size.height * 3/4);
        self.sectionInset = UIEdgeInsetsMake(0,inset, 0,inset);
        self.scrollDirection = UICollectionViewScrollDirectionHorizontal;
    }
接著這個
- (NSArray *)layoutAttributesForElementsInRect:(CGRect)rect方法應該是最重要的了,同理,我們先注釋掉裡面個性化的設置,只留[super layoutAttributesForElementsInRect:rect],我們發現炫酷的3D效果沒有了。因此可以斷定此方法是給每個Cell做個性化設置的。方法解析:
這個方法的返回值是一個數組(數組裡面存放著rect范圍內所有元素的布局屬性)
這個方法的返回值決定了rect范圍內所有元素的排布方式(frame)
UICollectionViewLayoutAttributes *attrs;
1.一個cell對應一個UICollectionViewLayoutAttributes對象
2.UICollectionViewLayoutAttributes對象決定了cell的frame
  - (NSArray *)layoutAttributesForElementsInRect:(CGRect)rect
{
    // 獲取父類(流水布局)已經計算好的布局,在這個基礎上做個性化修改
    NSArray *attributes = [super layoutAttributesForElementsInRect:rect];

    NSArray *cellIndices = [self.collectionView indexPathsForVisibleItems];
    if(cellIndices.count == 0 )
    {
        return attributes;
    }
    else if (cellIndices.count == 1)
    {
        mainIndexPath = cellIndices.firstObject;
        movingInIndexPath = nil;
    }
    else if(cellIndices.count > 1)
    {
        NSIndexPath *firstIndexPath = cellIndices.firstObject;
        if(firstIndexPath == mainIndexPath)
        {
            movingInIndexPath = cellIndices[1];
        }
        else
        {
            movingInIndexPath = cellIndices.firstObject;
            mainIndexPath = cellIndices[1];
        }

    }

    difference =  self.collectionView.contentOffset.x - previousOffset;

    previousOffset = self.collectionView.contentOffset.x;
    // 關鍵代碼:取每一個Cell的布局屬性,並添加3D效果
    for (UICollectionViewLayoutAttributes *attribute in attributes)
    {
        [self applyTransformToLayoutAttributes:attribute];
    }
    return  attributes;
}
上面關鍵方法都已經實現了,但是運行發現並沒有我們想要的效果,CollectionViewCell並沒有實時發生形變。y因此我們還需要調用以下方法。
方法解析:
只要滾動屏幕 就會調用 方法-(NSArray *)layoutAttributesForElementsInRect:(CGRect)rect
只要布局頁面的屬性發生改變 就會重新調用-(NSArray *)layoutAttributesForElementsInRect:(CGRect)rect這個方法
// indicate that we want to redraw as we scroll
  - (BOOL)shouldInvalidateLayoutForBoundsChange:(CGRect)newBounds {
    return YES;
}
(2)仿寫Demo
經過上面對代碼的分析,我們可以簡單了解到自定義layout布局的基本實現,下面就可以仿寫一個簡單的Demo了,效果圖如下。
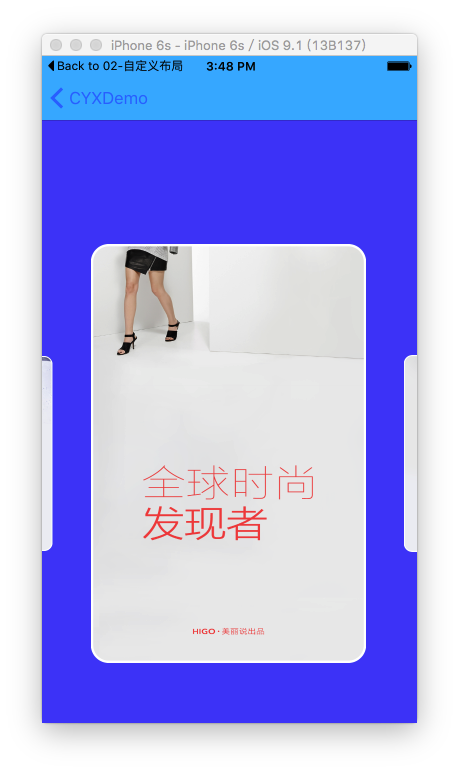
參考代碼如下(詳細見Github)
- (BOOL)shouldInvalidateLayoutForBoundsChange:(CGRect)newBounds
{
return YES;
}
- (void)prepareLayout{
[super prepareLayout];
self.scrollDirection = UICollectionViewScrollDirectionHorizontal;
// 設置內邊距
CGFloat inset = (self.collectionView.frame.size.width - self.itemSize.width) * 0.5;
self.sectionInset = UIEdgeInsetsMake(0, inset, 0, inset);
}
- (NSArray *)layoutAttributesForElementsInRect:(CGRect)rect
{
// 獲得super已經計算好的布局屬性
NSArray *attributes = [super layoutAttributesForElementsInRect:rect];
// 計算collectionView最中心點的x值
CGFloat centerX = self.collectionView.contentOffset.x + self.collectionView.frame.size.width * 0.5;
// 在原有布局屬性的基礎上,進行微調
for (UICollectionViewLayoutAttributes *attrs in attributes) {
// cell的中心點x 和 collectionView最中心點的x值 的間距
CGFloat delta = ABS(attrs.center.x - centerX);
// 根據間距值 計算 cell的縮放比例
CGFloat scale = 1.2 - delta / self.collectionView.frame.size.width;
NSLog(@"%f,%f",delta,scale);
// 設置縮放比例
attrs.transform = CGAffineTransformMakeScale(scale, scale);
}
return attributes;
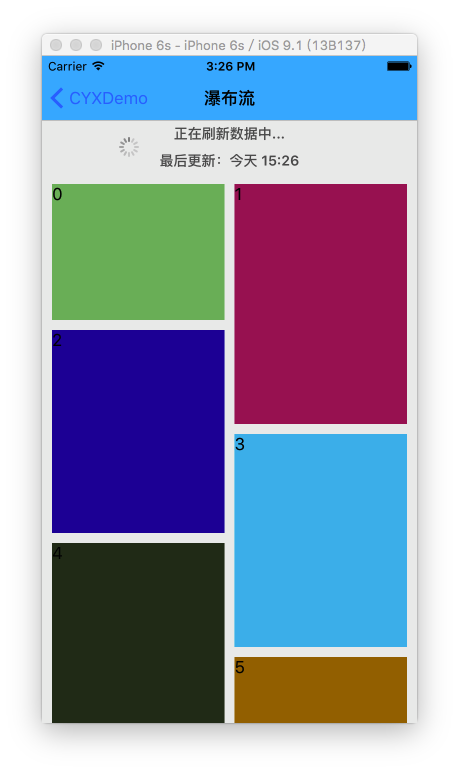
}5.瀑布流布局(自定義布局/下)
- 瀑布流布局在很多應用中非常常見,效果圖如下:
實現思路(簡化)
- (1)繼承自
UICollectionViewLayout; - (2)幾個需要重載的方法:
/*
 * 初始化
 */
- (void)prepareLayout;
/*
 * 返回rect中的所有的元素的布局屬性
 */
- (NSArray *)layoutAttributesForElementsInRect:(CGRect)rect;
/*
 * 返回對應於indexPath的位置的cell的布局屬性
 */
- (UICollectionViewLayoutAttributes *)layoutAttributesForItemAtIndexPath:(NSIndexPath *)indexPath;
/*
 * 返回collectionView的內容的尺寸
 */
- (CGSize)collectionViewContentSize;
關鍵計算代碼如下(詳細見Github)
/**
 * 返回indexPath位置cell對應的布局屬性
 */
- (UICollectionViewLayoutAttributes *)layoutAttributesForItemAtIndexPath:(NSIndexPath *)indexPath
{
    // 創建布局屬性
    UICollectionViewLayoutAttributes *attrs = [UICollectionViewLayoutAttributes layoutAttributesForCellWithIndexPath:indexPath];

    // collectionView的寬度
    CGFloat collectionViewW = self.collectionView.frame.size.width;

    // 設置布局屬性的frame
    CGFloat w = (collectionViewW - self.edgeInsets.left - self.edgeInsets.right - (self.columnCount - 1) * self.columnMargin) / self.columnCount;
    CGFloat h = [self.delegate waterflowLayout:self heightForItemAtIndex:indexPath.item itemWidth:w];

    // 找出高度最短的那一列
    NSInteger destColumn = 0;
    CGFloat minColumnHeight = [self.columnHeights[0] doubleValue];
    for (NSInteger i = 1; i < self.columnCount; i++) {
        // 取得第i列的高度
        CGFloat columnHeight = [self.columnHeights[i] doubleValue];

        if (minColumnHeight > columnHeight) {
            minColumnHeight = columnHeight;
            destColumn = i;
        }
    }

    CGFloat x = self.edgeInsets.left + destColumn * (w + self.columnMargin);
    CGFloat y = minColumnHeight;
    if (y != self.edgeInsets.top) {
        y += self.rowMargin;
    }
    attrs.frame = CGRectMake(x, y, w, h);

    // 更新最短那列的高度
    self.columnHeights[destColumn] = @(CGRectGetMaxY(attrs.frame));

    // 記錄內容的高度
    CGFloat columnHeight = [self.columnHeights[destColumn] doubleValue];
    if (self.contentHeight < columnHeight) {
        self.contentHeight = columnHeight;
    }
    return attrs;
}
6. 布局切換
- 蘋果已經為我們想好了布局切換的快捷方式,只需要通過以下方法,即可實現。
- (void)setCollectionViewLayout:(UICollectionViewLayout *)layout animated:(BOOL)animated; // transition from one layout to another
- (void)setCollectionViewLayout:(UICollectionViewLayout *)layout animated:(BOOL)animated completion:(void (^ __nullable)(BOOL finished))completion NS_AVAILABLE_IOS(7_0);
- iOS9與XCode7中不克不及應用http銜接的疾速處理方法
- iOS開源一個簡略的訂餐app UI框架
- xcode8 封閉掌握台不打印不信息的處理辦法(圖文詳解)
- 史上最具體的CocoaPods裝置教程(圖文)
- IOS Xcode中快捷鍵年夜全
- iOS中處理Xcode 8掌握台亂碼的方法
- IOS開辟之適配iOS10及Xcode8的留意點
- xcode8提交ipa掉敗沒法構建版本成績的處理計劃
- XCode 加速編譯鏈接速度的辦法
- 2016 cocoapods的裝置和應用辦法和版本進級碰到的成績
- 在uiview 的tableView中點擊cell進入跳轉到另外一個界面的完成辦法
- IOS 陀螺儀開辟(CoreMotion框架)實例詳解
- iOS開辟之UIScrollView控件詳解
- 進修iOS自界說導航掌握器UINavigationController
- Xcode 8打印log日記的成績小結及處理辦法