
ios 按鈕或圖片框圓角處理
編輯:IOS編程技術
1.圓形圖片
//1.圓形圖片

 uiimageview *headimage = [[uiimageviewalloc] initwithimage:[uiimageimagenamed:@"portrait_bg_80"]];

    headimage.frame = cgrectmake(imagetop.frame.origin.x+10, imagetop.frame.origin.y+10, 35, 35);

  //將radius設置為長度或者寬度的一半就可以實現圓形的圖片

   headimage.layer.cornerradius = 35/2.0;

    headimage.layer.maskstobounds = yes;

    [headimage.layer setborderwidth:1];

    [headimage.layersetbordercolor:[uicolorwhitecolor].cgcolor];
2.圓角圖片
//必須在uiimageview加載之後設置

//設置圖片為圓角的
        calayer *imagelayer = [cell.userpicview layer];   //獲取imageview的層

        [imagelayer setmaskstobounds:yes];

        [imagelayer setcornerradius:6.0];


//uiview圓角

viewt.layer.cornerradius = 10;//設置那個圓角的有多圓

iewt.layer.borderwidth = 10;//設置邊框的寬度,當然可以不要

viewt.layer.bordercolor = [[uicolor redcolor] cgcolor];//設置邊框的顏色

viewt.layer.maskstobounds = yes;
3.畫圖方式實現
1.//用畫圖的方式設置圓角
mimageview.image=[uiimage imagenamed:@"bg1.png"];
mimageview.frame=cgrectmake(center.x-radius, center.y-radius, 2*radius, 2*radius);
mimageview.layer.cornerradius=radius;//設置圓角半徑
mimageview.layer.maskstobounds=yes;
[mimageview.layer setborderwidth:1];//設置邊框寬度
[mimageview.layer setbordercolor:[uicolor whitecolor].cgcolor];//設置邊框顏色
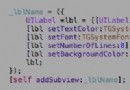
[self addsubview:mimageview];
圓形類別
創建圓形圖片/控件的方法
ios–創建圓角圖片的又一方法
圖片框圓角處理(uiimageview):
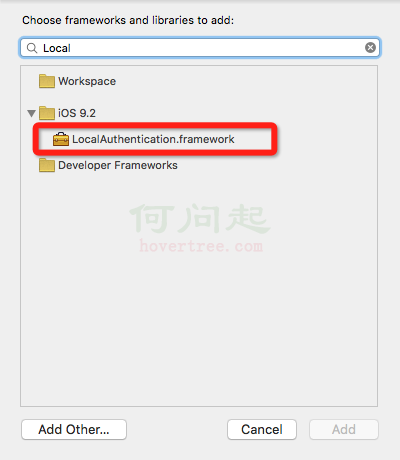
導入庫頭文件(重點)
#import <quartzcore/quartzcore.h> //圓角設置 imageview.layer.cornerradius = 6; imageview.layer.maskstobounds = yes; //邊框寬度及顏色設置 [imageview.layer setborderwidth:2]; [imageview.layer setbordercolor:[uicolor bluecolor]]; //設置邊框為藍色 //自動適應,保持圖片寬高比imageview.contentMode = UIViewContentModeScaleAspectFit;
ios開發之指定uiview的某幾個角為圓角
- 上一頁:IOS指紋識別調用
- 下一頁:iOS開發:保持程序在後台長時間運行
相關文章
+