iOS中UIAlertView正告框組件的應用教程
1. 最簡略的用法
初始化辦法:
- (instancetype)initWithTitle:(NSString *)title message:(NSString *)message delegate:(id /*<UIAlertViewDelegate>*/)delegate cancelButtonTitle:(NSString *)cancelButtonTitle otherButtonTitles:(NSString *)otherButtonTitles, ...;
這個辦法經由過程設置一個題目,內容,署理和一些按鈕的題目創立正告框,代碼示例以下:
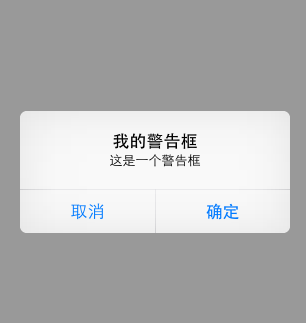
UIAlertView * alert = [[UIAlertView alloc]initWithTitle:@"我的正告框" message:@"這是一個正告框" delegate:self cancelButtonTitle:@"撤消" otherButtonTitles:@"肯定", nil];
[alert show];
後果以下:
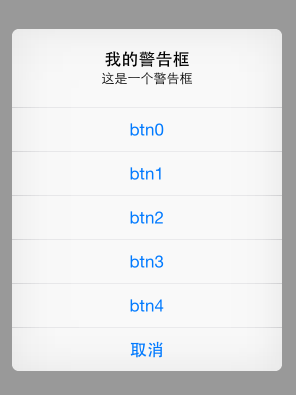
留意:假如按鈕數跨越兩個,將會創立成以下模樣:
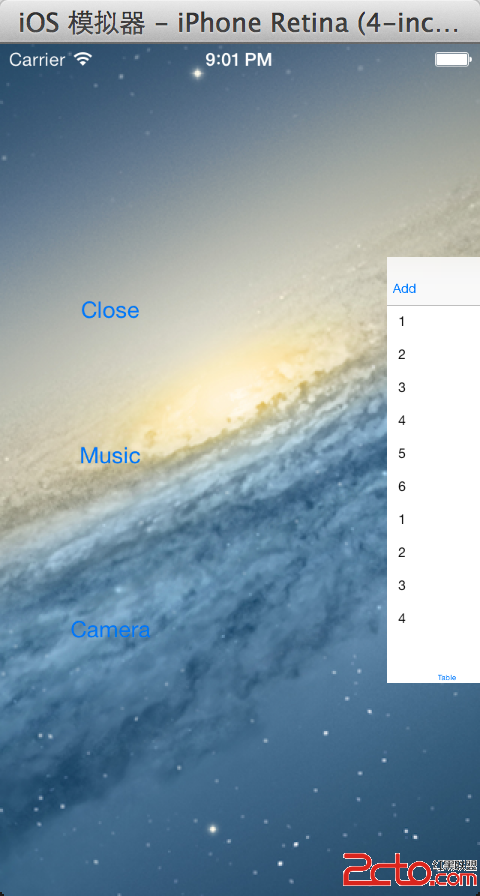
假如按鈕數目超越屏幕顯示規模,則會創立相似tableView的後果。
2. 為UIAlertView添加多個按鈕
UIAlertView*alert = [[UIAlertView alloc]initWithTitle:@"提醒"
message:@"請選擇一個按鈕:"
delegate:nil
cancelButtonTitle:@"撤消"
otherButtonTitles:@"按鈕一", @"按鈕二", @"按鈕三",nil];
[alert show];
[alert release];
3. 若何斷定用戶點擊的按鈕
UIAlertView有一個拜托(署理)UIAlertViewDelegate ,繼續該拜托來完成點擊事宜
頭文件:
@interface MyAlertViewViewController : UIViewController {
}
(void)alertView:(UIAlertView *)alertView clickedButtonAtIndex:(NSInteger)buttonIndex;
-(IBAction) buttonPressed;
@end
源文件:
-(IBAction) buttonPressed
{
UIAlertView*alert = [[UIAlertView alloc]initWithTitle:@"提醒"
message:@"請選擇一個按鈕:"
delegate:self
cancelButtonTitle:@"撤消"
otherButtonTitles:@"按鈕一", @"按鈕二", @"按鈕三",nil];
[alert show];
[alert release];
}
(void)alertView:(UIAlertView *)alertView clickedButtonAtIndex:(NSInteger)buttonIndex
{
NSString* msg = [[NSString alloc] initWithFormat:@"您按下的第%d個按鈕!",buttonIndex];
UIAlertView* alert = [[UIAlertView alloc]initWithTitle:@"提醒"
message:msg
delegate:nil
cancelButtonTitle:@"肯定"
otherButtonTitles:nil];
[alert show];
[alert release];
[msg release];
}
點擊“撤消”,“按鈕一”,“按鈕二”,“按鈕三”的索引buttonIndex分離是0,1,2,3
4. 手動的撤消對話框
[alertdismissWithClickedButtonIndex:0 animated:YES];
5. 為UIAlertView添加子視圖
在為UIAlertView對象太添加子視圖的進程中,有點是須要留意的處所,假如刪除按鈕,也就是撤消UIAlerView視圖中一切的按鈕的時刻,能夠會招致全部顯示構造掉衡。按鈕占用的空間不會消逝,我們也能夠懂得為這些按鈕沒有真實的刪除,僅僅是他弗成見了罷了。假如在UIAlertview對象中僅僅用來顯示文本,那末,可以在新聞的開首添加換行符(@"\n)有助於均衡按鈕底部和頂部的空間。
上面的代碼用來演示若何為UIAlertview對象添加子視圖的辦法。
UIAlertView*alert = [[UIAlertView alloc]initWithTitle:@"請期待"
message:nil
delegate:nil
cancelButtonTitle:nil
otherButtonTitles:nil];
[alert show];
UIActivityIndicatorView*activeView = [[UIActivityIndicatorView alloc]initWithActivityIndicatorStyle:UIActivityIndicatorViewStyleWhiteLarge];
activeView.center = CGPointMake(alert.bounds.size.width/2.0f, alert.bounds.size.height-40.0f);
[activeView startAnimating];
[alert addSubview:activeView];
[activeView release];
[alert release];
6. 其他
UIAlertView默許情形下一切的text是居中對齊的。 那假如須要將文本向左對齊或許添加其他控件好比輸出框時該怎樣辦呢? 不消擔憂, iPhone SDK照樣很靈巧的, 有許多delegate新聞供挪用法式應用。 所要做的就是在
(void)willPresentAlertView:(UIAlertView *)alertView
中依照本身的須要修正或添加便可, 好比須要將新聞文本左對齊,上面的代碼便可完成:
-(void) willPresentAlertView:(UIAlertView *)alertView
{
for( UIView * view in alertView.subviews )
{
if( [view isKindOfClass:[UILabel class]] )
{
UILabel* label = (UILabel*) view;
label.textAlignment=UITextAlignmentLeft;
}
}
}
這段代碼很簡略, 就是在新聞框行將彈出時,遍歷一切新聞框對象,將其文本對齊屬性修正為 UITextAlignmentLeft便可。
添加其他部件也千篇一律, 以下代碼添加兩個UITextField:
-(void) willPresentAlertView:(UIAlertView *)alertView
{
CGRect frame = alertView.frame;
frame.origin.y -= 120;
frame.size.height += 80;
alertView.frame = frame;
for( UIView * vieWin alertView.subviews )
{
if( ![viewisKindOfClass:[UILabelclass]] )
{
CGRect btnFrame = view.frame;
btnFrame.origin.y += 70;
view.frame = btnFrame;
}
}
UITextField* accoutName = [[UITextFieldalloc] init];
UITextField* accoutPassword = [[UITextFieldalloc] init];
accoutName.frame = CGRectMake( 10, frame.origin.y + 40,frame.size.width - 20, 30 );
accoutPassword.frame = CGRectMake( 10, frame.origin.y + 80,frame.size.width -20, 30 );
accoutName.placeholder = @"請輸出賬號";
accoutPassword.placeholder = @"請輸出暗碼";
accoutPassword.secureTextEntry = YES;
[alertView addSubview:accoutPassword];
[alertView addSubview:accoutName];
[accoutName release];
[accoutPassword release];
}
顯示將新聞框固有的button和label移位, 否則添加的text field會將其隱瞞住。 然後添加須要的部件到響應的地位便可。
關於UIActionSheet其實也是一樣的, 在
(void)willPresentActionSheet:(UIActionSheet *)actionSheet
中做異樣的處置一樣可以獲得本身想要的界面。
【iOS中UIAlertView正告框組件的應用教程】的相關資料介紹到這裡,希望對您有所幫助! 提示:不會對讀者因本文所帶來的任何損失負責。如果您支持就請把本站添加至收藏夾哦!