詳解iOS運用開辟中autoresizing尺寸主動順應屬性的用法
媒介:如今曾經不像之前那樣只要一個尺寸,如今起碼的iPhone開辟須要起碼須要適配三個尺寸。是以之前我們可使用硬坐標去設定各個控件的地位,然則如今的話曾經弗成以了,我們須要去做適配,或許你說可使用兩套UI或兩套以上的UI,但那樣不高效也不相符設計。IOS有兩年夜主動結構利器:autoresizing 和 autolayout(autolayout是IOS6今後新增)。autoresizing是UIView的屬性,一向存在,應用也比擬簡略,然則沒有autolayout那樣壯大。假如你的界面比擬簡略,請求的細節沒有那末高,那末你完整可使用autoresizing去停止主動結構。以下會針對autoresizing停止評論辯論。
零、autoresizing應用前的說明:
UIViewAutoresizing是一個列舉類型,默許是UIViewAutoresizingNone,也就是不做任何處置。
typedef NS_OPTIONS(NSUInteger, UIViewAutoresizing) {
UIViewAutoresizingNone = 0,
UIViewAutoresizingFlexibleLeftMargin = 1 << 0,
UIViewAutoresizingFlexibleWidth = 1 << 1,
UIViewAutoresizingFlexibleRightMargin = 1 << 2,
UIViewAutoresizingFlexibleTopMargin = 1 << 3,
UIViewAutoresizingFlexibleHeight = 1 << 4,
UIViewAutoresizingFlexibleBottomMargin = 1 << 5
};
各屬性說明:

在這裡解釋一下,假如是常常應用Storyboard/Xib設置autoresizing,那末改變應用代碼設置autoresizing的話,輕易湧現懂得毛病成績。好比說UIViewAutoresizingFlexibleTopMargin,或許會被誤以為是頂部間隔不變,實際上是底部間隔不變。這個處理方法也很簡略,只須要把應用代碼和應用Storyboard設置autoresizing,它們是相反的,只須要如許去記便可以了。
autoresizing組合應用:
也就是列舉中的值可使用|離隔,同時具有多個值的功效,可以針對分歧的場景作分歧的變更。例如:
UIViewAutoresizingFlexibleWidth | UIViewAutoresizingFlexibleBottomMargin
意思是:view的寬度依照父視圖的寬度比例停止縮放,間隔父視圖頂部間隔不變。
其它的組合相似,我這裡就紛歧一羅列了。
留意:
1)view的autoresizesSubviews屬性為yes時(默許為yes),autoresizing才會失效。
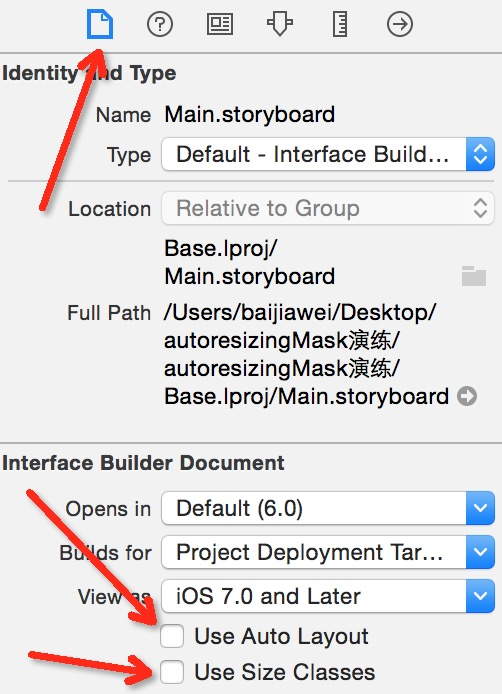
2)從XCODE6開端,Storyboard&Xib默許是主動結構,是以我們須要手動調劑,能力應用autoresizing。
詳細操作如圖(翻開Storyboard文件,你就會看到上面圖的界面):
上面會寫一個簡略的例子以賜與你們更直不雅的懂得,並會在本文最初附上Demo下載地址,請持續往下不雅看噢。
Demo:
1)頂部間隔父視圖間隔不變
2)寬度按父視圖比例停止拉伸
3)view與父視圖的右邊距和左邊距不變

1、應用代碼(Code)掌握autoresizingMask
上面是項目用到的宏:
#define topSpace 64
#define kMargin 20
#define kTopViewHeight 44
#define kTopViewWidth 300
#define kTextLabelWidth 200
#define kTextLabelHeight 30
沒有做適配之前的代碼:
// 以Iphone4(320, 480)為基本,設置各控件的地位
// 留意:必需一切控件都依照Iphone4(320, 480)為基本初始化一次,否則按比例縮放時會產生毛病!
UIView *topView = [[UIView alloc] initWithFrame:CGRectMake(kMargin, topSpace, kTopViewWidth, kTopViewHeight)];
CGFloat textLabelTop = (topView.frame.size.width - kTextLabelWidth) / 2;
CGFloat textLabelWidth = (topView.frame.size.height - kTextLabelHeight) / 2;
UILabel *textLabel = [[UILabel alloc] initWithFrame:CGRectMake(textLabelTop, textLabelWidth, kTextLabelWidth, kTextLabelHeight)];
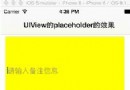
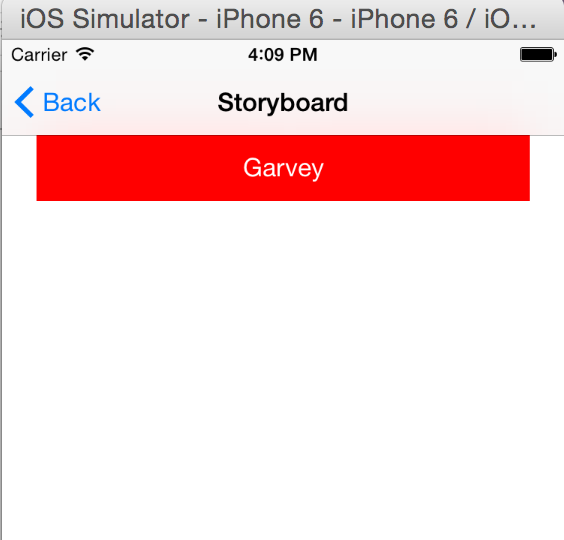
// 設置文字及居中
[textLabel setText:@"Garvey"];
[textLabel setTextAlignment:NSTextAlignmentCenter];
// 分離設置款式
[topView setBackgroundColor:[UIColor redColor]];
[textLabel setTextColor:[UIColor whiteColor]];// 添加視圖
[topView addSubview:textLabel];
[self.view addSubview:topView];
它將會顯示:

應用autoresizing停止界面適配:
彌補:你可以先按其它的裝備尺寸為界面上的控件初始化,由於autoresizing是會以父視圖的轉變而轉變。
// 以Iphone4(320, 480)為基本,設置各控件的地位
// 留意:必需一切控件都依照Iphone4(320, 480)為基本初始化一次,否則按比例縮放時會產生毛病!
UIView *topView = [[UIView alloc] initWithFrame:CGRectMake(kMargin, kTopSpace, kTopViewWidth, kTopViewHeight)];
CGFloat textLabelTop = (topView.frame.size.width - kTextLabelWidth) / 2;
CGFloat textLabelWidth = (topView.frame.size.height - kTextLabelHeight) / 2;
UILabel *textLabel = [[UILabel alloc] initWithFrame:CGRectMake(textLabelTop, textLabelWidth, kTextLabelWidth, kTextLabelHeight)];
// 設置文字及居中
[textLabel setText:@"Garvey"];
[textLabel setTextAlignment:NSTextAlignmentCenter];
// 分離設置款式
[topView setBackgroundColor:[UIColor redColor]];
[textLabel setTextColor:[UIColor whiteColor]];
// 設置文字控件的寬度依照上一級視圖(topView)的比例停止縮放
[textLabel setAutoresizingMask:UIViewAutoresizingFlexibleWidth];
// 設置View控件的寬度依照父視圖的比例停止縮放,間隔父視圖頂部、右邊距和左邊距的間隔不變
[topView setAutoresizingMask:UIViewAutoresizingFlexibleWidth | UIViewAutoresizingFlexibleBottomMargin | UIViewAutoresizingFlexibleRightMargin | UIViewAutoresizingFlexibleLeftMargin];
// 添加視圖
[topView addSubview:textLabel];
[self.view addSubview:topView];
// 留意:從新設置topView地位的代碼,必需要寫在添加視圖的前面,否則autoresizing的地位盤算會失足!
CGFloat topViewWidth = kUIScreen.size.width - kMargin * 2;
[topView setFrame:CGRectMake(kMargin, kTopSpace, topViewWidth, kTopViewHeight)];
最初顯示:
2、在Storyboard掌握autoresizingMask
autoresizingMask不管是在storyboard中完成照樣用代碼完成,實質下去說就是六條線。
在storyboard中應用autoresizingMask須要將Autolayout禁用失落。
如圖:
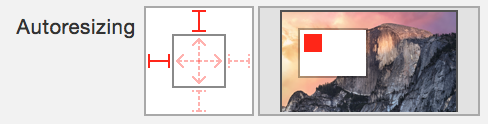
圖中共有六條線(高低閣下到核心的間隔線和外部的兩條線)。
假如高低閣下的線中的某一條選中,則表現間隔父控件的界限的間隔不變。
好比圖當選中左和上的線,表現藍色view間隔self.view的右邊界和上界限的間隔不變。
假如同時選中高低閣下的線,那末行動會和選中上左的線是一樣的,也就是默許的行動。
假如想讓子控件尺寸追隨父控件尺寸轉變而轉變,那末須要用到外部的兩條線。外部的線表現許可控件在程度和垂直偏向上可拉伸。假如不選中外部的線,解釋是不願望控件可拉伸的,也就是固定年夜小的。
也就是說,四周的線選中表現固定間隔,外部的線選中表現許可拉伸。
假如用代碼設置autoresizingMask,會發明一個view的autoresizingMask屬性是一個列舉:
UIViewAutoresizingNone = 0,
UIViewAutoresizingFlexibleLeftMargin = 1 << 0,
UIViewAutoresizingFlexibleWidth = 1 << 1,
UIViewAutoresizingFlexibleRightMargin = 1 << 2,
UIViewAutoresizingFlexibleTopMargin = 1 << 3,
UIViewAutoresizingFlexibleHeight = 1 << 4,
UIViewAutoresizingFlexibleBottomMargin = 1 << 5
除第一個是None,剩下的六個就對應storyboard中的六條線。
留意下面
UIViewAutoresizingFlexibleWidth
UIViewAutoresizingFlexibleHeight
這是正好和storyboard中設置autoresizingMask中外部的兩天線是分歧的:可拉伸的寬度和高度。
剩下的須要留意一下:
UIViewAutoresizingFlexibleLeftMargin
UIViewAutoresizingFlexibleRightMargin
UIViewAutoresizingFlexibleTopMargin
UIViewAutoresizingFlexibleBottomMargin
在storyboard中,假如選中四周的線,表現間隔固定。好比我選中了右邊的線,那末表現我想要右邊的間隔固定,所以在代碼中我應當選擇UIViewAutoresizingFlexibleRightMargin,即表現左邊的間隔不固定,那末則默許右邊的間隔固定。
autoresizingMask的缺陷是只能包管父控件和子控件間的關系,沒法包管同級控件間的關系,也就是說有些需求,autoresizingMask是沒法完成的。更多的精神應當放在Autolayout上。
【詳解iOS運用開辟中autoresizing尺寸主動順應屬性的用法】的相關資料介紹到這裡,希望對您有所幫助! 提示:不會對讀者因本文所帶來的任何損失負責。如果您支持就請把本站添加至收藏夾哦!