實例講授iOS運用UI開辟之基本動畫的創立
1、簡略引見
CAPropertyAnimation的子類
屬性解析:
fromValue:keyPath響應屬性的初始值
toValue:keyPath響應屬性的停止值
跟著動畫的停止,在長度為duration的連續時光內,keyPath響應屬性的值從fromValue逐漸地變成toValue
假如fillMode=kCAFillModeForwards和removedOnComletion=NO,那末在動畫履行終了後,圖層會堅持顯示動畫履行後的狀況。但在本質上,圖層的屬性值照樣動畫履行前的初始值,並沒有真正被轉變。
好比,CALayer的position初始值為(0,0),CABasicAnimation的fromValue為(10,10),toValue為(100,100),固然動畫履行終了後圖層堅持在(100,100)這個地位,本質上圖層的position照樣為(0,0)
2、平挪動畫
代碼示例:
//
// YYViewController.m
// 07-焦點動畫(基本動畫)
//
// Created by apple on 14-6-21.
// Copyright (c) 2014年 itcase. All rights reserved.
//
#import "YYViewController.h"
@interface YYViewController ()
@property(nonatomic,strong)CALayer *myLayer;
@end
@implementation YYViewController
- (void)viewDidLoad
{
[super viewDidLoad];
//創立layer
CALayer *myLayer=[CALayer layer];
//設置layer的屬性
myLayer.bounds=CGRectMake(0, 0, 50, 80);
myLayer.backgroundColor=[UIColor yellowColor].CGColor;
myLayer.position=CGPointMake(50, 50);
myLayer.anchorPoint=CGPointMake(0, 0);
myLayer.cornerRadius=20;
//添加layer
[self.view.layer addSublayer:myLayer];
self.myLayer=myLayer;
}
//設置動畫(基本動畫)
-(void)touchesBegan:(NSSet *)touches withEvent:(UIEvent *)event
{
//1.創立焦點動畫
// CABasicAnimation *anima=[CABasicAnimation animationWithKeyPath:<#(NSString *)#>]
CABasicAnimation *anima=[CABasicAnimation animation];
//1.1告知體系要履行甚麼樣的動畫
anima.keyPath=@"position";
//設置經由過程動畫,將layer從哪兒挪動到哪兒
anima.fromValue=[NSValue valueWithCGPoint:CGPointMake(0, 0)];
anima.toValue=[NSValue valueWithCGPoint:CGPointMake(200, 300)];
//1.2設置動畫履行終了以後不刪除動畫
anima.removedOnCompletion=NO;
//1.3設置保留動畫的最新狀況
anima.fillMode=kCAFillModeForwards;
//2.添加焦點動畫到layer
[self.myLayer addAnimation:anima forKey:nil];
}
@end
代碼解釋:
第42行設置的keyPath是@"position",解釋要修正的是CALayer的position屬性,也就是會履行平挪動畫
第44,45行,這裡的屬性吸收的時id類型的參數,是以其實不能直接應用CGPoint這類構造體類型,而是要先包裝成NSValue對象後再應用。
默許情形下,動畫履行終了後,動畫會主動從CALayer上移除,CALayer又會回到本來的狀況。為了堅持動畫履行後的狀況,可以參加第48,50行代碼
byValue和toValue的差別,前者是在以後的地位上增長若干,後者是到指定的地位。
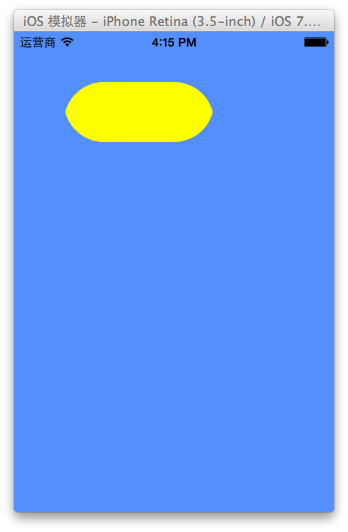
履行後果:

設置署理:設置動畫的署理,可以監聽動畫的履行進程,這裡設置掌握器為署理。
代碼示例:
#import "YYViewController.h"
@interface YYViewController ()
@property(nonatomic,strong)CALayer *myLayer;
@end
@implementation YYViewController
- (void)viewDidLoad
{
[super viewDidLoad];
//創立layer
CALayer *myLayer=[CALayer layer];
//設置layer的屬性
myLayer.bounds=CGRectMake(0, 0, 50, 80);
myLayer.backgroundColor=[UIColor yellowColor].CGColor;
myLayer.position=CGPointMake(50, 50);
myLayer.anchorPoint=CGPointMake(0, 0);
myLayer.cornerRadius=20;
//添加layer
[self.view.layer addSublayer:myLayer];
self.myLayer=myLayer;
}
//設置動畫(基本動畫)
-(void)touchesBegan:(NSSet *)touches withEvent:(UIEvent *)event
{
//1.創立焦點動畫
// CABasicAnimation *anima=[CABasicAnimation animationWithKeyPath:<#(NSString *)#>]
CABasicAnimation *anima=[CABasicAnimation animation];
//1.1告知體系要履行甚麼樣的動畫
anima.keyPath=@"position";
//設置經由過程動畫,將layer從哪兒挪動到哪兒
anima.fromValue=[NSValue valueWithCGPoint:CGPointMake(0, 0)];
anima.toValue=[NSValue valueWithCGPoint:CGPointMake(200, 300)];
//1.2設置動畫履行終了以後不刪除動畫
anima.removedOnCompletion=NO;
//1.3設置保留動畫的最新狀況
anima.fillMode=kCAFillModeForwards;
anima.delegate=self;
//打印
NSString *str=NSStringFromCGPoint(self.myLayer.position);
NSLog(@"履行前:%@",str);
//2.添加焦點動畫到layer
[self.myLayer addAnimation:anima forKey:nil];
}
-(void)animationDidStart:(CAAnimation *)anim
{
NSLog(@"開端履行動畫");
}
-(void)animationDidStop:(CAAnimation *)anim finished:(BOOL)flag
{
//動畫履行終了,打印履行終了後的position值
NSString *str=NSStringFromCGPoint(self.myLayer.position);
NSLog(@"履行後:%@",str);
}
@end
打印position的屬性值,驗證圖層的屬性值照樣動畫履行前的初始值{50,50},並沒有真正被轉變為{200,300}。

3、縮放動畫
完成縮放動畫的代碼示例:
//
// YYViewController.m
// 08-焦點動畫平移
//
// Created by apple on 14-6-21.
// Copyright (c) 2014年 itcase. All rights reserved.
//
#import "YYViewController.h"
@interface YYViewController ()
@property(nonatomic,strong)CALayer *myLayer;
@end
@implementation YYViewController
- (void)viewDidLoad
{
[super viewDidLoad];
//創立layer
CALayer *myLayer=[CALayer layer];
//設置layer的屬性
myLayer.bounds=CGRectMake(0, 0, 150, 60);
myLayer.backgroundColor=[UIColor yellowColor].CGColor;
myLayer.position=CGPointMake(50, 50);
myLayer.anchorPoint=CGPointMake(0, 0);
myLayer.cornerRadius=40;
//添加layer
[self.view.layer addSublayer:myLayer];
self.myLayer=myLayer;
}
-(void)touchesBegan:(NSSet *)touches withEvent:(UIEvent *)event
{
//1.創立動畫
CABasicAnimation *anima=[CABasicAnimation animationWithKeyPath:@"bounds"];
//1.1設置動畫履行時光
anima.duration=2.0;
//1.2設置動畫履行終了後不刪除動畫
anima.removedOnCompletion=NO;
//1.3設置保留動畫的最新狀況
anima.fillMode=kCAFillModeForwards;
//1.4修正屬性,履行動畫
anima.toValue=[NSValue valueWithCGRect:CGRectMake(0, 0, 200, 200)];
//2.添加動畫到layer
[self.myLayer addAnimation:anima forKey:nil];
}
@end
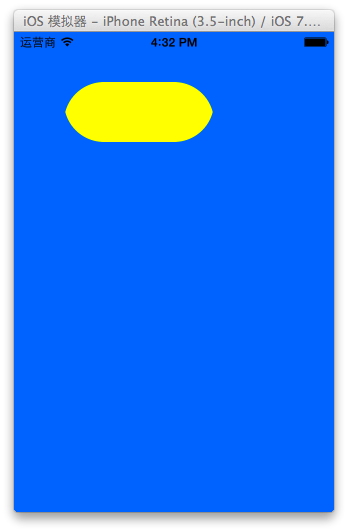
完成後果:
4、扭轉動畫
代碼示例:
//
// YYViewController.m
// 09-焦點動畫扭轉
//
// Created by apple on 14-6-21.
// Copyright (c) 2014年 itcase. All rights reserved.
//
#import "YYViewController.h"
@interface YYViewController ()
@property(nonatomic,strong)CALayer *myLayer;
@end
@implementation YYViewController
- (void)viewDidLoad
{
[super viewDidLoad];
//創立layer
CALayer *myLayer=[CALayer layer];
//設置layer的屬性
myLayer.bounds=CGRectMake(0, 0, 150, 60);
myLayer.backgroundColor=[UIColor yellowColor].CGColor;
myLayer.position=CGPointMake(50, 50);
myLayer.anchorPoint=CGPointMake(0, 0);
myLayer.cornerRadius=40;
//添加layer
[self.view.layer addSublayer:myLayer];
self.myLayer=myLayer;
}
-(void)touchesBegan:(NSSet *)touches withEvent:(UIEvent *)event
{
//1.創立動畫
CABasicAnimation *anima=[CABasicAnimation animationWithKeyPath:@"transform"];
//1.1設置動畫履行時光
anima.duration=2.0;
//1.2修正屬性,履行動畫
anima.toValue=[NSValue valueWithCATransform3D:CATransform3DMakeRotation(M_PI_2+M_PI_4, 1, 1, 0)];
//1.3設置動畫履行終了後不刪除動畫
anima.removedOnCompletion=NO;
//1.4設置保留動畫的最新狀況
anima.fillMode=kCAFillModeForwards;
//2.添加動畫到layer
[self.myLayer addAnimation:anima forKey:nil];
}
@end
完成後果:
彌補:
可以經由過程transform(KVC)的方法來停止設置。
代碼示例(平移):
#import "YYViewController.h"
@interface YYViewController ()
@property(nonatomic,strong)CALayer *myLayer;
@end
@implementation YYViewController
- (void)viewDidLoad
{
[super viewDidLoad];
//創立layer
CALayer *myLayer=[CALayer layer];
//設置layer的屬性
myLayer.bounds=CGRectMake(0, 0, 150, 60);
myLayer.backgroundColor=[UIColor yellowColor].CGColor;
myLayer.position=CGPointMake(50, 50);
myLayer.anchorPoint=CGPointMake(0, 0);
myLayer.cornerRadius=40;
//添加layer
[self.view.layer addSublayer:myLayer];
self.myLayer=myLayer;
}
-(void)touchesBegan:(NSSet *)touches withEvent:(UIEvent *)event
{
//1.創立動畫
CABasicAnimation *anima=[CABasicAnimation animation];
anima.keyPath=@"transform";
//1.1設置動畫履行時光
anima.duration=2.0;
//1.2修正屬性,履行動畫
anima.toValue=[NSValue valueWithCATransform3D:CATransform3DMakeTranslation(0, 100, 1)];
//1.3設置動畫履行終了後不刪除動畫
anima.removedOnCompletion=NO;
//1.4設置保留動畫的最新狀況
anima.fillMode=kCAFillModeForwards;
//2.添加動畫到layer
[self.myLayer addAnimation:anima forKey:nil];
}
完成後果:
繪制的圖形在y的偏向上挪動100個單元。

5、症結幀動畫
1.簡略引見
是CApropertyAnimation的子類,跟CABasicAnimation的差別是:CABasicAnimation只能從一個數值(fromValue)變到另外一個數值(toValue),而CAKeyframeAnimation會應用一個NSArray保留這些數值
屬性解析:
values:就是上述的NSArray對象。外面的元素稱為”症結幀”(keyframe)。動畫對象會在指定的時光(duration)內,順次顯示values數組中的每個症結幀
path:可以設置一個CGPathRef\CGMutablePathRef,讓層隨著途徑挪動。path只對CALayer的anchorPoint和position起感化。假如你設置了path,那末values將被疏忽
keyTimes:可認為對應的症結幀指定對應的時光點,其取值規模為0到1.0,keyTimes中的每個時光值都對應values中的每幀.當keyTimes沒有設置的時刻,各個症結幀的時光是等分的
解釋:CABasicAnimation可看作是最多只要2個症結幀的CAKeyframeAnimation
2.代碼示例
第一種方法:
代碼:
//
// YYViewController.m
// 10-焦點動畫(症結幀動畫1)
//
// Created by apple on 14-6-21.
// Copyright (c) 2014年 itcase. All rights reserved.
//
#import "YYViewController.h"
@interface YYViewController ()
@property (weak, nonatomic) IBOutlet UIView *customView;
@end
@implementation YYViewController
-(void)touchesBegan:(NSSet *)touches withEvent:(UIEvent *)event
{
//1.創立焦點動畫
CAKeyframeAnimation *keyAnima=[CAKeyframeAnimation animation];
//平移
keyAnima.keyPath=@"position";
//1.1告知體系要履行甚麼動畫
NSValue *value1=[NSValue valueWithCGPoint:CGPointMake(100, 100)];
NSValue *value2=[NSValue valueWithCGPoint:CGPointMake(200, 100)];
NSValue *value3=[NSValue valueWithCGPoint:CGPointMake(200, 200)];
NSValue *value4=[NSValue valueWithCGPoint:CGPointMake(100, 200)];
NSValue *value5=[NSValue valueWithCGPoint:CGPointMake(100, 100)];
keyAnima.values=@[value1,value2,value3,value4,value5];
//1.2設置動畫履行終了後,不刪除動畫
keyAnima.removedOnCompletion=NO;
//1.3設置保留動畫的最新狀況
keyAnima.fillMode=kCAFillModeForwards;
//1.4設置動畫履行的時光
keyAnima.duration=4.0;
//1.5設置動畫的節拍
keyAnima.timingFunction=[CAMediaTimingFunction functionWithName:kCAMediaTimingFunctionEaseInEaSEOut];
//設置署理,開端—停止
keyAnima.delegate=self;
//2.添加焦點動畫
[self.customView.layer addAnimation:keyAnima forKey:nil];
}
-(void)animationDidStart:(CAAnimation *)anim
{
NSLog(@"開端動畫");
}
-(void)animationDidStop:(CAAnimation *)anim finished:(BOOL)flag
{
NSLog(@"停止動畫");
}
@end
解釋:這個項目在storyboard中拖入了一個view,並和掌握器中的custom停止了聯系關系。
後果和打印成果:

彌補:設置動畫的節拍
第二種方法(應用path)讓layer在指定的途徑上挪動(畫圓):
代碼:
#import "YYViewController.h"
@interface YYViewController ()
@property (weak, nonatomic) IBOutlet UIView *customView;
@end
@implementation YYViewController
-(void)touchesBegan:(NSSet *)touches withEvent:(UIEvent *)event
{
//1.創立焦點動畫
CAKeyframeAnimation *keyAnima=[CAKeyframeAnimation animation];
//平移
keyAnima.keyPath=@"position";
//1.1告知體系要履行甚麼動畫
//創立一條途徑
CGMutablePathRef path=CGPathCreateMutable();
//設置一個圓的途徑
CGPathAddEllipseInRect(path, NULL, CGRectMake(150, 100, 100, 100));
keyAnima.path=path;
//有create就必定要有release
CGPathRelease(path);
//1.2設置動畫履行終了後,不刪除動畫
keyAnima.removedOnCompletion=NO;
//1.3設置保留動畫的最新狀況
keyAnima.fillMode=kCAFillModeForwards;
//1.4設置動畫履行的時光
keyAnima.duration=5.0;
//1.5設置動畫的節拍
keyAnima.timingFunction=[CAMediaTimingFunction functionWithName:kCAMediaTimingFunctionEaseInEaSEOut];
//設置署理,開端—停止
keyAnima.delegate=self;
//2.添加焦點動畫
[self.customView.layer addAnimation:keyAnima forKey:nil];
}
-(void)animationDidStart:(CAAnimation *)anim
{
NSLog(@"開端動畫");
}
-(void)animationDidStop:(CAAnimation *)anim finished:(BOOL)flag
{
NSLog(@"停止動畫");
}
@end
解釋:可以經由過程path屬性,讓layer在指定的軌跡上活動。
停滯動畫:
#import "YYViewController.h"
@interface YYViewController ()
@property (weak, nonatomic) IBOutlet UIView *customView;
- (IBAction)stopOnClick:(UIButton *)sender;
@end
@implementation YYViewController
-(void)touchesBegan:(NSSet *)touches withEvent:(UIEvent *)event
{
//1.創立焦點動畫
CAKeyframeAnimation *keyAnima=[CAKeyframeAnimation animation];
//平移
keyAnima.keyPath=@"position";
//1.1告知體系要履行甚麼動畫
//創立一條途徑
CGMutablePathRef path=CGPathCreateMutable();
//設置一個圓的途徑
CGPathAddEllipseInRect(path, NULL, CGRectMake(150, 100, 100, 100));
keyAnima.path=path;
//有create就必定要有release
CGPathRelease(path);
//1.2設置動畫履行終了後,不刪除動畫
keyAnima.removedOnCompletion=NO;
//1.3設置保留動畫的最新狀況
keyAnima.fillMode=kCAFillModeForwards;
//1.4設置動畫履行的時光
keyAnima.duration=5.0;
//1.5設置動畫的節拍
keyAnima.timingFunction=[CAMediaTimingFunction functionWithName:kCAMediaTimingFunctionEaseInEaSEOut];
//2.添加焦點動畫
[self.customView.layer addAnimation:keyAnima forKey:@"wendingding"];
}
- (IBAction)stopOnClick:(UIButton *)sender {
//停滯self.customView.layer上稱號標示為wendingding的動畫
[self.customView.layer removeAnimationForKey:@"wendingding"];
}
@end
點擊停滯動畫,法式外部會挪用 [self.customView.layer removeAnimationForKey:@"wendingding"];停滯self.customView.layer上稱號標示為wendingding的動畫。
3.圖標發抖
代碼示例:
//
// YYViewController.m
// 12-圖標發抖
//
// Created by apple on 14-6-21.
// Copyright (c) 2014年 itcase. All rights reserved.
//
#import "YYViewController.h"
#define angle2Radian(angle) ((angle)/180.0*M_PI)
@interface YYViewController ()
@property (weak, nonatomic) IBOutlet UIImageView *iconView;
@end
@implementation YYViewController
-(void)touchesBegan:(NSSet *)touches withEvent:(UIEvent *)event
{
//1.創立焦點動畫
CAKeyframeAnimation *keyAnima=[CAKeyframeAnimation animation];
keyAnima.keyPath=@"transform.rotation";
//設置動畫時光
keyAnima.duration=0.1;
//設置圖標發抖弧度
//把度數轉換為弧度 度數/180*M_PI
keyAnima.values=@[@(-angle2Radian(4)),@(angle2Radian(4)),@(-angle2Radian(4))];
//設置動畫的反復次數(設置為最年夜值)
keyAnima.repeatCount=MAXFLOAT;
keyAnima.fillMode=kCAFillModeForwards;
keyAnima.removedOnCompletion=NO;
//2.添加動畫
[self.iconView.layer addAnimation:keyAnima forKey:nil];
}
@end
解釋:圖標向左向右偏轉一個弧度(4),發生發抖的視覺後果。
法式界面:

【實例講授iOS運用UI開辟之基本動畫的創立】的相關資料介紹到這裡,希望對您有所幫助! 提示:不會對讀者因本文所帶來的任何損失負責。如果您支持就請把本站添加至收藏夾哦!
- iOS 完成多署理的辦法及實例代碼
- IOS 陀螺儀開辟(CoreMotion框架)實例詳解
- ajax 三種完成辦法實例代碼
- iOS中 LGLAlertView 提醒框的實例代碼
- IOS 仿時間網選票UI實例代碼
- iOS 雷達後果實例詳解
- IOS 粒子體系 (CAEmitterLayer)實例詳解
- iOS 動畫 —— 禮花後果實例具體
- 在Swift中應用JSONModel 實例代碼
- iOS 9 Core Spotlight搜刮實例代碼
- 圖文講授若何處理App的iOS 7頂部狀況欄適配成績
- 實例講授iOS中的UIPageViewController翻頁視圖掌握器
- 實例講授iOS中的CATransition轉場動畫應用
- 應用Swift代碼完成iOS手勢解鎖、指紋解鎖實例詳解
- iOS App開辟中應用設計形式中的單例形式的實例解析