為ios編譯python的圖像庫pillow
Pillow是python的圖像處理庫,可以從github下載pillow中部分代碼使用C編寫,如果需要在IOS環境中使用,則需要編譯為IOS的靜態庫。通過python命令編譯出來的是共享庫,需要使用ar命令將目標文件打包成靜態庫
Pillow使用了jpeg, png, freetype庫,首先需要編譯它們為靜態庫.
1.編譯jpeg,png,freetype為靜態庫jpeg使用版本jpegsrc.v9b;png使用版本libpng-1.6.26
a.首先設置交叉編譯環境export PATH="/Applications/Xcode.app/Contents/Developer/Toolchains/Xcodedefault.xctoolchain/usr/bin/:/usr/local/bin:/usr/bin:/bin:$PATH" export CFLAGS="-DIOS -arch x86_64 -miphoneos-version-min=6.0 -isysroot /Applications/Xcode.app/Contents/Developer/Platforms/iPhoneSimulator.platform/Developer/SDKs/iPhoneSimulator9.3.sdk" export CXXFLAGS="$CFLAGS" export CC="clang $CFLAGS" export CXX="clang++ $CXXFLAGS" export LDFLAGS="" export AR="ar" export RANLIB="ranlib" export STRIP="strip" export MAKE="make -j4"b.編譯jpeg
解壓jpegsrc.v9b.tar.gz
./configure LDFLAGS="-lm" CFLAGS="-fomit-frame-pointer -Wno-format" --disable-shared --host=x86_64-iphone-darWin --build=x86_64-apple-darWin  --prefix="$(pwd)/../install/jpeg9b.x86_64"
make
make install
c.編譯png
解壓libpng-1.6.26.tar.gz
./configure --disable-shared --host=x86_64-iphone-darWin --build=x86_64-apple-darwin  --prefix="$(pwd)/../install/libpng1626.x86_64"
make
make install
d.編譯freetype
解壓freetype-2.6.5.tar.gz
./configure LDFLAGS="-lm" LIBPNG_LIBS="-L$(pwd)../install/libpng1626.x86_64/lib" CFLAGS="-fomit-frame-pointer -Wno-format" LIBPNG_CFLAGS="-I$(pwd)/../install/libpng1626.x86_64/include" --disable-shared --host=x86_64-iphone-darwin --build=x86_64-apple-darwin  --prefix="$(pwd)/../install/freetype265.x86_64"
make
make install
2. 編譯pillow
從github下載pillow,解壓Pillow-master.zip
在ios環境中,pillow支持交叉編譯,但編譯之後生成的為動態庫,需要手動連接靜態庫
編譯需要python頭文件,下載starcore_for_ios,解壓到pillow同級目錄

設置編譯環境
export PATH="/Applications/Xcode.app/Contents/Developer/Toolchains/Xcodedefault.xctoolchain/usr/bin/:/usr/local/bin:/usr/bin:/bin:$PATH"

export ARCH="x86_64"

export CFLAGS="-fomit-frame-pointer -miphoneos-version-min=6.0 -isysroot /Applications/Xcode.app/Contents/Developer/Platforms/iPhoneSimulator.platform/Developer/SDKs/iPhoneSimulator9.3.sdk -I../starcore_for_ios/python.files/python-2.7/include -I../install/jpeg9b.x86_64/include  -I../install/freetype265.x86_64/include"

export CXXFLAGS="$CFLAGS"

export CC="clang"

export LDFLAGS="-lm -L../starcore_for_ios/python.files/python-2.7  -L../install/jpeg9b.x86_64/lib -L../install/freetype265.x86_64/lib  -L../install/libpng1626.x86_64/lib"

export CXX="clang++"

export AR="ar"

export RANLIB="ranlib"

export STRIP="strip"

export MAKE="make -j4"
使用python2.7編譯
python setup.py build
編譯結果在Pillow-master/build/lib.linux-x86_64-2.7
生成靜態庫
export OP="./build/temp.macosx-10.4-x86_64-2.7"
#_imaging.a

/Applications/Xcode.app/Contents/Developer/Toolchains/Xcodedefault.xctoolchain/usr/bin/ar rc _imaging.a $OP/_imaging.o $OP/decode.o $OP/encode.o $OP/map.o $OP/display.o $OP/outline.o $OP/path.o $OP/libImaging/Access.o $OP/libImaging/AlphaComposite.o $OP/libImaging/Resample.o $OP/libImaging/Bands.o $OP/libImaging/BcnDecode.o $OP/libImaging/BitDecode.o $OP/libImaging/Blend.o $OP/libImaging/Chops.o $OP/libImaging/Convert.o $OP/libImaging/ConvertYCbCr.o $OP/libImaging/Copy.o $OP/libImaging/Crc32.o $OP/libImaging/Crop.o $OP/libImaging/Dib.o $OP/libImaging/Draw.o $OP/libImaging/Effects.o $OP/libImaging/EpsEncode.o $OP/libImaging/File.o $OP/libImaging/Fill.o $OP/libImaging/Filter.o $OP/libImaging/FliDecode.o $OP/libImaging/Geometry.o $OP/libImaging/GetBBox.o $OP/libImaging/GifDecode.o $OP/libImaging/GifEncode.o $OP/libImaging/HexDecode.o $OP/libImaging/Histo.o $OP/libImaging/JpegDecode.o $OP/libImaging/JpegEncode.o $OP/libImaging/LzwDecode.o $OP/libImaging/Matrix.o $OP/libImaging/ModeFilter.o $OP/libImaging/MspDecode.o $OP/libImaging/Negative.o $OP/libImaging/Offset.o $OP/libImaging/Pack.o $OP/libImaging/PackDecode.o $OP/libImaging/Palette.o $OP/libImaging/Paste.o $OP/libImaging/Quant.o $OP/libImaging/QuantOctree.o $OP/libImaging/QuantHash.o $OP/libImaging/QuantHeap.o $OP/libImaging/PcdDecode.o $OP/libImaging/PcxDecode.o $OP/libImaging/PcxEncode.o $OP/libImaging/Point.o $OP/libImaging/RankFilter.o $OP/libImaging/RawDecode.o $OP/libImaging/RawEncode.o $OP/libImaging/Storage.o $OP/libImaging/SunRleDecode.o $OP/libImaging/TgaRleDecode.o $OP/libImaging/Unpack.o $OP/libImaging/UnpackYCC.o $OP/libImaging/UnsharpMask.o $OP/libImaging/XbmDecode.o $OP/libImaging/XbmEncode.o $OP/libImaging/ZipDecode.o $OP/libImaging/ZipEncode.o $OP/libImaging/TiffDecode.o $OP/libImaging/Jpeg2KDecode.o $OP/libImaging/Jpeg2KEncode.o $OP/libImaging/BoxBlur.o $OP/libImaging/QuantPngQuant.o $OP/libImaging/codec_fd.o

#_imagingft.a
/Applications/Xcode.app/Contents/Developer/Toolchains/XcodeDefault.xctoolchain/usr/bin/ar rc _imagingft.a $OP/_imagingft.o

#_imagingmath.a
/Applications/Xcode.app/Contents/Developer/Toolchains/XcodeDefault.xctoolchain/usr/bin/ar rc _imagingmath.a $OP/_imagingmath.o

#_imagingmorph.a
/Applications/Xcode.app/Contents/Developer/Toolchains/XcodeDefault.xctoolchain/usr/bin/ar rc _imagingmorph.a $OP/_imagingmorph.o

#_imagingtk.a
/Applications/Xcode.app/Contents/Developer/Toolchains/XcodeDefault.xctoolchain/usr/bin/ar rc _imagingtk.a $OP/_imagingtk.o $OP/Tk/tkImaging.o
3.測試pillow
創建xcode工程,添加cle,python,以及上面生成的jpeg,png,freetype,pillow的靜態庫。將/build/temp.macosx-10.4-x86_64-2.7/PIL目錄及文件添加到工程,需要刪除編譯生成的.so文件
靜態庫需要預先導入,而且需要修改對應.py文件中的導入相關的代碼,不能從包中導入,修改Image.py
    #from PIL import _imaging as core
    import _imaging as core
    if PILLOW_VERSION != getattr(core, 'PILLOW_VERSION', None):
        raise ImportError("The _imaging extension was built for another "
                          "version of Pillow or PIL")
創建測試testpillow.py
import traceback
print(Star_folder)
try:
from PIL import Image
print(Image)
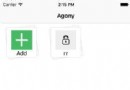
im = Image.open(Star_folder+"/Add.png")
print(im.format, im.size, im.mode)
except Exception,e:
traceback.print_exc()
初始化加載pillow靜態庫
extern "C" void init_imaging(void);
extern "C" void init_imagingmorph(void);
extern "C" void init_imagingft(void);
extern "C" void init_imagingmath(void);


    static VSImportPythonCModuleDef CModuleDef[]={{"_imaging",(void*)init_imaging},{"_imagingmorph",(void*)init_imagingmorph},{"_imagingft",(void*)init_imagingft},{"_imagingmath",(void*)init_imagingmath},{NULL,NULL}};

    VSCoreLib_InitPython((VS_CHAR*)python_home,(VS_CHAR *)python_path,CModuleDef);
運行test_pillow.py
    char FileBuf[256];

    SRPInterface->ScriptSetStr(python,"Star_folder",res_cpath);

    sprintf(FileBuf,"%s/test_pillow.py",res_cpath);
    SRPInterface->DoFile("python", FileBuf, NULL,NULL,VS_FALSE);
編譯需要starcore_for_ios:解壓後放在同一目錄:

示例下載
【為ios編譯python的圖像庫pillow】的相關資料介紹到這裡,希望對您有所幫助! 提示:不會對讀者因本文所帶來的任何損失負責。如果您支持就請把本站添加至收藏夾哦!
- 上一頁:iOS多線程網絡之NSOperation
- 下一頁:IOS開發入門(12)