iOS開發中使用UIScrollView實現圖片輪播和點擊加載
UIScrollView控件實現圖片輪播
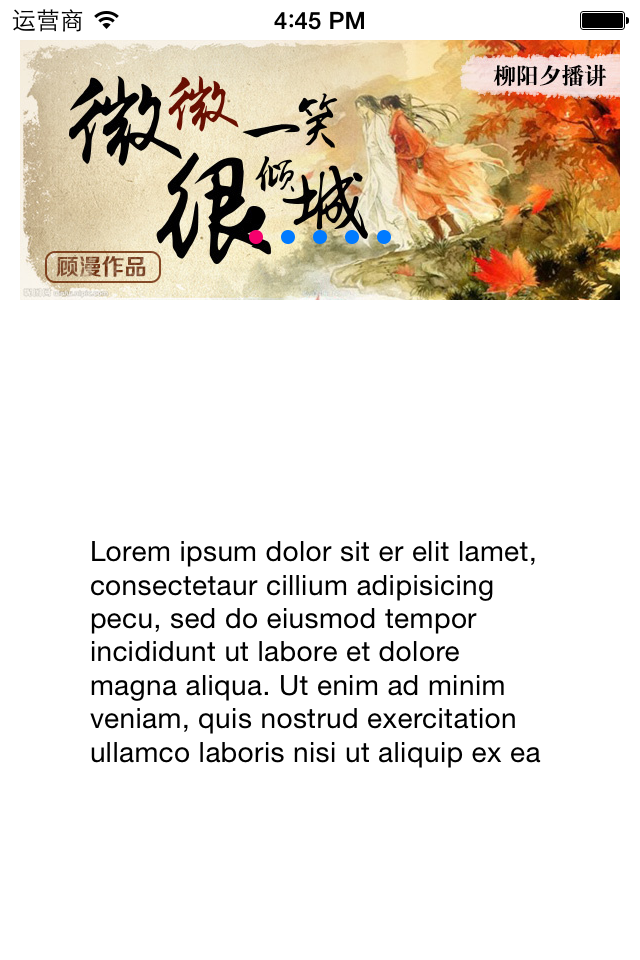
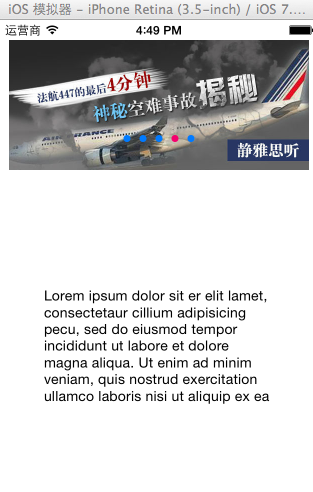
一、實現效果
實現圖片的自動輪播
二、實現代碼
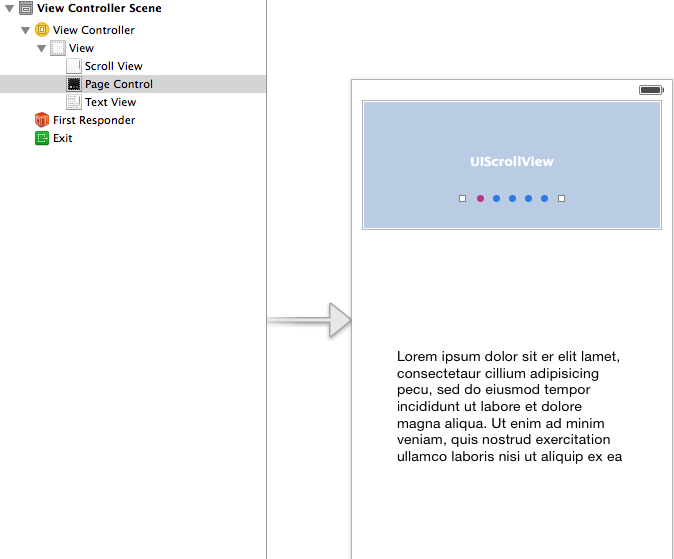
storyboard中布局
代碼:
復制代碼 代碼如下:
#import "YYViewController.h"
@interface YYViewController () <UIScrollViewDelegate>
@property (weak, nonatomic) IBOutlet UIScrollView *scrollview;
/**
* 頁碼
*/
@property (weak, nonatomic) IBOutlet UIPageControl *pageControl;
@property (nonatomic, strong) NSTimer *timer;
@end
復制代碼 代碼如下:
@implementation YYViewController
- (void)viewDidLoad
{
[super viewDidLoad];
// 圖片的寬
CGFloat imageW = self.scrollview.frame.size.width;
// CGFloat imageW = 300;
// 圖片高
CGFloat imageH = self.scrollview.frame.size.height;
// 圖片的Y
CGFloat imageY = 0;
// 圖片中數
NSInteger totalCount = 5;
// 1.添加5張圖片
for (int i = 0; i < totalCount; i++) {
UIImageView *imageView = [[UIImageView alloc] init];
// 圖片X
CGFloat imageX = i * imageW;
// 設置frame
imageView.frame = CGRectMake(imageX, imageY, imageW, imageH);
// 設置圖片
NSString *name = [NSString stringWithFormat:@"img_0%d", i + 1];
imageView.image = [UIImage imageNamed:name];
// 隱藏指示條
self.scrollview.showsHorizontalScrollIndicator = NO;
[self.scrollview addSubview:imageView];
}
// 2.設置scrollview的滾動范圍
CGFloat contentW = totalCount *imageW;
//不允許在垂直方向上進行滾動
self.scrollview.contentSize = CGSizeMake(contentW, 0);
// 3.設置分頁
self.scrollview.pagingEnabled = YES;
// 4.監聽scrollview的滾動
self.scrollview.delegate = self;
[self addTimer];
}
- (void)nextImage
{
int page = (int)self.pageControl.currentPage;
if (page == 4) {
page = 0;
}else
{
page++;
}
// 滾動scrollview
CGFloat x = page * self.scrollview.frame.size.width;
self.scrollview.contentOffset = CGPointMake(x, 0);
}
// scrollview滾動的時候調用
- (void)scrollViewDidScroll:(UIScrollView *)scrollView
{
NSLog(@"滾動中");
// 計算頁碼
// 頁碼 = (contentoffset.x + scrollView一半寬度)/scrollView寬度
CGFloat scrollviewW = scrollView.frame.size.width;
CGFloat x = scrollView.contentOffset.x;
int page = (x + scrollviewW / 2) / scrollviewW;
self.pageControl.currentPage = page;
}
// 開始拖拽的時候調用
- (void)scrollViewWillBeginDragging:(UIScrollView *)scrollView
{
// 關閉定時器(注意點; 定時器一旦被關閉,無法再開啟)
// [self.timer invalidate];
[self removeTimer];
}
- (void)scrollViewDidEndDragging:(UIScrollView *)scrollView willDecelerate:(BOOL)decelerate
{
// 開啟定時器
[self addTimer];
}
/**
* 開啟定時器
*/
- (void)addTimer{
self.timer = [NSTimer scheduledTimerWithTimeInterval:1 target:self selector:@selector(nextImage) userInfo:nil repeats:YES];
106 }
/**
* 關閉定時器
*/
- (void)removeTimer
{
[self.timer invalidate];
}
@end
提示:以下兩個屬性已經和storyboard中的控件進行了連線。
復制代碼 代碼如下:
@property (weak, nonatomic) IBOutletUIScrollView *scrollview;
@property (weak, nonatomic) IBOutletUIPageControl *pageControl;
補充:定時器NSTimer
定時器 適合用來隔一段時間做一些間隔比較長的操作
NSTimeInterval:多長多件操作一次
target :操作誰
selector : 要操作的方法
userInfo: 傳遞參數
repeats: 是否重復
復制代碼 代碼如下:
self.timer = [NSTimer scheduledTimerWithTimeInterval:1 target:self selector:@selector(nextImage) userInfo:nil repeats:YES];
在UItableview中實現加載更多功能
一、實現效果
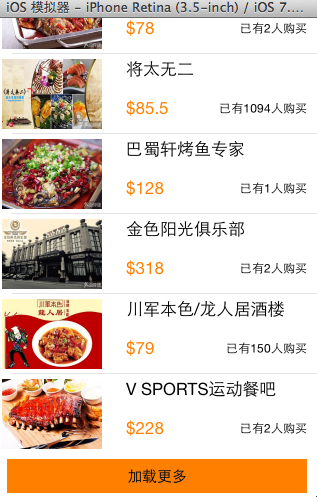
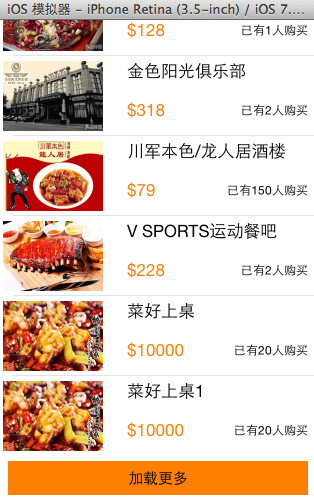
點擊加載更多按鈕,出現一個加載圖示,三秒鐘後添加兩條新的數據。

二、實現代碼和說明
當在頁面(視圖部分)點擊加載更多按鈕的時候,主頁面(主控制器)會加載兩條數據進來。
視圖部分的按鈕被點擊的時候,要讓主控制器加載數據,刷新表格,2B青年會在視圖中增加一個主控制器的屬性,通過這個屬性去調用進行加載,但在開發中通常通過代理模式來完成這個操作。
下面分別是兩種實現的代碼。
1、項目結構和說明
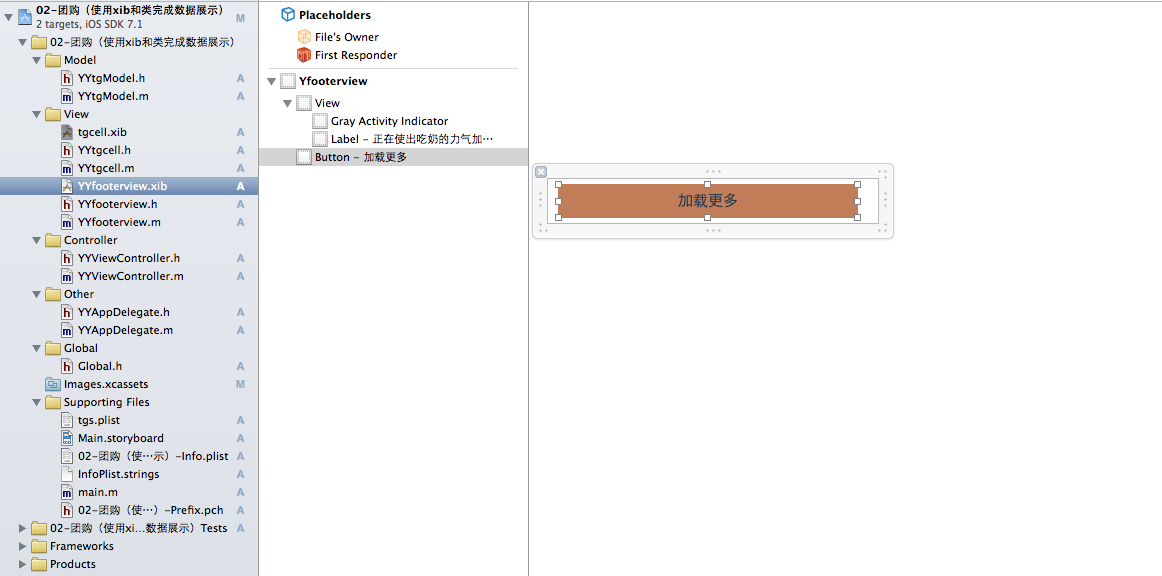
說明:加載更多永遠都放在這個tableview的最下端,因此這裡設置成了這個tableview的tableFooterView。
復制代碼 代碼如下:
self.tableview.tableFooterView=footerview;
在實現上通過xib來進行處理,考慮到左右的留白,以及點擊後的要切換到加載按鈕和文字,要同時控制圖標和文字,因此把加載圖標和文字提示放在了一個view中以便控制,這個xib已經和YYfooterview.xib進行了關聯,通過這個類來控制xib。
2、實現代碼
(1).垃圾代碼
數據模型部分
YYtg.h文件
復制代碼 代碼如下:
//
// YYtg.h
// 02-團購(使用xib和類完成數據展示)
//
// Created by apple on 14-5-29.
// Copyright (c) 2014年 itcase. All rights reserved.
//
#import <Foundation/Foundation.h>
#import "Global.h"
@interface YYtgModel : NSObject
@property(nonatomic,copy)NSString *icon;
@property(nonatomic,copy)NSString *buyCount;
@property(nonatomic,copy)NSString *title;
@property(nonatomic,copy)NSString *price;
//對外接口
YYinitH(tg)
@end
YYtg.m文件
復制代碼 代碼如下:
//
// YYtg.m
// 02-團購(使用xib和類完成數據展示)
//
// Created by apple on 14-5-29.
// Copyright (c) 2014年 itcase. All rights reserved.
//
#import "YYtgModel.h"
@implementation YYtgModel
YYinitM(tg)
@end
注意:對於數據轉模型部分的構造方法接口和實現代碼已經通過自定義帶參數的宏來進行了封裝。
封裝代碼如下:
復制代碼 代碼如下:
#ifndef _0____________Global_h
#define _0____________Global_h
/**
* 自定義帶參數的宏
*/
#define YYinitH(name) -(instancetype)initWithDict:(NSDictionary *)dict;\
+(instancetype)name##WithDict:(NSDictionary *)dict;
#define YYinitM(name) -(instancetype)initWithDict:(NSDictionary *)dict\
{\
if (self=[super init]) {\
[self setValuesForKeysWithDictionary:dict];\
}\
return self;\
}\
\
+(instancetype)name##WithDict:(NSDictionary *)dict\
{\
return [[self alloc]initWithDict:dict];\
}\
#endif
視圖部分
YYtgcell.h文件
復制代碼 代碼如下:
//
// YYtgcell.h
// 02-團購(使用xib和類完成數據展示)
//
// Created by apple on 14-5-29.
// Copyright (c) 2014年 itcase. All rights reserved.
//
#import <UIKit/UIKit.h>
#import "YYtgModel.h"
@interface YYtgcell : UITableViewCell
@property(nonatomic,strong)YYtgModel *yytg;
//把加載數據(使用xib創建cell的內部細節進行封裝)
+(instancetype)tgcellWithTableView:(UITableView *)tableView;
@end
YYtgcell.m文件
復制代碼 代碼如下:
//
// YYtgcell.m
// 02-團購(使用xib和類完成數據展示)
//
// Created by apple on 14-5-29.
// Copyright (c) 2014年 itcase. All rights reserved.
//
#import "YYtgcell.h"
//私有擴展
@interface YYtgcell()
@property (strong, nonatomic) IBOutlet UIImageView *img;
@property (strong, nonatomic) IBOutlet UILabel *titlelab;
@property (strong, nonatomic) IBOutlet UILabel *pricelab;
@property (strong, nonatomic) IBOutlet UILabel *buycountlab;
@end
復制代碼 代碼如下:
@implementation YYtgcell
#pragma mark 重寫set方法,完成數據的賦值操作
-(void)setYytg:(YYtgModel *)yytg
{
_yytg=yytg;
self.img.image=[UIImage imageNamed:yytg.icon];
self.titlelab.text=yytg.title;
self.pricelab.text=[NSString stringWithFormat:@"$%@",yytg.price];
self.buycountlab.text=[NSString stringWithFormat:@"已有%@人購買",yytg.buyCount];
}
+(instancetype)tgcellWithTableView:(UITableView *)tableView
{
static NSString *identifier= @"tg";
YYtgcell *cell=[tableView dequeueReusableCellWithIdentifier:identifier];
if (cell==nil) {
//如何讓創建的cell加個戳
//對於加載的xib文件,可以到xib視圖的屬性選擇器中進行設置
cell=[[[NSBundle mainBundle]loadNibNamed:@"tgcell" owner:nil options:nil]firstObject];
NSLog(@"創建了一個cell");
}
return cell;
}
@end
YYfooterview.h文件
復制代碼 代碼如下:
//
// YYfooterview.h
// 02-團購(使用xib和類完成數據展示)
//
// Created by apple on 14-5-29.
// Copyright (c) 2014年 itcase. All rights reserved.
//
#import <UIKit/UIKit.h>
@class YYViewController;
@interface YYfooterview : UIView
@property(nonatomic,strong) YYViewController *controller;
@end
YYfooterview.m文件
復制代碼 代碼如下:
//
// YYfooterview.m
// 02-團購(使用xib和類完成數據展示)
//
// Created by apple on 14-5-29.
// Copyright (c) 2014年 itcase. All rights reserved.
//
#import "YYfooterview.h"
#import "YYViewController.h"
@interface YYfooterview ()
@property (strong, nonatomic) IBOutlet UIActivityIndicatorView *loadingview;
@property (strong, nonatomic) IBOutlet UIButton *loadbtn;
@end
復制代碼 代碼如下:
@implementation YYfooterview
- (IBAction)loadbtclick {
NSLog(@"按鈕被點擊了");
//隱藏按鈕
self.loadbtn.hidden=YES;
//顯示菊花
self.loadingview.hidden=NO;
#warning 模擬發送網絡請求, 3秒之後隱藏菊花
dispatch_after(dispatch_time(DISPATCH_TIME_NOW, (int64_t)(3.0 * NSEC_PER_SEC)), dispatch_get_main_queue(), ^{
// 3.調用控制的加載數據方法
[self.controller LoadMore];
// 4.隱藏菊花視圖
self.loadingview.hidden = YES;
// 5.顯示按鈕
self.loadbtn.hidden = NO;
});
}
@end
主控制器
YYViewController.h文件
復制代碼 代碼如下:
//
// YYViewController.h
// 02-團購(使用xib和類完成數據展示)
//
// Created by apple on 14-5-29.
// Copyright (c) 2014年 itcase. All rights reserved.
//
#import <UIKit/UIKit.h>
@interface YYViewController : UIViewController
//公開接口
//- (void)LoadMore;
@end
YYViewController.m文件
復制代碼 代碼如下:
//
// YYViewController.m
// 02-團購(使用xib和類完成數據展示)
//
// Created by apple on 14-5-29.
// Copyright (c) 2014年 itcase. All rights reserved.
//
#import "YYViewController.h"
#import "YYtgModel.h"
#import "YYtgcell.h"
#import "YYfooterview.h"
@interface YYViewController ()<UITableViewDataSource,UITableViewDelegate>
@property (strong, nonatomic) IBOutlet UITableView *tableview;
@property(strong,nonatomic)NSMutableArray *tg;
@end
復制代碼 代碼如下:
@implementation YYViewController
#pragma mark-加載數據方法
-(void)LoadMore
{
//創建模型
YYtgModel *tgmodel=[[YYtgModel alloc]init];
tgmodel.title=@"菜好上桌";
tgmodel.icon=@"5ee372ff039073317a49af5442748071";
tgmodel.buyCount=@"20";
tgmodel.price=@"10000";
//將模型添加到數組中
[self.tg addObject:tgmodel];
YYtgModel *tgmodelq=[[YYtgModel alloc]init];
tgmodelq.title=@"菜好上桌1";
tgmodelq.icon=@"5ee372ff039073317a49af5442748071";
tgmodelq.buyCount=@"20";
tgmodelq.price=@"10000";
[self.tg addObject:tgmodelq];
//刷新表格
[self.tableview reloadData];
}
- (void)viewDidLoad
{
[super viewDidLoad];
self.tableview.rowHeight=80.f;
//加載底部視圖
//從xib中獲取數據
UINib *nib=[UINib nibWithNibName:@"YYfooterview" bundle:nil];
YYfooterview *footerview=[[nib instantiateWithOwner:nil options:nil] firstObject];
self.tableview.tableFooterView=footerview;
//設置控制
footerview.controller=self;
}
#pragma mark- 懶加載
-(NSArray *)tg
{
if (_tg==nil) {
NSString *fullpath=[[NSBundle mainBundle]pathForResource:@"tgs.plist" ofType:nil];
NSArray *temparray=[NSArray arrayWithContentsOfFile:fullpath];
NSMutableArray *arrayM=[NSMutableArray arrayWithCapacity:temparray.count];
for (NSDictionary *dict in temparray) {
YYtgModel *tg=[YYtgModel tgWithDict:dict];
[arrayM addObject:tg];
}
_tg=arrayM;
}
return _tg;
}
#pragma mark- xib創建cell數據處理
#pragma mark 多少組
-(NSInteger)numberOfSectionsInTableView:(UITableView *)tableView
{
return 1;
}
#pragma mark多少行
-(NSInteger)tableView:(UITableView *)tableView numberOfRowsInSection:(NSInteger)section
{
return self.tg.count;
}
#pragma mark設置每組每行
-(UITableViewCell *)tableView:(UITableView *)tableView cellForRowAtIndexPath:(NSIndexPath *)indexPath
{
//1.創建cell
YYtgcell *cell=[YYtgcell tgcellWithTableView:tableView];
//2.獲取當前行的模型,設置cell的數據
YYtgModel *tg=self.tg[indexPath.row];
cell.yytg=tg;
//3.返回cell
return cell;
}
#pragma mark- 隱藏狀態欄
-(BOOL)prefersStatusBarHidden
{
return YES;
}
@end
2.通過代理完成
當按鈕被點擊的時候,視圖部分本身不干活,而是通知它的代理(控制器)完成接下來的操作。
該部分代碼在1的基礎上對下面幾個文件進行了修改:
視圖部分:
YYfooterview.h文件
復制代碼 代碼如下:
//
// YYfooterview.h
// 02-團購(使用xib和類完成數據展示)
//
// Created by apple on 14-5-29.
// Copyright (c) 2014年 itcase. All rights reserved.
//
#import <UIKit/UIKit.h>
@class YYViewController ,YYfooterview;
//約定協議
@protocol YYfooterviewDelegate <NSObject>
-(void)footerviewLoadMore;
@end
@interface YYfooterview : UIView
//聲明一個id類型屬性,遵守了協議的“人”即可成為它的代理
@property(nonatomic,strong)id<YYfooterviewDelegate> delegate;
//@property(nonatomic,strong) YYViewController *controller;
@end
YYfooterview.m文件
復制代碼 代碼如下:
//
// YYfooterview.m
// 02-團購(使用xib和類完成數據展示)
//
// Created by apple on 14-5-29.
// Copyright (c) 2014年 itcase. All rights reserved.
//
#import "YYfooterview.h"
#import "YYViewController.h"
@interface YYfooterview ()
@property (strong, nonatomic) IBOutlet UIActivityIndicatorView *loadingview;
@property (strong, nonatomic) IBOutlet UIButton *loadbtn;
@end
復制代碼 代碼如下:
@implementation YYfooterview
- (IBAction)loadbtclick {
NSLog(@"按鈕被點擊了");
//隱藏按鈕
self.loadbtn.hidden=YES;
//顯示菊花
self.loadingview.hidden=NO;
#warning 模擬發送網絡請求, 3秒之後隱藏菊花
dispatch_after(dispatch_time(DISPATCH_TIME_NOW, (int64_t)(3.0 * NSEC_PER_SEC)), dispatch_get_main_queue(), ^{
// 3.調用控制的加載數據方法
// [self.controller LoadMore];
//通知代理
[self.delegate footerviewLoadMore];
// 4.隱藏菊花視圖
self.loadingview.hidden = YES;
// 5.顯示按鈕
self.loadbtn.hidden = NO;
});
}
@end
主控制器部分
YYViewController.h文件
復制代碼 代碼如下:
//
// YYViewController.h
// 02-團購(使用xib和類完成數據展示)
//
// Created by apple on 14-5-29.
// Copyright (c) 2014年 itcase. All rights reserved.
//
#import <UIKit/UIKit.h>
@interface YYViewController : UIViewController
//公開接口
//- (void)LoadMore;
@end
YYViewController.m文件
復制代碼 代碼如下:
//
// YYViewController.m
// 02-團購(使用xib和類完成數據展示)
//
// Created by apple on 14-5-29.
// Copyright (c) 2014年 itcase. All rights reserved.
//
#import "YYViewController.h"
#import "YYtgModel.h"
#import "YYtgcell.h"
#import "YYfooterview.h"
@interface YYViewController ()<UITableViewDataSource,UITableViewDelegate,YYfooterviewDelegate>
@property (strong, nonatomic) IBOutlet UITableView *tableview;
@property(strong,nonatomic)NSMutableArray *tg;
@end
復制代碼 代碼如下:
@implementation YYViewController
#pragma mark-加載數據方法
-(void)footerviewLoadMore
{
//創建模型
YYtgModel *tgmodel=[[YYtgModel alloc]init];
tgmodel.title=@"菜好上桌";
tgmodel.icon=@"5ee372ff039073317a49af5442748071";
tgmodel.buyCount=@"20";
tgmodel.price=@"10000";
//將模型添加到數組中
[self.tg addObject:tgmodel];
YYtgModel *tgmodelq=[[YYtgModel alloc]init];
tgmodelq.title=@"菜好上桌1";
tgmodelq.icon=@"5ee372ff039073317a49af5442748071";
tgmodelq.buyCount=@"20";
tgmodelq.price=@"10000";
[self.tg addObject:tgmodelq];
//刷新表格
[self.tableview reloadData];
}
//-(void)LoadMore
//{
// //創建模型
// YYtgModel *tgmodel=[[YYtgModel alloc]init];
// tgmodel.title=@"菜好上桌";
// tgmodel.icon=@"5ee372ff039073317a49af5442748071";
// tgmodel.buyCount=@"20";
// tgmodel.price=@"10000";
// //將模型添加到數組中
// [self.tg addObject:tgmodel];
//
// YYtgModel *tgmodelq=[[YYtgModel alloc]init];
// tgmodelq.title=@"菜好上桌1";
// tgmodelq.icon=@"5ee372ff039073317a49af5442748071";
// tgmodelq.buyCount=@"20";
// tgmodelq.price=@"10000";
//
// [self.tg addObject:tgmodelq];
// //刷新表格
// [self.tableview reloadData];
//}
- (void)viewDidLoad
{
[super viewDidLoad];
self.tableview.rowHeight=80.f;
//加載底部視圖
//從xib中獲取數據
UINib *nib=[UINib nibWithNibName:@"YYfooterview" bundle:nil];
YYfooterview *footerview=[[nib instantiateWithOwner:nil options:nil] firstObject];
self.tableview.tableFooterView=footerview;
//設置控制
// footerview.controller=self;
//設置代理
footerview.delegate=self;
}
#pragma mark- 懶加載
-(NSArray *)tg
{
if (_tg==nil) {
NSString *fullpath=[[NSBundle mainBundle]pathForResource:@"tgs.plist" ofType:nil];
NSArray *temparray=[NSArray arrayWithContentsOfFile:fullpath];
NSMutableArray *arrayM=[NSMutableArray arrayWithCapacity:temparray.count];
for (NSDictionary *dict in temparray) {
YYtgModel *tg=[YYtgModel tgWithDict:dict];
[arrayM addObject:tg];
}
_tg=arrayM;
}
return _tg;
}
#pragma mark- xib創建cell數據處理
#pragma mark 多少組
-(NSInteger)numberOfSectionsInTableView:(UITableView *)tableView
{
return 1;
}
#pragma mark多少行
-(NSInteger)tableView:(UITableView *)tableView numberOfRowsInSection:(NSInteger)section
{
return self.tg.count;
}
#pragma mark設置每組每行
-(UITableViewCell *)tableView:(UITableView *)tableView cellForRowAtIndexPath:(NSIndexPath *)indexPath
{
//1.創建cell
YYtgcell *cell=[YYtgcell tgcellWithTableView:tableView];
//2.獲取當前行的模型,設置cell的數據
YYtgModel *tg=self.tg[indexPath.row];
cell.yytg=tg;
//3.返回cell
return cell;
}
#pragma mark- 隱藏狀態欄
-(BOOL)prefersStatusBarHidden
{
return YES;
}
@end
- 上一頁:深入講解iOS開發中應用數據的存儲方式
- 下一頁:IOS觀察者設計模式