使用Swift代碼實現iOS手勢解鎖、指紋解鎖實例詳解
一、手勢密碼
1、
1.1、用UIButton組成手勢的節點。
1.2、當手指接觸屏幕時,調用重寫的 touchesBegan:withEvent方法(在touchesBegan裡調用setNeedsDisplay,這樣就會自動調用drawRect方法)。
1.3、當手指在屏幕上滑動時,調用重寫的touchesEnded:withEvent方法。
這兩個方法執行的操作是一樣的:通過locationInView獲取 觸摸的坐標,然後用 CGRectContainsPoint 判斷手指是否經過UIButton,如果經過按鈕,就更換按鈕的圖片,同時 保存劃過按鈕的tag。
1.4、默認情況下 跳躍連線 第1個和第3個節點,中間的第2個節點 會被忽略,所以要單獨進行處理。根據1和3節點 的2個UIButton的坐標 計算出第1個和第3個節點 中間的坐標,判斷該坐標是否存在UIButton,如果存在就加入設置選中,並加入選中數組。
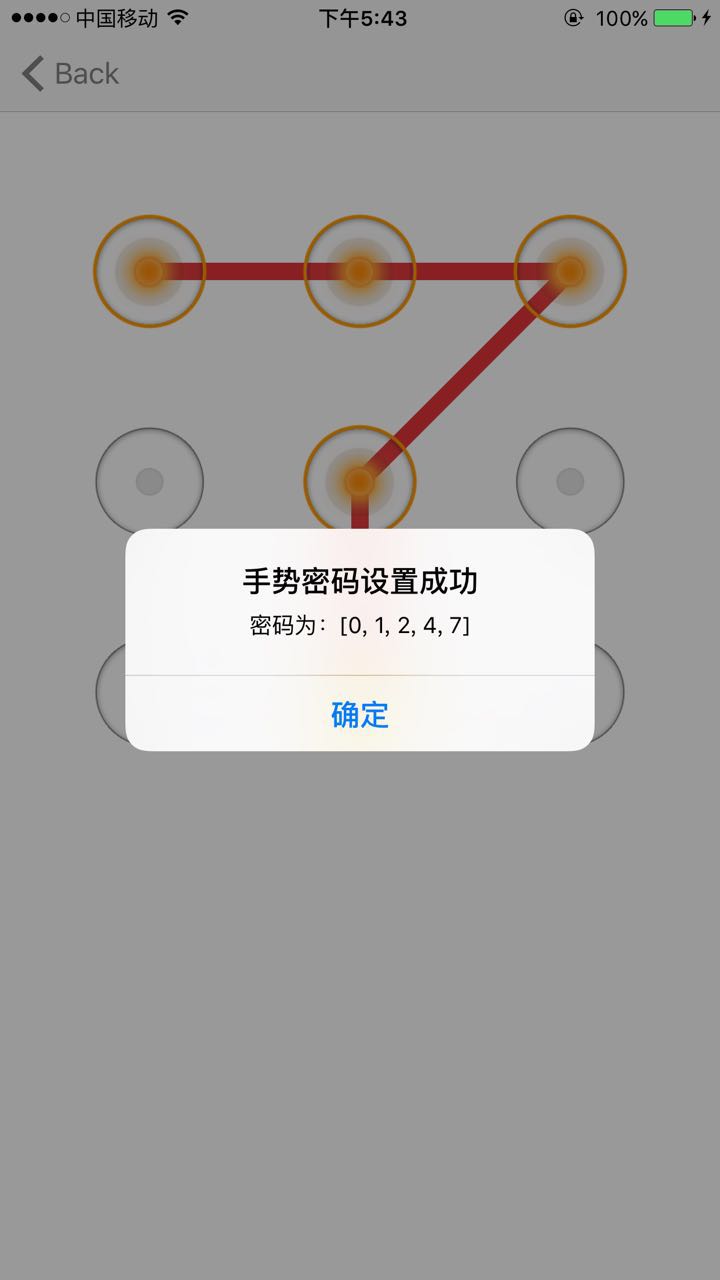
到這裡 就已經實現了 手指滑過 節點的時候 節點被選中的效果:
 // MARK: - Override
 // 當手指接觸屏幕時,就會調用touchesBegan:withEvent方法;
 override func touchesBegan(touches: Set<UITouch>, withEvent event: UIEvent?) {
  print("執行touchesBegan")
  selectBtnTagArray.removeAll()
  touchesChange(touches)
 }
 //當手指在屏幕上移動時,調用touchesMoved:withEvent方法;
 override func touchesMoved(touches: Set<UITouch>, withEvent event: UIEvent?) {
  touchesChange(touches)
 }
 //當觸摸被取消(比如觸摸過程中被來電打斷),就會調用touchesCancelled:withEvent方法。
 override func touchesCancelled(touches: Set<UITouch>?, withEvent event: UIEvent?) {
 }
 //當手指離開屏幕時,就會調用touchesEnded:withEvent方法;
 override func touchesEnded(touches: Set<UITouch>, withEvent event: UIEvent?) {
  print("執行touchesEnded")
  var alertTitle = "請設置正確的手勢"
  var alertMessage = "手勢密碼不能少於4個"
  var isSuccess = false
  if selectBtnTagArray.count >= 4 {
   alertTitle = "手勢密碼設置成功"
   isSuccess = true
   alertMessage = "密碼為:\(selectBtnTagArray)"
  }
  gestureLockDelegate!.gestureLockSuccess(isSuccess, title: alertTitle, message: alertMessage)
  gesturePoint = CGPointZero;
  self.setNeedsDisplay()
 }
 // MARK: - PrivateMethod
 private func initButtons() {
  for i in 0...8 {
   //第幾行
   let row = i / 3
   let loc = i % 3
   //兩個button的間距
   let btnSpace = (screenWidth - 3*btnWH)/4
   let btnX = btnSpace + (btnWH + btnSpace) * CGFloat(loc)
   let btnY = 70 + btnSpace + (btnWH + btnSpace) * CGFloat(row)
   let gestureNodeBtn = UIButton(frame:CGRectMake(btnX, btnY, btnWH, btnWH))
   gestureNodeBtn.tag = i
   gestureNodeBtn.userInteractionEnabled = false //不響應用戶的交互。一定要加上這句
   gestureNodeBtn.setImage(UIImage(named: btnImgNormal), forState: .Normal)
   self.addSubview(gestureNodeBtn)
   btnArray.append(gestureNodeBtn)
  }
 }
 private func touchesChange(touches: Set<UITouch>) {
  //獲取 觸摸對象 ,觸摸對象的位置坐標來實現
  gesturePoint = touches.first!.locationInView(self)
  for btn in btnArray {
   //判斷 手指的坐標 是否在 button的坐標裡
   if !selectBtnTagArray.contains(btn.tag) && CGRectContainsPoint(btn.frame, gesturePoint) {
    //處理跳躍連線
    var lineCenterPoint:CGPoint = CGPoint()
    if selectBtnTagArray.count > 0 {
     lineCenterPoint = centerPoint(btn.frame.origin, endPoint: btnArray[selectBtnTagArray.last!].frame.origin)
    }
    //保存中間跳躍 過的節點
    for btn in btnArray {
     if !selectBtnTagArray.contains(btn.tag) && CGRectContainsPoint(btn.frame, lineCenterPoint) {
      btn.setImage(UIImage(named: btnImgSelected), forState: .Normal)
      selectBtnTagArray.append(btn.tag)
     }
    }
    //保存劃過的按鈕的tag
    selectBtnTagArray.append(btn.tag)
    btn.setImage(UIImage(named: btnImgSelected), forState: .Normal)
   }
  }
  //setNeedsDisplay會自動調用drawRect方法 進行畫線
  self.setNeedsDisplay()
 }
 //計算2個節點中心的坐標
 private func centerPoint(startPoint: CGPoint, endPoint:CGPoint) -> CGPoint {
  let rightPoint = startPoint.x > endPoint.x ? startPoint.x : endPoint.x
  let leftPoint = startPoint.x < endPoint.x ? startPoint.x : endPoint.x
  let topPoint = startPoint.y > endPoint.y ? startPoint.y : endPoint.y
  let bottomPoint = startPoint.y < endPoint.y ? startPoint.y : endPoint.y
  //x坐標: leftPoint +(rightPoint-leftPoint)/2 = (rightPoint+leftPoint)/2
  return CGPointMake((rightPoint + leftPoint)/2 + btnWH/2, (topPoint + bottomPoint)/2 + btnWH/2);
 }
 func recoverNodeStatus() {
  selectBtnTagArray.removeAll()
  for btn in btnArray {
   btn.setImage(UIImage(named: btnImgNormal), forState: .Normal)
  }
  self.setNeedsDisplay()
 }
2、畫線:在drawRect方法中進行畫線。
 override func drawRect(rect: CGRect) {
  print("執行drawRect")
  let context = UIGraphicsGetCurrentContext() //獲取畫筆上下文
  var i = 0
  for tag in selectBtnTagArray {
   if (0 == i) {
    //開始畫線,設置直線的起點坐標
    CGContextMoveToPoint(context, btnArray[tag].center.x, btnArray[tag].center.y)
   } else {
    //畫直線,設置直線的終點坐標
    CGContextAddLineToPoint(context, btnArray[tag].center.x,btnArray[tag].center.y)
   }
   i = i+1
  }
  //如果有選中的節點,就取 跟著 手指的滑動 畫線
  if (selectBtnTagArray.count > 0) {
   // 移除最後一條多余的線,
   if gesturePoint != CGPointZero {
    CGContextAddLineToPoint(context, gesturePoint.x, gesturePoint.y)
   }
  }
  CGContextSetLineWidth(context, 10)  //設置畫筆寬度
  CGContextSetLineJoin(context, .Round) //兩個線相交點 平滑處理
  CGContextSetLineCap(context, .Round) //設置線條兩端的樣式為圓角
  CGContextSetRGBStrokeColor(context, 227/255.0, 54/255.0, 58/255.0, 1)
  CGContextStrokePath(context)   // //對線條進行渲染
 }
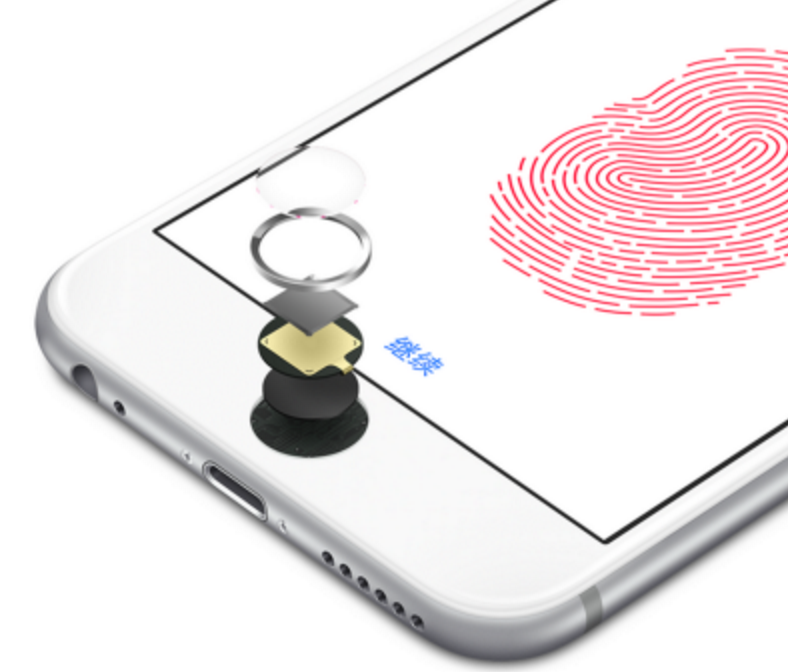
二、指紋驗證
iPhone 的Home鍵 上的金屬環 能感應手指,通知Touch ID 讀取指紋,Touch ID 傳感器 可以拍攝 皮膚 皮下層指紋。
每次使用指紋,Touch ID 會持續的添加新的指紋特性,進一步提高准確、安全性。
Touch ID 不會儲存指紋的圖像。它只存儲指紋的數學表達式。設備中的芯片還包含稱為“Secure Enclave”的高級安全架構,專門用於保護密碼和指紋數據。指紋數據通過 Secure Enclave 的專用密鑰得到加密和保護。iOS 和其他 app 絕不會訪問您的指紋數據,指紋數據絕不會存儲到 Apple 服務器、 iCloud 或其他地方。
1、 import LocalAuthentication
2、用 LAContext 類的 canEvaluatePolicy 方法 判斷設備是否支持指紋,然後用 evaluatePolicy 方法 來進行指紋驗證。
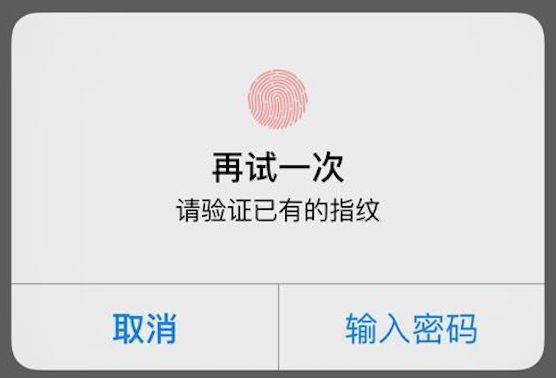
執行evaluatePolicy方法,系統會自動彈出 驗證指紋的提示框,提示副標題可以自己設定。
如果輸入錯誤後,系統會自動進入“再試一次”的提示框,點擊右邊的 “輸入密碼”選項,要自己寫代碼實現 輸入密碼的彈框。
Demo地址:https://github.com/bugaoshuni/TouchIDAndGestureLock
以上所述是小編給大家介紹的使用Swift代碼實現iOS手勢解鎖、指紋解鎖實例詳解,希望對大家有所幫助!

- 值得珍藏的iOS開辟經常使用代碼塊
- iOS Webview自順應現實內容高度的4種辦法詳解
- iOS 開辟經常使用宏總結
- iOS經常使用加密算法引見和代碼理論
- 比擬IOS開辟中經常使用視圖的四種切換方法
- iOS中NSArray數組經常使用處置方法
- Swift 同享文件操作小結(iOS 8 +)
- Swift 2.1 為 UIView 添加點擊事宜和點擊後果
- 在Swift中應用JSONModel 實例代碼
- iOS App應用SQLite之句柄的界說及數據庫的根本操作
- iOS中的表單按鈕選項UIActionSheet經常使用辦法整頓
- 應用Swift代碼完成iOS手勢解鎖、指紋解鎖實例詳解
- iOS運用開辟中AFNetworking庫的經常使用HTTP操作辦法小結
- 詳解iOS App中UISwitch開關組件的根本創立及應用辦法
- iOS運用中UILabel文字顯示後果的經常使用設置總結