
iOS項目開發--實現類似淘寶詳情頁面
編輯:IOS開發綜合
前段時間公司在研發一個電商項目,趁現在有時間把其中的知識點整理整理。
項目的商品詳情頁面當時是仿制淘寶的,用到的第三方庫是MJRefresh,上拉操作和下拉操作的刷新效果是把MJRefresh刷新效果從新建個分類封裝了一下,感謝傑哥!!!
基本思路:
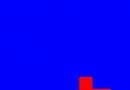
1、設置一個 UIScrollView 作為視圖底層,並且設置分頁為兩頁
2、然後在第一個分頁上添加一個 UITableView 並且設置表格能夠上提加載(上拉操作即為讓視圖滾動到下一頁)
3、 在第二個分頁上添加一個 UIScrollView 並且設置能有下拉刷新操作(下拉操作即為讓視圖滾動到上一頁)
4、第二個分頁UIScrollView添加子UIView,一般式商品的圖文詳情、產品參數、店鋪等
5、Demo只提供簡單的思路,項目具體實現基本相同

 /** 封裝刷新 MJRefresh */
#import "QRG_MJRefreshAutoFooter.h"
#import "QRG_MJRefreshNormalHeader.h"

#import "CollectionViewCell.h"
#define WIDTH [UIScreen mainScreen].bounds.size.width
#define HEIGHT [UIScreen mainScreen].bounds.size.height

#define ARCCOLOR (arc4random() % 255/256.0)
#import "ViewController.h"
主要代碼
- (void)viewDidLoad {
 [super viewDidLoad];

 /** 底層view*/
 UIScrollView *mainScrollView = [[UIScrollView alloc] init];
 mainScrollView.scrollEnabled = NO;
 mainScrollView.frame = CGRectMake(0, 0, WIDTH, HEIGHT);
 mainScrollView.contentSize = CGSizeMake(WIDTH, HEIGHT * 2);
 mainScrollView.backgroundColor = [UIColor greenColor];
 mainScrollView.pagingEnabled = YES;
 mainScrollView.bounces = YES;
 [self.view addSubview:mainScrollView];
 /** 第一頁面 table*/
 OneTable = [[UITableView alloc] init];
 OneTable.frame = CGRectMake(0,0, WIDTH, HEIGHT - 64);
 OneTable.separatorColor = [UIColor greenColor];
 OneTable.delegate = self;
 OneTable.dataSource = self;
 OneTable.rowHeight = 80;
 [mainScrollView addSubview:OneTable];
 /** 第二頁面 scrollView*/
 UIScrollView *TwoScrollView = [[UIScrollView alloc] init];
 TwoScrollView.frame = CGRectMake(0, HEIGHT + 64, WIDTH, HEIGHT - 64);
 TwoScrollView.contentSize = CGSizeMake(WIDTH * 3, HEIGHT - 64);
 TwoScrollView.backgroundColor = [UIColor cyanColor];
 TwoScrollView.pagingEnabled = YES;
 TwoScrollView.bounces = NO;

 [mainScrollView addSubview:TwoScrollView];

 /** 第二頁面 table*/

 TwoTable = [[UITableView alloc] init];
 TwoTable.frame = CGRectMake(WIDTH, 0, WIDTH, HEIGHT - 64);
 TwoTable.separatorColor = [UIColor redColor];
 TwoTable.delegate = self;
 TwoTable.dataSource = self;
 [TwoScrollView addSubview:TwoTable];

 /** 第二頁面 UICollectionView*/
 UICollectionViewFlowLayout *flow = [[UICollectionViewFlowLayout alloc] init];
 [flow setScrollDirection:UICollectionViewScrollDirectionVertical];

 UICollectionView *TwoCollectionView = [[UICollectionView alloc] initWithFrame:CGRectMake(0, 0, WIDTH, HEIGHT - 64) collectionViewLayout:flow];
 TwoCollectionView.backgroundColor = [UIColor lightTextColor];
 TwoCollectionView.delegate = self;
 TwoCollectionView.dataSource = self;
 [TwoScrollView addSubview:TwoCollectionView];

// [TwoCollectionView registerClass:[UICollectionViewCell class] forCellWithReuseIdentifier:@"Coll"];

 [TwoCollectionView registerNib:[UINib nibWithNibName:@"CollectionViewCell" bundle:nil] forCellWithReuseIdentifier:@"Coll"];


 //設置UITableView 上拉加載
 OneTable.mj_footer = [QRG_MJRefreshAutoFooter footerWithRefreshingBlock:^{
  //上拉,執行對應的操作---改變底層滾動視圖的滾動到對應位置
  //設置動畫效果
  [UIView animateWithDuration:0.5 delay:0.0 options:UIViewAnimationOptionLayoutSubviews animations:^{
   //   self.scrollV.contentOffset = CGPointMake(0, IPHONE_H);
   [mainScrollView setContentOffset:CGPointMake(0, HEIGHT)];

  } completion:^(BOOL finished) {
   //結束加載
   [OneTable.mj_footer endRefreshing];
  }];


 }];

 //設置TwoCollectionView 有下拉操作
 TwoCollectionView.mj_header = [QRG_MJRefreshNormalHeader headerWithRefreshingBlock:^{
  //下拉執行對應的操作
  //  self.scrollV.contentOffset = CGPointMake(0,0);
  [UIView animateWithDuration:1 animations:^{
   [mainScrollView setContentOffset:CGPointMake(0, - 64)];

  }];

  //結束加載
  [TwoCollectionView.mj_header endRefreshing];
 }];

 //設置TwoTable 有下拉操作
 TwoTable.mj_header = [QRG_MJRefreshNormalHeader headerWithRefreshingBlock:^{
  //下拉執行對應的操作
  //  self.scrollV.contentOffset = CGPointMake(0,0);

  [UIView animateWithDuration:1 animations:^{
   [mainScrollView setContentOffset:CGPointMake(0, - 64)];

  }];
  //結束加載
  [TwoTable.mj_header endRefreshing];
 }];


}
pragma mark---------Delegate
#pragma mark---------tableDelegate
- (CGFloat)tableView:(UITableView *)tableView heightForRowAtIndexPath:(NSIndexPath *)indexPath
{
 CGFloat height;
  if([tableView isEqual:OneTable])
  {
   height = 80;
  }else
  {
   return 120;
  }
 return height;


}
- (NSInteger)tableView:(UITableView *)tableView numberOfRowsInSection:(NSInteger)section
{
 return 10;
}

- (UITableViewCell *)tableView:(UITableView *)tableView cellForRowAtIndexPath:(NSIndexPath *)indexPath
{
 static NSString *Cell = @"Cell";
 UITableViewCell *cell = [tableView dequeueReusableCellWithIdentifier:Cell];

 if(!cell)
 {
  cell = [[UITableViewCell alloc]initWithStyle:UITableViewCellStyleDefault reuseIdentifier:Cell];
 }

 cell.textLabel.text = [NSString stringWithFormat:@"%ld--askl",indexPath.row];
 cell.imageView.image = [UIImage imageNamed:@"6"];
 return cell;

}

#pragma mark---------CollectionViewDelegate
- (NSInteger)collectionView:(UICollectionView *)collectionView numberOfItemsInSection:(NSInteger)section
{
 return 20;
}
- (CGSize)collectionView:(UICollectionView *)collectionView layout:(UICollectionViewLayout *)collectionViewLayout sizeForItemAtIndexPath:(NSIndexPath *)indexPath
{
 return CGSizeMake(150, 100);
}

- (UICollectionViewCell *)collectionView:(UICollectionView *)collectionView cellForItemAtIndexPath:(NSIndexPath *)indexPath
{
 static NSString *Coll = @"Coll";

 CollectionViewCell *cell = [collectionView dequeueReusableCellWithReuseIdentifier:Coll forIndexPath:indexPath];

// cell.backgroundColor =[UIColor greenColor];
 return cell;
}
以上就是本文的全部內容,希望對大家的學習有所幫助,也希望大家多多支持本站。

相關文章
+