iOS實現淘寶上拉進入詳情頁交互效果
前言
這篇文章主要給大家介紹的是利用iOS實現淘寶中上拉進入詳情頁交互的效果,下面話不多說,來看看詳細的實現過程。
實現分析
可以看到,該頁面是分為兩部分的,一部分是一開始就能看到的商品信息,然後我們上拉屏幕,屏幕不斷往上滾動,滾動到第一部分結束時可以看到底部有“繼續拖動,查看圖文詳情”一行文本出現。繼續上拉到一個臨界點便觸發了翻頁,此時第二部分以動畫的形式從底部湧出占滿整個屏幕。而且效果是該頁面整體上移了,即第一部分和第二部分都是上移的。
此時,第二部分占滿著整個屏幕,若我們下拉屏幕,則在屏幕頂部淡出“下拉,返回寶貝詳情”的文本提示,並且達到一個臨界值後文本變為“釋放,返回寶貝詳情”,此時松開手指,頁面又滾動到第一部分的尾部。

實現方法
在自己寫的demo中,第一部分是個tableView,展示商品基本信息。第二部分是個webView,展示商品圖文詳情。
第一步首先加載需要的視圖。主要是第一部分的tableView和第二部分的webView,還有第二部分頂部顯示上拉返回文本提示的headLab。為了節省資源,其實可以在上拉觸發時再加載第二部分視圖的,但是這裡僅作示例,所以並沒有懶加載。
- (void)loadContentView
{
  // first view
  [self.contentView addSubview:self.tableView];

  // second view
  [self.contentView addSubview:self.webView];

  UILabel *hv = self.headLab;
  // headLab
  [self.webView addSubview:hv];
  [self.headLab bringSubviewToFront:self.contentView];
}


- (UILabel *)headLab
{
  if(!_headLab){
    _headLab = [[UILabel alloc] init];
    _headLab.text = @"上拉,返回詳情";
    _headLab.textAlignment = NSTextAlignmentCenter;
    _headLab.font = FONT(13);

  }

  _headLab.frame = CGRectMake(0, 0, PDWidth_mainScreen, 40.f);
  _headLab.alpha = 0.f;
  _headLab.textColor = PDColor_button_Gray;


  return _headLab;
}


- (UITableView *)tableView
{
  if(!_tableView){
    _tableView = [[UITableView alloc] initWithFrame:CGRectMake(0, 0, PDWidth_mainScreen, self.contentView.bounds.size.height) style:UITableViewStylePlain];
    //  _tableView.contentSize = CGSizeMake(PDWidth_mainScreen, 800);
    _tableView.dataSource = self;
    _tableView.delegate = self;
    _tableView.rowHeight = 40.f;
    UILabel *tabFootLab = [[UILabel alloc] initWithFrame:CGRectMake(0, 0, PDWidth_mainScreen, 60)];
    tabFootLab.text = @"繼續拖動,查看圖文詳情";
    tabFootLab.font = FONT(13);
    tabFootLab.textAlignment = NSTextAlignmentCenter;
//    tabFootLab.backgroundColor = PDColor_Orange;
    _tableView.tableFooterView = tabFootLab;
  }

  return _tableView;
}


- (UIWebView *)webView
{
  if(!_webView){
    _webView = [[UIWebView alloc] initWithFrame:CGRectMake(0, _tableView.contentSize.height, PDWidth_mainScreen, PDHeight_mainScreen)];
    _webView.delegate = self;
    _webView.scrollView.delegate = self;
    [_webView loadRequest:[NSURLRequest requestWithURL:[NSURL URLWithString:@"https://www.baidu.com"]]];
  }

  return _webView;
}
然後實現滾動視圖UIScrollView的代理方法,在裡面完成滾動到達臨界值後,觸發翻頁動畫的處理。包括了上拉翻到第二頁和下拉翻回第一頁兩部分,即要在該方法裡通過判斷scrollView的類型做相應的處理。
#pragma mark ---- scrollView delegate

-(void)scrollViewDidEndDragging:(UIScrollView *)scrollView willDecelerate:(BOOL)decelerate
{
  CGFloat offsetY = scrollView.contentOffset.y;

  if([scrollView isKindOfClass:[UITableView class]]) // tableView界面上的滾動
  {
    // 能觸發翻頁的理想值:tableView整體的高度減去屏幕本省的高度
    CGFloat valueNum = _tableView.contentSize.height -PDHeight_mainScreen;
    if ((offsetY - valueNum) > _maxContentOffSet_Y)
    {
      [self goToDetailAnimation]; // 進入圖文詳情的動畫
    }
  }

  else // webView頁面上的滾動
  {
    NSLog(@"-----webView-------");
    if(offsetY<0 && -offsetY>_maxContentOffSet_Y)
    {
      [self backToFirstPageAnimation]; // 返回基本詳情界面的動畫
    }
  }
}
再看看兩個翻頁的動畫,其實很簡單,就是移動它們的位置。
// 進入詳情的動畫
- (void)goToDetailAnimation
{
  [UIView animateWithDuration:0.3 delay:0.0 options:UIViewAnimationOptionLayoutSubviews animations:^{
    _webView.frame = CGRectMake(0, 0, PDWidth_mainScreen, PDHeight_mainScreen);
    _tableView.frame = CGRectMake(0, -self.contentView.bounds.size.height, PDWidth_mainScreen, self.contentView.bounds.size.height);
  } completion:^(BOOL finished) {

  }];
}


// 返回第一個界面的動畫
- (void)backToFirstPageAnimation
{
  [UIView animateWithDuration:0.3 delay:0.0 options:UIViewAnimationOptionLayoutSubviews animations:^{
    _tableView.frame = CGRectMake(0, 0, PDWidth_mainScreen, self.contentView.bounds.size.height);
    _webView.frame = CGRectMake(0, _tableView.contentSize.height, PDWidth_mainScreen, PDHeight_mainScreen);

  } completion:^(BOOL finished) {

  }];
}
然後還有個在第二頁下拉時屏幕頂部的文本提示的動畫呢。這個我我們通過KVO來監聽webView的scrollView的偏移量,只要其偏移量發生變化,便會實時執行KVO的代理方法,然後我們在方法內根據其偏移量的變動完成動畫即可(隨著偏移量變大字體變得非透明,達到某個臨界點後,字體變為紅色,文本內容也變為“釋放,返回詳情”)。
開始監聽webView滾動的偏移量
  // 開始監聽_webView.scrollView的偏移量
  [_webView.scrollView addObserver:self forKeyPath:@"contentOffset" options:NSKeyValueObservingOptionNew|NSKeyValueObservingOptionOld context:nil];
在KVO的代理方法裡,根據偏移量完成提示文本的動畫
- (void)observeValueForKeyPath:(NSString *)keyPath ofObject:(id)object change:(NSDictionary<NSString *,id> *)change context:(void *)context
{
  if(object == _webView.scrollView && [keyPath isEqualToString:@"contentOffset"])
  {
    NSLog(@"----old:%@----new:%@",change[@"old"],change[@"new"]);
    [self headLabAnimation:[change[@"new"] CGPointValue].y];
  }else
  {
    [super observeValueForKeyPath:keyPath ofObject:object change:change context:context];
  }

}
提示文本的動畫的實現代碼:
// 頭部提示文本動畫
- (void)headLabAnimation:(CGFloat)offsetY
{
  _headLab.alpha = -offsetY/60;
  _headLab.center = CGPointMake(PDWidth_mainScreen/2, -offsetY/2.f);
  // 圖標翻轉,表示已超過臨界值,松手就會返回上頁
  if(-offsetY>_maxContentOffSet_Y){
    _headLab.textColor = [UIColor redColor];
    _headLab.text = @"釋放,返回詳情";
  }else{
    _headLab.textColor = PDColor_button_Gray;
    _headLab.text = @"上拉,返回詳情";
  }
}
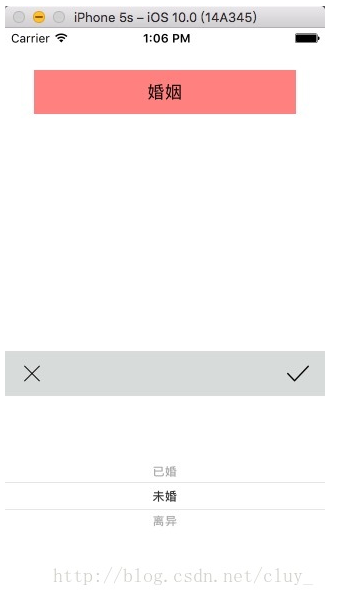
實現的最終效果:
總結
以上就是這篇文章的全部內容了,希望本文的內容對各位iOS開發者們能有所幫助,如果有疑問大家可以留言交流。