零基礎學習iOS直播之采集
編輯:IOS開發綜合
直播的采集由采集的設備(攝像頭、話筒)不同分為視頻采集和音頻采集,本篇文章會分別介紹。
1.采集步驟
- 創建捕捉會話(AVCaptureSession),iOS調用相機和話筒之前都需要創建捕捉對話,把輸入輸出設備添加進對話中。
- 往會話中添加視頻輸入對象(AVCaptureDeviceInput)。
- 往會話中添加音頻輸入對象(AVCaptureDeviceInput)。
- 往會話中添加視頻輸出對象(AVCaptureVideoDataOutput)。
- 往會話中添加音頻輸出對象(AVCaptureAudioDataOutput)。
- 添加視屏預覽圖層(AVCaptureVideoPreviewLayer)。
- 開啟會話。
- 推流(以後講)。
2.效果圖

這是後置攝像頭采集的,直播一般用前置攝像頭的,但是我實在沒勇氣放出我的自拍😂。
3.代碼演示
// 采集
- (void)setupCaputureVideo {
 // 1.創建捕獲對話,必須要強引用,否則會釋放
 _captureSession = [[AVCaptureSession alloc] init];
 // 2.捕獲攝像頭設備,默認前置攝像頭
 AVCaptureDevice *videoDevice = [self getVideoDevice:AVCaptureDevicePositionFront];
 // 3.獲取聲音設備
 AVCaptureDevice *audioDevice = [AVCaptureDevice defaultDeviceWithMediaType:AVMediaTypeAudio];
 // 4.創建對應視頻設備輸入對象
 _currentVideoDeviceInput = [AVCaptureDeviceInput deviceInputWithDevice:videoDevice error:nil];
 // 5.創建對應音頻設備輸入對象
 AVCaptureDeviceInput *audioDeviceInput = [AVCaptureDeviceInput deviceInputWithDevice:audioDevice error:nil];
 // 6.添加到會話中 注意:最好要判斷是否能添加輸入,會話不能添加空的
 // 6.1 添加視頻
 if ([_captureSession canAddInput:_currentVideoDeviceInput]) {
 [_captureSession addInput:_currentVideoDeviceInput];
 }
 // 6.2 添加音頻
 if ([_captureSession canAddInput:audioDeviceInput]) {
 [_captureSession addInput:audioDeviceInput];
 }
 // 7.捕獲視頻數據輸出設備
 AVCaptureVideoDataOutput *videoOutput = [[AVCaptureVideoDataOutput alloc] init];
 //7.1 設置代理, 捕獲視頻樣品數據
 dispatch_queue_t videoQueue = dispatch_queue_create("Video Capure Queue", DISPATCH_QUEUE_SERIAL);
 [videoOutput setSampleBufferDelegate: self queue:videoQueue];
 // 8.設置音頻數據輸出設備
 AVCaptureAudioDataOutput *audioOutput = [[AVCaptureAudioDataOutput alloc] init];
 // 8.1 設置代理,捕獲音頻樣品數據 注意:必須是串行隊列才能捕獲到數據,而且不能為空
 dispatch_queue_t audioQueue = dispatch_queue_create("Audio Capure Queue", DISPATCH_QUEUE_SERIAL);
 [audioOutput setSampleBufferDelegate:self queue:audioQueue];
 // 9.添加到會話中 注意:最好要判斷是否能添加輸入,會話不能添加空的
 if ([_captureSession canAddOutput:videoOutput]) {
 [_captureSession addOutput:videoOutput];
 }
 if ([_captureSession canAddOutput:audioOutput]) {
 [_captureSession addOutput:audioOutput];
 }
 // 10.獲取視屏輸入與輸出連接,用於分辨音視頻數據
 _videoConnection = [videoOutput connectionWithMediaType:AVMediaTypeVideo];
 // 11.添加視屏預覽圖層
 _previewdLayer = [AVCaptureVideoPreviewLayer layerWithSession:_captureSession];
 _previewdLayer.frame = [UIScreen mainScreen].bounds;
 [self.view.layer insertSublayer:_previewdLayer atIndex:0];
 // 12.開啟會話
 [_captureSession startRunning];
}
// 根據攝像頭方向獲取攝像頭
- (AVCaptureDevice *)getVideoDevice: (AVCaptureDevicePosition)position {
 NSArray *devices = [AVCaptureDevice devicesWithMediaType:AVMediaTypeVideo];
 for (AVCaptureDevice *device in devices) {
 if (device.position == position) {
 return device;
 }
 }
 return nil;
}
分析:
(1)攝像頭:每個手機都有且僅有兩個攝像頭,前置攝像頭和後置攝像頭,包括iPhone 7 Plus,它後面的兩個攝像頭統稱為後置攝像頭。所以獲取的是攝像頭數組,我們根據攝像頭的方向獲取指定的攝像頭。對話裡只能有一個攝像頭設備。
(2)攝像頭方向(AVCaptureDevicePosition):是一個枚舉,有三個值可選擇。不過如果選擇
AVCaptureDevicePositionUnspecified,那麼是不能調用攝像頭的。
typedef NS_ENUM(NSInteger, AVCaptureDevicePosition) {
 AVCaptureDevicePositionUnspecified = 0, // 不指定
 AVCaptureDevicePositionBack = 1, //後置
 AVCaptureDevicePositionFront = 2 // 前置
}
(3)代理:AVCaptureVideoDataOutputSampleBufferDelegate, AVCaptureAudioDataOutputSampleBufferDelegate,分別為視頻和音頻輸出設備對象的代理,兩個代理都有下面的方法:
// 獲取輸出設備數據,有可能是音頻,有可能是視頻
- (void)captureOutput:(AVCaptureOutput *)captureOutput didOutputSampleBuffer:(CMSampleBufferRef)sampleBuffer fromConnection:(AVCaptureConnection *)connection {
 if (_videoConnection == connection) {
 NSLog(@"采集到視屏數據");
 }else {
 NSLog(@"采集到音頻數據");
 }
}
4.切換攝像頭
#pragma mark - 切換攝像頭
- (IBAction)toggleCapture:(id)sender {
 // 1.獲取當前設備方向
 AVCaptureDevicePosition cureentPosition = _currentVideoDeviceInput.device.position;
 // 2.獲取需要改變的方向
 AVCaptureDevicePosition togglePosition = (cureentPosition == AVCaptureDevicePositionFront ? AVCaptureDevicePositionBack : AVCaptureDevicePositionFront);
 // 3.獲取需要改變的攝像頭設備
 AVCaptureDevice *toggleDevice = [self getVideoDevice:togglePosition];
 // 4.獲取需要改變的攝像頭輸入設備
 AVCaptureDeviceInput *toggleDeviceInput = [[AVCaptureDeviceInput alloc] initWithDevice:toggleDevice error:nil];
 // 5.停止會話,否則會有一瞬間的白屏
 [_captureSession stopRunning];
 // 6.移除之前的攝像頭輸入設備,否則會崩潰,因為會話裡只能有一個攝像頭設備
 [_captureSession removeInput:_currentVideoDeviceInput];
 // 7.添加新的攝像頭輸入設備
 [_captureSession addInput:toggleDeviceInput];
 // 8.重新開始會話
 [_captureSession startRunning];
 // 記錄當前攝像頭輸入設備
 //9.重新開始
 _currentVideoDeviceInput = toggleDeviceInput;
}
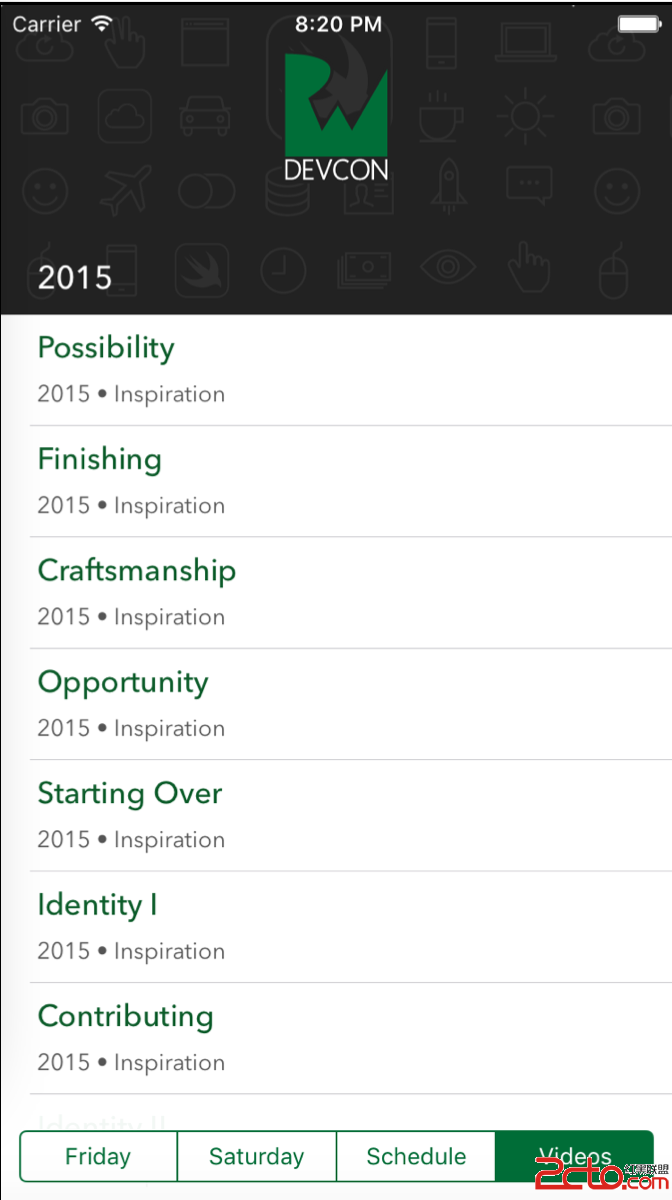
demo裡還有其他的功能,但是感覺沒什麼太大用處,就不講了,有興趣的可以去我的GitHub上下載看看。
demo下載
demo下載地址。下載下來運行,發現報錯。
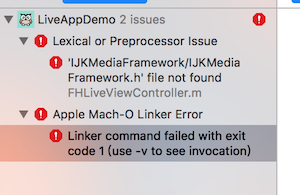
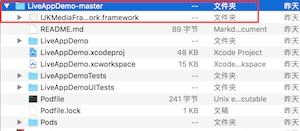
那是因為我沒有在工程裡上傳ijkplayer視屏直播框架,我能上傳上去,但下載太慢了,什麼原因大家都懂得。我把ijkplayer視屏直播框架放到百度雲上了,沒有密碼,下載下來之後,放到LiveAppDemo-master文件夾裡,重新打開就可以運行了。
以上就是本文的全部內容,希望本文的內容對大家的學習或者工作能帶來一定的幫助,同時也希望多多支持本站!

相關文章
+- iOS開發入門 ☞ OC語言(基礎知識)
- iOS基礎UI控件之UIView、UITextField、UILabel、UIColor、UIButton、UIImageView
- iOS基礎通過案例學知識之UITableView
- iOS基礎通知代理之NSNotificationCenter、Delegate
- 新手iPhone 4越獄解鎖基礎知識
- iPhone浏覽器Safari基礎使用技巧
- iOS7 Beta2閃退的解決基礎方法
- 蘋果iOS7系統基礎教程:讓系統字體變粗
- iPhone/iPad電子書管理基礎教程
- iPhone/iPad視頻管理基礎教程
- iPhone/iPad音樂管理基礎教程
- iPhone手機炒股基礎操作教程
- iphone十二個基礎操作教程
- iOS 7基礎教程: AirDrop文件傳輸詳解
- iOS7基礎技巧:鎖屏界面拒接來電