android中UIColletionView瀑布流布局實現思路以及封裝的實現
瀑布流實現思路
- 第一種就是用ScrollView來進行實現,由於它不具備復用的功能,因此我們需要自己寫一套類似復用的模塊來進行優化
- 第二種就是利用apple做好的復用模塊,自定義UIColletionLayout來實現瀑布流,想想也是第二種實現起來更快更優,OK,封裝一個小小的框架來試試
默認兩列


其他案例
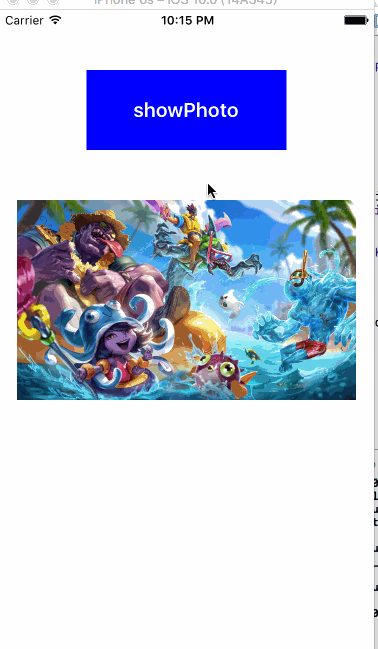
上面的動畫切換布局也是自定義UICollectionLayout來進行布局的,簡單的靜態圖片布局展示其實就重寫幾個方法就可以了
1.prepareLayout 每次重新刷新collectionView的時候會調用一次,做一些初始化的工作
2.layoutAttributesForElementsInRect 返回已經制定好之後的每個cell對應的attribute屬性對象進行布局
3.layoutAttributesForItemAtIndexPath 該方法會一直調用,每次cell出來就會根據對應的indexpath來進行方法調用,因此關鍵布局代碼就可以放置在這裡進行重新計算
4.collectionViewContentSize 計算整體的大小,實現滾動
上面插入樣式實現的傳送門
瀑布流實現分析
1.基本變量的聲明
// 每一列的間距
static const CGFloat MKJDefaultColumnMargin = 10;
// 每一行間距
static const CGFloat MKJDefaultRowMargin = 10;
// 整體的上間距,左間距,下間距,右間距
static const UIEdgeInsets MKJDefaultEdgeInsets = {10,10,10,10};
// 默認是多少列
static const NSUInteger MKJDefaultColumnCounts = 2;

@interface MKJWaterFallLayout ()

@property (nonatomic,strong) NSMutableArray *attributeArr; // cell屬性的數組
@property (nonatomic,strong) NSMutableArray *columnHeightArr; // 每列的高度數組

@end
2.初始化
// 每次刷新會調用一次
- (void)prepareLayout
{
  [super prepareLayout];

  // 每次重新刷新的時候清除之前的所有高度值,默認就是UIEdg給定的top
  [self.columnHeightArr removeAllObjects];
  for (NSInteger i = 0; i < [self columnCount]; i++) {
    [self.columnHeightArr addObject:@([self insetMargin].top)];
  }
  // 每次刷新把對應的att屬性清空
  [self.attributeArr removeAllObjects];
  // 初始化一次每個cell對應的attribute屬性
  NSInteger count = [self.collectionView numberOfItemsInSection:0];
  for (NSInteger i = 0; i < count; i++) {
    NSIndexPath *indexpath = [NSIndexPath indexPathForItem:i inSection:0];
    UICollectionViewLayoutAttributes *attribute = [self layoutAttributesForItemAtIndexPath:indexpath];
    [self.attributeArr addObject:attribute];
  }
}
3.關鍵計算代碼
// 返回attribute屬性數組決定最後的排布
- (NSArray<UICollectionViewLayoutAttributes *> *)layoutAttributesForElementsInRect:(CGRect)rect
{
  return self.attributeArr;
}

// 返回對應的indexpath下每個cell的屬性 cell的出現會一直刷新該方法
- (UICollectionViewLayoutAttributes *)layoutAttributesForItemAtIndexPath:(NSIndexPath *)indexPath
{
  // 初始化布局屬性---> 對應的indexpath
  UICollectionViewLayoutAttributes *att = [UICollectionViewLayoutAttributes layoutAttributesForCellWithIndexPath:indexPath];

  CGFloat collectionW = self.collectionView.frame.size.width;

  // 寬度是根據列數和間距固定算出來的
  CGFloat width = (collectionW - [self insetMargin].left - [self insetMargin].right - ([self columnCount] - 1) * [self columnMargin]) / [self columnCount];

  // 高度是根據代理的數據源返回比例計算的
  CGFloat height = [self.delegate MKJWaterFallLayout:self heightForItemAtIndexPath:indexPath] * width;
  // X 和 Y值都是在找出最小column之後才能確定,核心就是根據列數,找出最小高度的那一列
  // 先取出第一個默認是最小的
  CGFloat minColumnHeight = [self.columnHeightArr[0] doubleValue];
  // 默認最小的是第0列
  NSUInteger finalCol = 0;
  for (NSInteger i = 1 ; i < [self columnCount]; i++) {
    CGFloat currentColHeight = [self.columnHeightArr[i] doubleValue];
    if (minColumnHeight > currentColHeight) {
      minColumnHeight = currentColHeight;
      finalCol = i;
    }
  }

  // x,y值是根據最小高度列算出來的
  CGFloat x = [self insetMargin].left + (width + [self columnMargin]) * finalCol;
  CGFloat y = minColumnHeight;
  // 當你是一個行排布的時候 默認是top值,不需要加間距
  NSInteger count = indexPath.item;
  if ((count / ([self columnCount])) >= 1) {
    y += [self rowMargin];
  }
  att.frame = CGRectMake(x, y, width, height);
  self.columnHeightArr[finalCol] = @(CGRectGetMaxY(att.frame));
  return att;

}
這裡的計算簡概括為就是對每個cell進行frame的計算
1.寬度的計算是根據列間距和整體左右間距以及行數進行限制,這些參數可以是固定值,也可以是代理傳進去的
2.高度的計算必定是根據外部代理進行計算的
3.X值的計算是根據這個框架內部的每一列的高度數組進行之前的緩存高度,進行最小值計算,然後拿出最小值對應的列數,根據上面算出來的高度進行X值的計算
4.Y值的計算和X值一樣,根據給定的數組,比出最小高度列的列數,根據數組的高度,計算出對應的Y值,最終再進行數組對應列數的高度更新
4.獲取實際能容大小,讓其可以滾動
// 計算出滾動區域的大小
- (CGSize)collectionViewContentSize
{
  CGFloat maxColumHeight = [self.columnHeightArr[0] doubleValue];
  for (NSInteger i = 1; i < [self columnCount]; i++) {
    CGFloat currentColHeight = [self.columnHeightArr[i] doubleValue];
    if (maxColumHeight < currentColHeight) {
      maxColumHeight = currentColHeight;
    }
  }
  return CGSizeMake(0, maxColumHeight + [self insetMargin].bottom);

}
5.這個小框架已經封裝好了,簡單介紹下用法
// 聲明如下
- (UICollectionView *)colletionView
{
  if (_colletionView == nil) {
    MKJWaterFallLayout *layout = [[MKJWaterFallLayout alloc] init];
    layout.delegate = self;
    UICollectionView *collectionV = [[UICollectionView alloc] initWithFrame:[UIScreen mainScreen].bounds collectionViewLayout:layout];
    collectionV.backgroundColor = [UIColor redColor];
    [collectionV registerNib:[UINib nibWithNibName:productID bundle:nil] forCellWithReuseIdentifier:productID];
    collectionV.delegate = self;
    collectionV.dataSource = self;
    _colletionView = collectionV;

  }
  return _colletionView;
}

// 內部行數,間距的控制
#pragma mark - waterfallLayoutDelegate
- (CGFloat)MKJWaterFallLayout:(MKJWaterFallLayout *)layout heightForItemAtIndexPath:(NSIndexPath *)indexPath
{
  // 返回寬度和高度比例
  MKJProductModel *product = self.dataSource[indexPath.item];
  return product.h / product.w;
}

// 控制列間距
- (CGFloat)columnMarginForWaterFallLayout:(MKJWaterFallLayout *)collectionViewLayout
{
  return 10;
}
// 控制行間距
- (CGFloat)rowMarginForWaterFallLayout:(MKJWaterFallLayout *)collectionViewLayout
{
  return 30;
}
// 控制列數
- (NSUInteger)columnCountForWaterFallLayout:(MKJWaterFallLayout *)collectionViewLayout
{
//  if (self.dataSource.count > 50) {
//    return 3;
//  }
  return 3;
}
// 控制整體上左下右間距
- (UIEdgeInsets)insetForWaterFallLayout:(MKJWaterFallLayout *)collectionViewLayout
{
  return UIEdgeInsetsMake(10, 10, 10, 10);
}
Demo地址: http://xiazai.jb51.net/201702/yuanma/MKJWaterFallLayout_jb51.rar
以上就是本文的全部內容,希望對大家的學習有所幫助,也希望大家多多支持本站。


- Mac Android Studio快捷鍵整頓
- iOS 和 Android 哪一個更利於賺錢?
- Android中getActivity()為null的處理方法
- iOS的CoreAnimation開辟框架中的Layer層動畫制造解析
- 實例講授iOS中的CATransition轉場動畫應用
- IOS CoreAnimation中layer動畫閃耀的處理辦法
- iOS中UIActivityIndicatorView的用法及齒輪期待動畫實例
- iOS圖片縮小的方法(transform和frame)
- IOS UI進修教程之辨別NSBundle和NSURL(讀取文件、寫入文件)
- iOS運用開辟中視圖控件UIWindow的根本應用教程
- 簡略控制iOS運用開辟中sandbox沙盒的應用
- 解析iOS開辟中的FirstResponder第一呼應對象
- 深刻懂得iOS開辟中UIWindow的相干應用
- 詳解iOS設計中的UIWindow應用
- resource fork, Finder information, or similar detritus not allowed錯誤處置步驟