
IOS控件的應用UIPageController與UIScrollView
UIPageController是大多數IOS教程上不會寫的系統自帶控件。它主要的功能是實現視圖分頁,有點類似於網頁上的分頁功能。
這次主要通過一個例子來講講UIPageController控件和UIScrollView的應用。首先上圖:

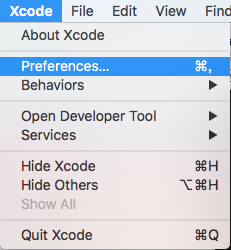
圖中標有紅框的地方,便是UIPageController的展現樣式,在xcode裡它是這個樣子的:
現在要開始使用UIPageController控件了,首先在申明文件頂部添加一個常量,來定義滾圖中的子項數量
#define
PAGENUM 4
在類的申明文件(.h)裡添加對Page控制器的申明:
@property
(strong, nonatomic) IBOutlet UIPageControl *page;
@property
(strong, nonatomic) IBOutlet UIScrollView *imageScrollView;
然後在實現文件(.m)裡添加 對page對象的
@synthesize
page;
@synthesize
imageScrollView;
實現page對象的自動存取器。
改寫viewDidLoad方法如下
(void)viewDidLoad
{
[super
viewDidLoad];
//這裡定義了滾動視圖的大小,是否支持翻頁,是否顯示水平滾動標示,委托對象是哪個
imageScrollView.contentSize
= CGSizeMake(PAGENUM * 320.0f, imageScrollView.frame.size.height);
imageScrollView.pagingEnabled
= YES;
imageScrollView.showsHorizontalScrollIndicator
= NO;
imageScrollView.delegate
= self;
//這裡為滾動視圖添加了子視圖,為了能添加後續操作,我這裡定義的子視圖是按鍵UIButton
for
(int
i = 0; i < PAGENUM; i++) {
NSString
* fileName = [NSString stringWithFormat:@"%d.jpg",i+1];
UIButton
*imageButton = [[UIButton alloc] initWithFrame:CGRectMake(i * 320.0f, 0.0f, 320.0f, 218.0f)];
[imageButton
setBackgroundImage:[UIImage imageNamed:fileName] forState:UIControlStateNormal];
imageButton.tag
= 900 + i;
[imageScrollView
addSubview:imageButton];
}
//定義PageController
設定總頁數,當前頁,定義當控件被用戶操作時,要觸發的動作。
page.numberOfPages
= PAGENUM;
page.currentPage
= 0;
[page
addTarget:self action:@selector(pageTurn:) forControlEvents:UIControlEventValueChanged];
//使用NSTimer實現定時觸發滾動控件滾動的動作。
timeCount
= 0;
[NSTimer
scheduledTimerWithTimeInterval:5 target:self selector:@selector(scrollTimer) userInfo:nil repeats:YES];
}
增加兩個翻頁動畫和自動翻頁的函數
//滾圖的動畫效果
-(void)pageTurn:(UIPageControl
*)aPageControl{
int
whichPage = aPageControl.currentPage;
[UIView
beginAnimations:nil context:NULL];
[UIView
setAnimationDuration:0.3f];
[UIView
setAnimationCurve:UIViewAnimationCurveEaseInOut];
[imageScrollView
setContentOffset:CGPointMake(320.0f * whichPage, 0.0f) animated:YES];
[UIView
commitAnimations];
}
//定時滾動
-(void)scrollTimer{
timeCount
++;
if
(timeCount == PAGENUM) {
timeCount
= 0;
}
[imageScrollView
scrollRectToVisible:CGRectMake(timeCount * 320.0, 65.0, 320.0, 218.0) animated:YES];
}


- 【IOS 開發】基本 UI 控件詳解 (UISegmentedControl | UIImageView | UIProgressView | UISlider | UIAlertView )
- (NO.00005)iOS實現炸彈人游戲(四):游戲數據初始化介紹(一)
- touchesBegan: withEvent: 不執行解決
- IOS開發(48)之由init、loadView、viewDidLoad、viewDidUnload、dealloc的關系說起
- 可運行於IOS的Python解釋器
- iOS動畫詳解
- UIKit視圖動畫的微擴展
- iOS運用中UILabel文字顯示後果的經常使用設置總結
- ios8 UITableView設置 setSeparatorInset UIEdgeInsetsZero不起作用的解決辦法(去掉15px空白間距)
- IOS學習筆記46--Block探究(二)