IOS開發(68)之捕獲點擊劃屏手勢
1 前言
手勢其實是一組觸摸事件的組合, 手勢事件識別必須要添加到一個 UIView 這個類裡面去,一個單獨存在的視圖可以添加多個手勢識別器。一旦這個界面捕獲到了一些手勢動作,這個視圖將會把這個手勢動作傳遞給其他的手勢識別器。
一些觸摸事件需要手機系統的支持,如下是 iOS SDK5 提供的 6 個手勢識別器.
• Swipe //劃動
• Rotation //轉動
• Pinch //收縮
• Pan //搖動
• Long press //長按
• Tap //輕擊
最基礎的框架為了能夠處理手勢的動作必須要按照如下步驟來進行操作:
創建一個合適的手勢識別器的對象。
把這個手勢識別器的對象綁定到一個視圖上。
添加一些捕獲手勢事件發生的方法。
• 這個方法必須返回類型為空
• 這個方法要麼是無參數類型的,要麼只能接受一個 UIGestureRecognizer 類型的參數。
手勢識別器一般可以分為兩個大類,一個是單獨的一個手勢,一個是連貫的手勢組合。單獨的顧名思義, 就是一個手勢之後就會有一個監聽捕獲的事件,然後來做相應的操作。連貫的就是一組手勢動作,然後在進行 監聽捕獲事件進行相關的處理。的操作。連貫的就是一組手勢動作,然後在進行 監聽捕獲事件進行相關的處理。
參考代碼
- (void) tapRecognizer:(UITapGestureRecognizer *)paramSender{
/* */
}
- (void) tapRecognizer{
/* */
}
這節我們來學習UISwipeGestureRecognizer
2 代碼實例
ZYViewController.m
[plain]
- (void)viewDidLoad
{
[super viewDidLoad];
// Do any additional setup after loading the view, typically from a nib.
/* 實例化手勢對象 */
self.swipeGestureRecognizer = [[UISwipeGestureRecognizer alloc]
initWithTarget:self action:@selector(handleSwipes:)];
/*從右向左滑動*/
self.swipeGestureRecognizer.direction = UISwipeGestureRecognizerDirectionLeft;
/* 單個手指 */
self.swipeGestureRecognizer.numberOfTouchesRequired = 1;
/* 添加到view中 */
[self.view addGestureRecognizer:self.swipeGestureRecognizer];
}
- (void) handleSwipes:(UISwipeGestureRecognizer *)paramSender{
//按下
if (paramSender.direction & UISwipeGestureRecognizerDirectionDown){
NSLog(@"Swiped Down.");
}
//向左
if (paramSender.direction & UISwipeGestureRecognizerDirectionLeft){
NSLog(@"Swiped Left.");
}
//向右
if (paramSender.direction & UISwipeGestureRecognizerDirectionRight){
NSLog(@"Swiped Right.");
}
//抬起
if (paramSender.direction & UISwipeGestureRecognizerDirectionUp){
NSLog(@"Swiped Up.");
}
}
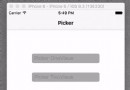
運行結果
鼠標在模擬器屏幕上從右向左移動後,控制台顯示的結果
2013-05-12 22:22:43.005 UISwipeGestureTest[734:c07] Swiped Left.