ios和node上傳下載文件
首先,上傳和下載需要server和client互相配合。同樣的客戶端代碼,可能在servlet裡能成功,換成node就不行,反過來也是一樣,因為不同的服務端,對http請求的處理可能不同。本文介紹的是服務端使用node,客戶端使用NSURLSession的情況
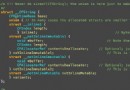
服務端代碼
我還沒見過哪種實現方式,比node+express更簡單的:
var express = require("express");

var app = express();

app.use(express.bodyParser({
        uploadDir: __dirname + '/../var/uploads',
        keepExtensions: true,
        limit: 100 * 1024 * 1024,
        defer: true
    }))
    .use('/svc/public', express.static(__dirname + '/../public'));

app.post('/svc/upload', function (req, res) {

    req.form.on('progress', function (bytesReceived, bytesExpected) {

    });

    req.form.on('end', function () {
        var tmp_path = req.files.file.path;
        var name = req.files.file.name;

        console.log("tmp_path: "+ tmp_path);
        console.log("name: "+name);

        res.end("success");
    });
});

app.listen(3000);
console.log("server started at 3000 port");
上面就是服務端全部的代碼。defer屬性設置為true,這樣下面的2個生命周期回調才能生效。不過這個服務,直接用CocoaRestClient發POST請求調不通,似乎需要在http header裡加上Content-Type才可以
上傳的客戶端代碼
View省略,只介紹關鍵的ViewController代碼
@interface YLSUploadViewController : UIViewController-(void) doUpload; @end
主要是實現NSURLSessionTaskDelegate協議,因為我們需要其中的生命周期方法來實現進度條
下面是初始化的代碼:
{
    NSString *boundary;
    NSString *fileParam;
    NSURL *uploadURL;
}

- (id)initWithNibName:(NSString *)nibNameOrNil bundle:(NSBundle *)nibBundleOrNil
{
    self = [super initWithNibName:nibNameOrNil bundle:nibBundleOrNil];

    if (self) {

        boundary = @"----------V2ymHFg03ehbqgZCaKO6jy";
        fileParam = @"file";
        uploadURL = [NSURL URLWithString:@"http://192.168.1.103:3000/svc/upload"];
    }
    return self;
}
這裡初始化了幾個實例變量,下面是最關鍵的方法:
-(void) doUpload
{
    dispatch_async(dispatch_get_global_queue(DISPATCH_QUEUE_PRIORITY_DEFAULT, 0), ^(void){

        NSURLSessionConfiguration *configuration = [NSURLSessionConfiguration defaultSessionConfiguration];

        NSURLSession *session = [NSURLSession sessionWithConfiguration:configuration delegate:self delegateQueue:nil];

        NSData *body = [self prepareDataForUpload];

        NSMutableURLRequest *request = [[NSMutableURLRequest alloc] initWithURL:uploadURL];
        [request setHTTPMethod:@"POST"];

        // 以下2行是關鍵,NSURLSessionUploadTask不會自動添加Content-Type頭
        NSString *contentType = [NSString stringWithFormat:@"multipart/form-data; boundary=%@", boundary];
        [request setValue:contentType forHTTPHeaderField: @"Content-Type"];

        NSURLSessionUploadTask *uploadTask = [session uploadTaskWithRequest:request fromData:body completionHandler:^(NSData *data, NSURLResponse *response, NSError *error){

            NSString *message = [[NSString alloc] initWithData:data encoding:NSUTF8StringEncoding];
            NSLog(@"message: %@", message);

            [session invalidateAndCancel];
        }];

        [uploadTask resume];
    });
}

-(NSData*) prepareDataForUpload
{
    NSArray *paths = NSSearchPathForDirectoriesInDomains(NSDocumentDirectory, NSUserDomainMask, YES);
    NSString *documentsDirectory = [paths objectAtIndex:0];
    NSString *uploadFilePath = [documentsDirectory stringByAppendingPathComponent:@"QQ.dmg"];

    NSString *fileName = [uploadFilePath lastPathComponent];

    NSMutableData *body = [NSMutableData data];

    NSData *dataOfFile = [[NSData alloc] initWithContentsOfFile:uploadFilePath];

    if (dataOfFile) {
        [body appendData:[[NSString stringWithFormat:@"--%@\r\n", boundary] dataUsingEncoding:NSUTF8StringEncoding]];
        [body appendData:[[NSString stringWithFormat:@"Content-Disposition: form-data; name=\"%@\"; filename=\"%@\"\r\n", fileParam, fileName] dataUsingEncoding:NSUTF8StringEncoding]];
        [body appendData:[@"Content-Type: application/zip\r\n\r\n" dataUsingEncoding:NSUTF8StringEncoding]];
        [body appendData:dataOfFile];
        [body appendData:[[NSString stringWithFormat:@"\r\n"] dataUsingEncoding:NSUTF8StringEncoding]];
    }

    [body appendData:[[NSString stringWithFormat:@"--%@--\r\n", boundary] dataUsingEncoding:NSUTF8StringEncoding]];

    return body;
}
關鍵是怎麼拿到NSURLSessionUploadTask,雖然NSURLSession提供了uploadTaskWithRequest:fromFile:方法,不過經過實踐,發現跑不通。NSURLSession似乎不會自動加上Content-Type頭,也不會自動在Data中加入boundary,結果就是server端報錯:
TypeError: Cannot call method 'on' of undefined
at /Users/apple/WebstormProjects/uploadAndDownloadServer/lib/main.js:15:14
at callbacks (/Users/apple/WebstormProjects/uploadAndDownloadServer/node_modules/express/lib/router/index.js:161:37)
at param (/Users/apple/WebstormProjects/uploadAndDownloadServer/node_modules/express/lib/router/index.js:135:11)
at pass (/Users/apple/WebstormProjects/uploadAndDownloadServer/node_modules/express/lib/router/index.js:142:5)
at Router._dispatch (/Users/apple/WebstormProjects/uploadAndDownloadServer/node_modules/express/lib/router/index.js:170:5)
at Object.router (/Users/apple/WebstormProjects/uploadAndDownloadServer/node_modules/express/lib/router/index.js:33:10)
at next (/Users/apple/WebstormProjects/uploadAndDownloadServer/node_modules/express/node_modules/connect/lib/proto.js:190:15)
at next (/Users/apple/WebstormProjects/uploadAndDownloadServer/node_modules/express/node_modules/connect/lib/proto.js:165:78)
at multipart (/Users/apple/WebstormProjects/uploadAndDownloadServer/node_modules/express/node_modules/connect/lib/middleware/multipart.js:60:27)
at /Users/apple/WebstormProjects/uploadAndDownloadServer/node_modules/express/node_modules/connect/lib/middleware/bodyParser.js:57:9
所以我最後的做法是,自己從File中讀出Data,並拼上所需的控制符,這都是在prepareDataForUpload()方法裡實現的
最後是Delegate method方法,我只需要一個:
- (void)URLSession:(NSURLSession *)session task:(NSURLSessionTask *)task didSendBodyData:(int64_t)bytesSent totalBytesSent:(int64_t)totalBytesSent totalBytesExpectedToSend:(int64_t)totalBytesExpectedToSend
這個就很簡單了,不多介紹了,有totalBytesSent和totalBytesExpectedSend這2個變量,無論是要做文本提示,還是進度條,都是很容易實現的
不過上面的示例代碼,為了方便把自己設置為delegate了。實際項目裡,應該把業務邏輯的類設置為upload組件的delegate。因為上傳之後應該做什麼,應該是在業務組件裡控制才對
下載的客戶端代碼
相比上傳的代碼,下載簡單很多:
-(void) doDownload
{
    dispatch_async(dispatch_get_global_queue(DISPATCH_QUEUE_PRIORITY_DEFAULT, 0), ^(void){

        NSURLSessionConfiguration *configuration = [NSURLSessionConfiguration defaultSessionConfiguration];

        NSURLSession *session = [NSURLSession sessionWithConfiguration:configuration delegate:self delegateQueue:nil];

        NSURL *url = [NSURL URLWithString:@"http://192.168.1.103:3000/svc/public/bigfile.dmg"];

        NSMutableURLRequest *request = [[NSMutableURLRequest alloc] initWithURL:url];
        [request setHTTPMethod:@"GET"];

        NSURLSessionDownloadTask *downloadTask = [session downloadTaskWithRequest:request];// 未設置block

        [downloadTask resume];
    });
}
代碼只有一點需要注意,即調用的是downloadTaskWithRequest:方法,而不是另一個帶block callback的API。因為發現,如果設置了completionHandler,則delegate method不會被調用,但是和上傳一樣,我們需要delegate method來實現下載進度條
@interface YLSDownloadViewController : UIViewController
- (void)URLSession:(NSURLSession *)session downloadTask:(NSURLSessionDownloadTask *)downloadTask didWriteData:(int64_t)bytesWritten totalBytesWritten:(int64_t)totalBytesWritten totalBytesExpectedToWrite:(int64_t)totalBytesExpectedToWrite
下載後的文件,是放在tmp目錄下,如果不處理的話,馬上就會被移除,所以需要在另一個delegate method裡拷貝到最終路徑:
- (void)URLSession:(NSURLSession *)session downloadTask:(NSURLSessionDownloadTask *)downloadTask didFinishDownloadingToURL:(NSURL *)location
{
    NSArray *paths = NSSearchPathForDirectoriesInDomains(NSDocumentDirectory, NSUserDomainMask, YES);
    NSString *documentsDirectory = [paths objectAtIndex:0];
    NSString *distFilePath = [documentsDirectory stringByAppendingPathComponent:@"success.dmg"];

    NSString* tempFilePath = [location path];

    NSFileManager *fileManager = [NSFileManager defaultManager];
    if([fileManager fileExistsAtPath:tempFilePath]){
        [fileManager copyItemAtPath:tempFilePath toPath:distFilePath error:nil];
    }

    [session invalidateAndCancel];
}
- iPhone怎麼設置多位數字密碼
- 【WWDC 2016 Session 228】讓你的應用支持 3D Touch
- iOS技巧之獲取本機通訊錄中的內容,解析通訊錄源代碼
- iOS Universal Static Framework 手動轉 XCode Cocoa Framework
- iOS8.1正式版新特性 iOS8.1正式版新功能
- iPhone7的起始內存是多少 iPhone7內存有哪幾個版本
- iPad Air2電池耐用嗎_iPad Air2續航能力
- iphone6海淘有什麼攻略?
- 請問什麼gevey卡貼不用每次重啟都要撥112,同時能保持facetime的激活狀態呢?
- iPhone達人拍照經驗分享 如何構圖攝影後期處理