
IOS中的手勢詳解
編輯:IOS開發綜合
1、點擊
UITapGestureRecognizer *tap=[[UITapGestureRecognizer alloc] initWithTarget:self action:@selector(click)]; //設置當前需要點擊的次數 [tap setNumberOfTapsRequired:1]; //設置當前需要觸發事件的手指數量 [tap setNumberOfTouchesRequired:2]; //設置當前代理 tap.delegate=self; [_view addGestureRecognizer:tap]; //觸發方法 - (void) click{ NSLog(@"當前視圖被點擊了! "); }
2、長按
UILongPressGestureRecognizer * longPress=[[UILongPressGestureRecognizer alloc] initWithTarget:self action:@selector(longPress)]; //設置當前長按最小的時長 longPress.minimumPressDuration=2; //設置允許的移動范圍 [longPress setAllowableMovement:2]; [_view addGestureRecognizer:longPress]; //觸發方法 - (void) longPress{ NSLog(@"長按事件觸發! "); }
3、輕掃
UISwipeGestureRecognizer * swip=[[UISwipeGestureRecognizer alloc] initWithTarget:self action:@selector(swipMethod)]; //往左邊方向 swip.direction=UISwipeGestureRecognizerDirectionLeft ; //往右邊方向 swip.direction=UISwipeGestureRecognizerDirectionRight ; //往上面方向 swip.direction=UISwipeGestureRecognizerDirectionUp ; //往下面方向 swip.direction=UISwipeGestureRecognizerDirectionDown ; [_view addGestureRecognizer:swip]; //觸發方法 - (void) swipMethod{ NSLog(@"輕掃事件觸發! "); }
如果涉及到2個以上方向的手勢最好添加多個UISwipeGestureRecognizer 對象並設置不同的方向,不要通過下面方式用符號|來連接:
swip.direction=UISwipeGestureRecognizerDirectionLeft | UISwipeGestureRecognizerDirectionRight
4、拖動

第一步:添加視圖
_view=[[UIView alloc] initWithFrame:CGRectMake(50, 250, 300, 200)]; [_view setBackgroundColor:[UIColor redColor]]; [self.view addSubview:_view];
第二步:添加手勢
UIPanGestureRecognizer *pan=[[UIPanGestureRecognizer alloc] initWithTarget:self action:@selector(paned:)]; [_view addGestureRecognizer:pan];
第三步:實現方法
- (void) paned:(UIPanGestureRecognizer *) pan{ //獲取移動的大小 CGPoint point= [pan translationInView:pan.view]; //更改視圖的中心點坐標 CGPoint points=_view.center; points.x+=point.x; points.y+=point.y; _view.center=points; //每次都清空一下消除坐標疊加 [pan setTranslation:CGPointZero inView:pan.view]; }
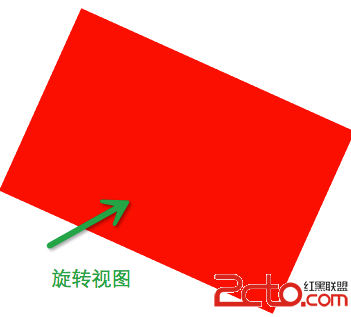
5、旋轉
第一步:添加視圖
_view=[[UIView alloc] initWithFrame:CGRectMake(50, 250, 300, 200)]; [_view setBackgroundColor:[UIColor redColor]]; [self.view addSubview:_view];
第二步:添加手勢
UIRotationGestureRecognizer * roate=[[UIRotationGestureRecognizer alloc] initWithTarget:self action:@selector(rotate:)]; [_view addGestureRecognizer:roate]; roate.delegate=self;
第三步:實現方法
- (void) rotate:(UIRotationGestureRecognizer *) rote{ //獲取當前旋轉的度數 CGFloat rotation= rote.rotation; //通過仿射變換實現旋轉 _view.transform=CGAffineTransformRotate(_view.transform, rotation); //防止旋轉疊加需要清零 rote.rotation=0; }
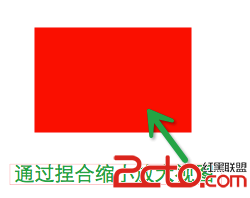
6、捏合
第一步:添加視圖
_view=[[UIView alloc] initWithFrame:CGRectMake(50, 250, 300, 200)]; [_view setBackgroundColor:[UIColor redColor]]; [self.view addSubview:_view];
第二步:添加手勢
UIPinchGestureRecognizer * pich=[[UIPinchGestureRecognizer alloc] initWithTarget:self action:@selector(piches:)]; [_view addGestureRecognizer:pich]; pich.delegate=self;
第三步:實現方法
- (void) piches:(UIPinchGestureRecognizer *) pich{ //獲取比例 CGFloat scale=pich.scale; //通過仿射變換實現縮放 _view.transform=CGAffineTransformScale(_view.transform, scale, scale); //防止比例疊加需要置為1 pich.scale=1; }
【補充】如果需要同時響應多個手勢需要重寫代理方法
- (BOOL)gestureRecognizer:(UIGestureRecognizer *)gestureRecognizer shouldRecognizeSimultaneouslyWithGestureRecognizer:(UIGestureRecognizer *)otherGestureRecognizer{ return YES; }
相關文章
+
- Swift:一個簡單的貨幣轉換器App在iOS10中的分析和完善
- 搭建自己的iOS內測分發平台[以無線方式裝置企業外部使用 ]
- iOS8 UILocalNotification 增加啟動授權
- iOS插件化研究之一——JavaScriptCore
- iOS 手機號正則表達式(全)
- __weak修飾後再block中運用__strong修飾問題
- CocoaPods安裝使用及配置私有庫
- [Phonegap+Sencha Touch] 移動開發18 Sencha Touch項目通過phonegap打包後的程序名字的問題
- iOS設計模式--MVVM
- ios7 導航控制器切換影響UIScrollView布局的問題