iOS開發——封裝自己的下拉菜單
編輯:IOS開發綜合
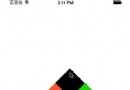
效果圖

思路
1、圖片的拉伸:
UIImage *image = [UIImage imageNamed:@popover_background];
        image = [image resizableImageWithCapInsets:UIEdgeInsetsMake(24, 0, 24, 0) resizingMode:UIImageResizingModeStretch];
-resizableImageWithCapInsets:resizingMode 方法的第二個參數,調整模式分為兩種,平鋪與拉伸。這裡采用拉伸,可以保證背景的帶箭頭的框框按照內容大小正確地將其包圍。
2、圓形過渡動畫
具體實現方式可以參考這篇博客: iOS開發——圓形過渡動畫。這裡把代碼擺上
    CGRect originalRect = CGRectMake(point.x, point.y, 1, 1);

    self.startPath = [UIBezierPath bezierPathWithOvalInRect:originalRect];

    CGPoint extremePoint = CGPointMake(point.x, point.y + contentView.frame.size.height);
    CGFloat radius = sqrtf(extremePoint.x * extremePoint.x + extremePoint.y * extremePoint.y);
    UIBezierPath *endPath = [UIBezierPath bezierPathWithOvalInRect:
                             CGRectInset(originalRect, -radius, -radius)];

    self.shapeLayer = [CAShapeLayer layer];
    self.shapeLayer.path = endPath.CGPath;
    self.layer.mask = self.shapeLayer;

    if (animated) {
        CABasicAnimation *animation = [CABasicAnimation animationWithKeyPath:@path];
        animation.fromValue = (__bridge id)(self.startPath.CGPath);
        animation.toValue = (__bridge id)(endPath.CGPath);
        animation.duration = 0.3f;
        [self.shapeLayer addAnimation:animation forKey:@begin];
    }
3、其他
①view的層級關系:
主要有兩個控件,contentView為用戶傳入的view,一般是一個表給,用戶需要自己規定這個contentView的寬高。
另一個是imageView充當背景圖片,同時該imageView會作為用戶傳入的contentView的容器,
整個控件為一個View,背景透明,做mask用,當菜單處於打開狀態時用戶點擊背景會使菜單收回。
當用戶傳入contentView後,重設其原點,同時更新imageView的大小使其將整個contentView包圍。
最後,將這個整體加到window中,保證菜單處於最上層。
②坐標系轉換
由用戶傳入一個控件來決定該菜單顯示在哪時,需要用到坐標系轉換。關於坐標系轉換,之前的博客中也有記錄,在此留一個簡單的結論:
[viewA convertRect:viewA.bounds toView:viewB]—得到viewA在viewB坐標系下的bounds。
③CAAnimationDelegate中區分多個animation對象
首先在添加animation時為其設置標志key:
[self.shapeLayer addAnimation:animation forKey:@end];
在代理方法中根據layer的方法拿:
- (void)animationDidStop:(CAAnimation *)anim finished:(BOOL)flag {

    if (anim == [self.shapeLayer animationForKey:@end]) {
        self.shapeLayer.path = self.startPath.CGPath;
        [self removeFromSuperview];
    }

}
- 上一頁:ios 加載xib遇到的坑
- 下一頁:iOS 數據存儲 - 01基本介紹

相關文章
+