iOS Tableview側滑刪除和移動cell的實現
編輯:IOS開發綜合
慕課網上學習了tableview的使用,突然讓我覺得iOS比android簡單多了,可能是我的感覺吧。因為android實現list view側拉刪除,動態移動item過程還是稍微有點復雜的。但是iOS卻只需要重寫幾個方法就可以實現了。我只能說iOS太神奇!我就跟著做了一下。
項目地址:Todo


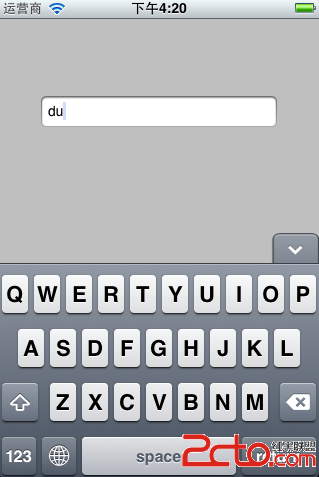
看效果,UI還可以。先上stZ喎?/kf/ware/vc/" target="_blank" class="keylink">vcnlib2FyZL3hubnNvKO6PGJyIC8+DQo8aW1nIGFsdD0="這裡寫圖片描述" src="/uploadfile/Collfiles/20150819/2015081908343584.png" title="\" />
navigate controller 實現一個導航欄。view controller 實現一個tableview,tableviewCell 。
//
//  ViewController.swift
//  Todo
//
//  Created by zhouyihua on 15/8/17.
//  Copyright (c) 2015年 xiebangyuan. All rights reserved.
//

import UIKit

var todos:[TodoModel] = []
var filtertodos:[TodoModel] = []

func dateFromString(dateStr:String) -> NSDate?{
    let dateFormatter = NSDateFormatter()
    dateFormatter.dateFormat = yyyy-MM-dd
    let date = dateFormatter.dateFromString(dateStr)
    return date
}

class ViewController: UIViewController ,
UITableViewDataSource,UITableViewDelegate,UISearchDisplayDelegate{


    @IBOutlet weak var tableView: UITableView!

    override func viewDidLoad() {
        super.viewDidLoad()
        // Do any additional setup after loading the view, typically from a nib.
        todos = [TodoModel(id: 1, image: child-selected, title: 1. 去游樂場, date: dateFromString(2014-10-20)!),
            TodoModel(id: 2, image: shopping-cart-selected, title: 2. 購物, date: dateFromString(2014-10-28)!),
            TodoModel(id: 3, image: phone-selected, title: 3. 打電話, date: dateFromString(2014-10-30)!),
            TodoModel(id: 4, image: travel-selected, title: 4. Travel to Europe, date: dateFromString(2014-10-31)!)]

        navigationItem.leftBarButtonItem = editButtonItem()
        var contentOffset = tableView.contentOffset
        contentOffset.y += searchDisplayController!.searchBar.frame.size.height
        tableView.contentOffset = contentOffset

    }

    override func didReceiveMemoryWarning() {
        super.didReceiveMemoryWarning()
        // Dispose of any resources that can be recreated.
    }
    //返回加載的條數 方法來自UITableViewdelegate
    func tableView(tableView: UITableView, numberOfRowsInSection section: Int) -> Int{

        if tableView == searchDisplayController?.searchResultsTableView {
            return filtertodos.count
        }else{
            return todos.count
        }
    }

    // Row display. Implementers should *always* try to reuse cells by setting each cell's reuseIdentifier and querying for available reusable cells with dequeueReusableCellWithIdentifier:
    // Cell gets various attributes set automatically based on table (separators) and data source (accessory views, editing controls)
    //返回tableview的cell 就是list view的 item
    func tableView(tableView: UITableView, cellForRowAtIndexPath indexPath: NSIndexPath) -> UITableViewCell{
        let cell = self.tableView.dequeueReusableCellWithIdentifier(todocell) as! UITableViewCell
        var todo:TodoModel?

        if tableView == searchDisplayController?.searchResultsTableView {
            todo = filtertodos[indexPath.row] as TodoModel
        }else{
            todo = todos[indexPath.row] as TodoModel
        }

        var title = cell.viewWithTag(103) as! UILabel
        var date = cell.viewWithTag(104) as! UILabel
        var image = cell.viewWithTag(102) as! UIImageView

        image.image = UIImage(named:todo!.image)
        title.text = todo!.title
        let locale = NSLocale.currentLocale()
        let dateFormat = NSDateFormatter.dateFormatFromTemplate(yyyy-MM-dd, options: 0, locale: locale)
        let dateFormatter = NSDateFormatter()
            dateFormatter.dateFormat = dateFormat
            date.text = dateFormatter.stringFromDate(todo!.date)
        return cell
    }

    //mark-UITableViewdelegate
    func tableView(tableView: UITableView, commitEditingStyle editingStyle: UITableViewCellEditingStyle, forRowAtIndexPath indexPath: NSIndexPath){
        if editingStyle == UITableViewCellEditingStyle.Delete{
            todos.removeAtIndex(indexPath.row)
            self.tableView.deleteRowsAtIndexPaths([indexPath],withRowAnimation: UITableViewRowAnimation.Automatic)
        }
    }

    override func setEditing(editing: Bool, animated: Bool) {
        super.setEditing(editing, animated: animated)
        self.tableView.setEditing(editing, animated: animated)
    }
    //點擊確定按鈕 unsegue 操作
    @IBAction func close(segue:UIStoryboardSegue){
        println(close)
        tableView.reloadData()
    }
    //實現側滑刪除,方法來自 UITableViewDelegate
    func tableView(tableView: UITableView, canMoveRowAtIndexPath indexPath: NSIndexPath) -> Bool{
        return editing
    }
   //實現cell移動,方法來自 UITableViewDelegate
    func tableView(tableView: UITableView, moveRowAtIndexPath sourceIndexPath: NSIndexPath, toIndexPath destinationIndexPath: NSIndexPath){
        let todo = todos.removeAtIndex(sourceIndexPath.row)
        todos.insert(todo, atIndex: destinationIndexPath.row)
    }
}
實現tableview 很明顯就是給一個Datasoure和一個delegate。view controller extension UITableViewDataSource(處理數據源),UITableViewDelegate (處理tableview各種操作)
最後記得綁定datasoure和delegate 。貌似是不是很簡單。我靠,android程序猿的路過點贊!!

相關文章
+