『零行代碼』解決鍵盤遮擋問題(iOS)
授權轉載,作者:Draveness,關注倉庫,及時獲得更新:iOS-Source-Code-Analyze

這篇文章會對 IQKeyboardManager 自動解決鍵盤遮擋問題的方法進行分析。
最近在項目中使用了IQKeyboardManager來解決 UITextField 被鍵盤遮擋的問題,這個框架的使用方法可以說精簡到了極致,只需要將 IQKeyboardManager 加入 Podfile,然後 pod install 就可以了。
pod 'IQKeyboardManager'
這篇文章的題目《零行代碼解決鍵盤遮擋問題》來自於開源框架的介紹:
Codeless drop-in universal library allows to prevent issues of keyboard sliding up and cover UITextField/UITextView. Neither need to write any code nor any setup required and much more.
因為在項目中使用了 IQKeyboardManager,所以,我想通過閱讀其源代碼來了解這個黑箱是如何工作的。
雖然這個框架的實現的方法是比較簡單的,不過它的實現代碼不是很容易閱讀,框架因為包含了很多與 UI 有關的實現細節,所以代碼比較復雜。
架構分析
說是架構分析,其實只是對 IQKeyboardManager 中包含的類以及文件有一個粗略地了解,研究一下這個項目的層級是什麼樣的。

整個項目中最核心的部分就是 IQKeyboardManager 這個類,它負責管理鍵盤出現或者隱藏時視圖移動的距離,是整個框架中最核心的部分。
在這個框架中還有一些用於支持 IQKeyboardManager 的分類,以及顯示在鍵盤上面的 IQToolBar:

使用紅色標記的部分就是 IQToolBar,左側的按鈕可以在不同的 UITextField 之間切換,中間的文字是 UITextField.placeholderText,右邊的 Done 應該就不需要解釋了。
這篇文章會主要分析 IQKeyboardManager 中解決的問題,會用小篇幅介紹包含占位符(Placeholder) IQTextView 的實現。
IQTextView 的實現
在具體研究如何解決鍵盤遮擋問題之前,我們先分析一下框架中最簡單的一部分 IQTextView 是如何為 UITextView 添加占位符的。
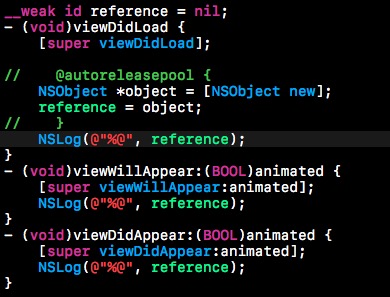
@interface IQTextView : UITextView
@end
IQTextView 繼承自 UITextView,它只是在 UITextView 上添加上了一個 placeHolderLabel。
在初始化時,我們會為 UITextViewTextDidChangeNotification 注冊通知:
- (void)initialize   {
    [[NSNotificationCenter defaultCenter] addObserver:self selector:@selector(refreshPlaceholder) name:UITextViewTextDidChangeNotification object:self];
}
在每次 UITextView 中的 text 更改時,就會調用 refreshPlaceholder 方法更新 placeHolderLabel 的 alpha 值來隱藏或者顯示 label:
-(void)refreshPlaceholder {
    if ([[self text] length]) {
        [placeHolderLabel setAlpha:0];
    } else {
        [placeHolderLabel setAlpha:1];
    }
    [self setNeedsLayout];
    [self layoutIfNeeded];
}
IQKeyboardManager
下面就會進入這篇文章的正題:IQKeyboardManager。
如果你對 iOS 開發比較熟悉,可能會發現每當一個類的名字中包含了 manager,那麼這個類可能可能遵循單例模式,IQKeyboardManager 也不例外。
IQKeyboardManager 的初始化
當 IQKeyboardManager 初始化的時候,它做了這麼幾件事情:
監聽有關鍵盤的通知
[[NSNotificationCenter defaultCenter] addObserver:self selector:@selector(keyboardWillShow:) name:UIKeyboardWillShowNotification object:nil];
[[NSNotificationCenter defaultCenter] addObserver:self selector:@selector(keyboardWillHide:) name:UIKeyboardWillHideNotification object:nil];
[[NSNotificationCenter defaultCenter] addObserver:self selector:@selector(keyboardDidHide:) name:UIKeyboardDidHideNotification object:nil];
注冊與 UITextField 以及 UITextView 有關的通知
[self registerTextFieldViewClass:[UITextField class]
 didBeginEditingNotificationName:UITextFieldTextDidBeginEditingNotification
   didEndEditingNotificationName:UITextFieldTextDidEndEditingNotification];
[self registerTextFieldViewClass:[UITextView class]
 didBeginEditingNotificationName:UITextViewTextDidBeginEditingNotification
   didEndEditingNotificationName:UITextViewTextDidEndEditingNotification];
調用的方法將通知綁定到了 textFieldViewDidBeginEditing: 和 textFieldViewDidEndEditing: 方法上
- (void)registerTextFieldViewClass:(nonnull Class)aClass
  didBeginEditingNotificationName:(nonnull NSString *)didBeginEditingNotificationName
    didEndEditingNotificationName:(nonnull NSString *)didEndEditingNotificationName {
    [[NSNotificationCenter defaultCenter] addObserver:self selector:@selector(textFieldViewDidBeginEditing:) name:didBeginEditingNotificationName object:nil];
    [[NSNotificationCenter defaultCenter] addObserver:self selector:@selector(textFieldViewDidEndEditing:) name:didEndEditingNotificationName object:nil];
}
初始化一個 UITapGestureRecognizer,在點擊 UITextField 對應的 UIWindow 的時候,收起鍵盤
strongSelf.tapGesture = [[UITapGestureRecognizer alloc] initWithTarget:self action:@selector(tapRecognized:)];
- (void)tapRecognized:(UITapGestureRecognizer*)gesture {
    if (gesture.state == UIGestureRecognizerStateEnded)
        [self resignFirstResponder];
}
初始化一些默認屬性,例如鍵盤距離、覆寫鍵盤的樣式等
strongSelf.animationDuration = 0.25;
strongSelf.animationCurve = UIViewAnimationCurveEaseInOut;
[self setKeyboardDistanceFromTextField:10.0];
[self setShouldPlayInputClicks:YES];
[self setShouldResignOnTouchOutside:NO];
[self setOverrideKeyboardAppearance:NO];
[self setKeyboardAppearance:UIKeyboardAppearanceDefault];
[self setEnableAutoToolbar:YES];
[self setPreventShowingBottomBlankSpace:YES];
[self setShouldShowTextFieldPlaceholder:YES];
[self setToolbarManageBehaviour:IQAutoToolbarBySubviews];
[self setLayoutIfNeededOnUpdate:NO];
設置不需要解決鍵盤遮擋問題的類
strongSelf.disabledDistanceHandlingClasses = [[NSMutableSet alloc] initWithObjects:[UITableViewController class], nil];
strongSelf.enabledDistanceHandlingClasses = [[NSMutableSet alloc] init];
strongSelf.disabledToolbarClasses = [[NSMutableSet alloc] init];
strongSelf.enabledToolbarClasses = [[NSMutableSet alloc] init];
strongSelf.toolbarPreviousNextAllowedClasses = [[NSMutableSet alloc] initWithObjects:[UITableView class],[UICollectionView class],[IQPreviousNextView class], nil];
strongSelf.disabledTouchResignedClasses = [[NSMutableSet alloc] init];
strongSelf.enabledTouchResignedClasses = [[NSMutableSet alloc] init];
整個初始化方法大約有幾十行的代碼,在這裡就不再展示整個方法的全部代碼了。
基於通知的解決方案
在這裡,我們以 UITextField 為例,分析方法的調用流程。
在初始化方法中,我們注冊了很多的通知,包括鍵盤的出現和隱藏,UITextField 開始編輯與結束編輯。
UIKeyboardWillShowNotification
UIKeyboardWillHideNotification
UIKeyboardDidHideNotification
UITextFieldTextDidBeginEditingNotification
UITextFieldTextDidEndEditingNotification
在這些通知響應時,會執行以下的方法:
| Notification | Selector | |:-:|:-:| | UIKeyboardWillShowNotification | @selector(keyboardWillShow:)| | UIKeyboardWillHideNotification | @selector(keyboardWillHide:) | | UIKeyboardDidHideNotification | @selector(keyboardDidHide:) | |UITextFieldTextDidBeginEditingNotification|@selector(textFieldViewDidBeginEditing:)| |UITextFieldTextDidEndEditingNotification|@selector(textFieldViewDidEndEditing:)|
整個解決方案其實都是基於 iOS 中的通知系統的;在事件發生時,調用對應的方法做出響應。
開啟 Debug 模式
在閱讀源代碼的過程中,我發現 IQKeyboardManager 提供了 enableDebugging 這一屬性,可以通過開啟它,來追蹤方法的調用,我們可以在 Demo 加入下面這行代碼:
[IQKeyboardManager sharedManager].enableDebugging = YES;
鍵盤的出現
然後運行工程,在 Demo 中點擊一個 UITextField

上面的操作會打印出如下所示的 Log:
IQKeyboardManager: ****** textFieldViewDidBeginEditing: started ******
IQKeyboardManager: adding UIToolbars if required
IQKeyboardManager: Savingbeginning Frame: {{0, 0}, {320, 568}}
IQKeyboardManager: ****** adjustFrame started ******
IQKeyboardManager: Need to move: -451.00
IQKeyboardManager: ****** adjustFrame ended ******
IQKeyboardManager: ****** textFieldViewDidBeginEditing: ended ******
IQKeyboardManager: ****** keyboardWillShow: started ******
IQKeyboardManager: ****** adjustFrame started ******
IQKeyboardManager: Need to move: -154.00
IQKeyboardManager: ****** adjustFrame ended ******
IQKeyboardManager: ****** keyboardWillShow: ended ******
我們可以通過分析 - textFieldViewDidBeginEditing: 以及 - keyboardWillShow: 方法來了解這個項目的原理。
textFieldViewDidBeginEditing:
當 UITextField 被點擊時,方法 - textFieldViewDidBeginEditing: 被調用,但是注意這裡的方法並不是代理方法,它只是一個跟代理方法同名的方法,根據 Log,它做了三件事情:
為 UITextField 添加 IQToolBar
在調整 frame 前,保存當前 frame,以備之後鍵盤隱藏後的恢復
調用 - adjustFrame 方法,將視圖移動到合適的位置
添加 ToolBar
添加 ToolBar 是通過方法 - addToolbarIfRequired 實現的,在 - textFieldViewDidBeginEditing: 先通過 - privateIsEnableAutoToolbar 判斷 ToolBar 是否需要添加,再使用相應方法 - addToolbarIfRequired 實現這一目的。
這個方法會根據根視圖上 UITextField 的數量執行對應的代碼,下面為一般情況下執行的代碼:
- (void)addToolbarIfRequired {
    NSArray *siblings = [self responderViews];
    for (UITextField *textField in siblings) {
        [textField addPreviousNextDoneOnKeyboardWithTarget:self previousAction:@selector(previousAction:) nextAction:@selector(nextAction:) doneAction:@selector(doneAction:) shouldShowPlaceholder:_shouldShowTextFieldPlaceholder];
        textField.inputAccessoryView.tag = kIQPreviousNextButtonToolbarTag;
        IQToolbar *toolbar = (IQToolbar*)[textField inputAccessoryView];
        toolbar.tintColor = [UIColor blackColor];
        [toolbar setTitle:textField.drawingPlaceholderText];
        [textField setEnablePrevious:NO next:YES];
    }
}
在鍵盤上的 IQToolBar 一般由三部分組成:
切換 UITextField 的箭頭按鈕
指示當前 UITextField 的 placeholder
Done Button

這些 item 都是 IQBarButtonItem 的子類
這些 IQBarButtonItem 以及 IQToolBar 都是通過方法 - addPreviousNextDoneOnKeyboardWithTarget:previousAction:nextAction:doneAction: 或者類似方法添加的:
- (void)addPreviousNextDoneOnKeyboardWithTarget:(id)target previousAction:(SEL)previousAction nextAction:(SEL)nextAction doneAction:(SEL)doneAction titleText:(NSString*)titleText {
    IQBarButtonItem *prev = [[IQBarButtonItem alloc] initWithImage:imageLeftArrow style:UIBarButtonItemStylePlain target:target action:previousAction];
    IQBarButtonItem *next = [[IQBarButtonItem alloc] initWithImage:imageRightArrow style:UIBarButtonItemStylePlain target:target action:nextAction];
    IQTitleBarButtonItem *title = [[IQTitleBarButtonItem alloc] initWithTitle:self.shouldHideTitle?nil:titleText];
    IQBarButtonItem *doneButton =[[IQBarButtonItem alloc] initWithBarButtonSystemItem:UIBarButtonSystemItemDone target:target action:doneAction];
    IQToolbar *toolbar = [[IQToolbar alloc] init];
    toolbar.barStyle = UIBarStyleDefault;
    toolbar.items = @[prev, next, title, doneButton];
    toolbar.titleInvocation = self.titleInvocation;
    [(UITextField*)self setInputAccessoryView:toolbar];
}
上面是方法簡化後的實現代碼,初始化需要的 IQBarButtonItem,然後將這些 IQBarButtonItem 全部加入到 IQToolBar 上,最後設置 UITextField 的 accessoryView。
保存 frame
這一步的主要目的是為了在鍵盤隱藏時恢復到原來的狀態,其實現也非常簡單:
_rootViewController = [_textFieldView topMostController];
_topViewBeginRect = _rootViewController.view.frame;
獲取 topMostController,在 _topViewBeginRect 中保存 frame。
adjustFrame
在上述的任務都完成之後,最後就需要調用 - adjustFrame 方法來調整當前根試圖控制器的 frame 了:
我們只會研究一般情況下的實現代碼,因為這個方法大約有 400 行代碼對不同情況下的實現有不同的路徑,包括有 lastScrollView、含有 superScrollView 等等。
而這裡會省略絕大多數情況下的實現代碼。
- (void)adjustFrame {
    UIWindow *keyWindow = [self keyWindow];
    UIViewController *rootController = [_textFieldView topMostController];
    CGRect textFieldViewRect = [[_textFieldView superview] convertRect:_textFieldView.frame toView:keyWindow];
    CGRect rootViewRect = [[rootController view] frame];
    CGSize kbSize = _kbSize;
    kbSize.height += keyboardDistanceFromTextField;
    CGFloat topLayoutGuide = CGRectGetHeight(statusBarFrame);
    CGFloat move = MIN(CGRectGetMinY(textFieldViewRect)-(topLayoutGuide+5), CGRectGetMaxY(textFieldViewRect)-(CGRectGetHeight(keyWindow.frame)-kbSize.height));
    if (move >= 0) {
        rootViewRect.origin.y -= move;
        [self setRootViewFrame:rootViewRect];
    } else {
        CGFloat disturbDistance = CGRectGetMinY(rootViewRect)-CGRectGetMinY(_topViewBeginRect);
        if (disturbDistance < 0) {
            rootViewRect.origin.y -= MAX(move, disturbDistance);
            [self setRootViewFrame:rootViewRect];
        }
    }
}
方法 - adjustFrame 的工作分為兩部分:
計算 move 的距離
調用 - setRootViewFrame: 方法設置 rootView 的大小
- (void)setRootViewFrame:(CGRect)frame {
    UIViewController *controller = [_textFieldView topMostController];
    frame.size = controller.view.frame.size;
[UIView animateWithDuration:_animationDuration delay:0 options:(_animationCurve|UIViewAnimationOptionBeginFromCurrentState) animations:^{
    [controller.view setFrame:frame];
} completion:NULL];
}
不過,在 - textFieldViewDidBeginEditing: 的調用棧中,並沒有執行 - setRootViewFrame: 來更新視圖的大小,因為點擊最上面的 UITextField 時,不需要移動視圖就能保證鍵盤不會遮擋 UITextField。
keyboardWillShow:
上面的代碼都是在鍵盤出現之前執行的,而這裡的 - keyboardWillShow: 方法的目的是為了保證鍵盤出現之後,依然沒有阻擋 UITextField。
因為每一個 UITextField 對應的鍵盤大小可能不同,所以,這裡通過檢測鍵盤大小是否改變,來決定是否調用 - adjustFrame 方法更新視圖的大小。
- (void)keyboardWillShow:(NSNotification*)aNotification {
    _kbShowNotification = aNotification;
    _animationCurve = [[aNotification userInfo][UIKeyboardAnimationCurveUserInfoKey] integerValue];
    _animationCurve = _animationCurve<<16;
    CGFloat duration = [[aNotification userInfo][UIKeyboardAnimationDurationUserInfoKey] floatValue];
    if (duration != 0.0)    _animationDuration = duration;
    CGSize oldKBSize = _kbSize;
    CGRect kbFrame = [[aNotification userInfo][UIKeyboardFrameEndUserInfoKey] CGRectValue];
    CGRect screenSize = [[UIScreen mainScreen] bounds];
    CGRect intersectRect = CGRectIntersection(kbFrame, screenSize);
    if (CGRectIsNull(intersectRect)) {
        _kbSize = CGSizeMake(screenSize.size.width, 0);
    } else {
        _kbSize = intersectRect.size;
    }
    if (!CGSizeEqualToSize(_kbSize, oldKBSize)) {
        [self adjustFrame];
    }
}
在 - adjustFrame 方法調用之前,執行了很多代碼都是用來保存一些關鍵信息的,比如通知對象、動畫曲線、動畫時間。
最關鍵的是更新鍵盤的大小,然後比較鍵盤的大小 CGSizeEqualToSize(_kbSize, oldKBSize) 來判斷是否執行 - adjustFrame 方法。
因為 - adjustFrame 方法的結果是依賴於鍵盤大小的,所以這裡對 - adjustFrame 是有意義並且必要的。
鍵盤的隱藏
通過點擊 IQToolBar 上面的 done 按鈕,鍵盤就會隱藏:

鍵盤隱藏的過程中會依次調用下面的三個方法:
- keyboardWillHide:
- textFieldViewDidEndEditing:
- keyboardDidHide:
IQKeyboardManager: ****** keyboardWillHide: started ******
IQKeyboardManager: Restoringframe to : {{0, 0}, {320, 568}}
IQKeyboardManager: ****** keyboardWillHide: ended ******
IQKeyboardManager: ****** textFieldViewDidEndEditing: started ******
IQKeyboardManager: ****** textFieldViewDidEndEditing: ended ******
IQKeyboardManager: ****** keyboardDidHide: started ******
IQKeyboardManager: ****** keyboardDidHide: ended ******
鍵盤在收起時,需要將視圖恢復至原來的位置,而這也就是 - keyboardWillHide: 方法要完成的事情:
[strongSelf.rootViewController.view setFrame:strongSelf.topViewBeginRect]
並不會給出該方法的全部代碼,只會給出關鍵代碼梳理它的工作流程。
在重新設置視圖的大小以及位置之後,會對之前保存的屬性進行清理:
_lastScrollView = nil;
_kbSize = CGSizeZero;
_startingContentInsets = UIEdgeInsetsZero;
_startingScrollIndicatorInsets = UIEdgeInsetsZero;
_startingContentOffset = CGPointZero;
而之後調用的兩個方法 - textFieldViewDidEndEditing: 以及 - keyboardDidHide: 也只做了很多簡單的清理工作,包括添加到 window 上的手勢,並重置保存的 UITextField 和視圖的大小。
- (void)textFieldViewDidEndEditing:(NSNotification*)notification{
    [_textFieldView.window removeGestureRecognizer:_tapGesture];
    _textFieldView = nil;
}
- (void)keyboardDidHide:(NSNotification*)aNotification {
    _topViewBeginRect = CGRectZero;
}
UITextField 和 UITextView 通知機制
因為框架的功能是基於通知實現的,所以通知的時序至關重要,在 IQKeyboardManagerConstants.h 文件中詳細地描述了在編輯 UITextField 的過程中,通知觸發的先後順序。

上圖准確說明了通知發出的時機,透明度為 50% 的部分表示該框架沒有監聽這個通知。
而 UITextView 的通知機制與 UITextField 略有不同:

當 Begin Editing 這個事件發生時,UITextView 的通知機制會先發出 UIKeyboardWillShowNotification 通知,而 UITextField 會先發出 UITextFieldTextDidBeginEditingNotification 通知。
而這兩個通知的方法都調用了 - adjustFrame 方法來更新視圖的大小,最開始我並不清楚到底是為什麼?直到我給作者發了一封郵件,作者告訴我這麼做的原因:
Good questions draveness. I'm very happy to answer your questions. There is a file in library IQKeyboardManagerConstants.h. You can find iOS Notification mechanism structure.
You'll find that for UITextField, textField notification gets fire first and then UIKeyboard notification fires.
For UITextView, UIKeyboard notification gets fire first and then UITextView notification get's fire.
So that's why I have to call adjustFrame at both places to fulfill both situations. But now I think I should add some validation and make sure to call it once to improve performance.
Let me know if you have some more questions, I would love to answer them. Thanks again to remind me about this issue.
在不同方法中調用通知的原因是,UITextView 和 UITextField 通知機制的不同,不過作者可能會在未來的版本中修復這一問題,來獲得性能上的提升。
小結
IQKeyboardManager 使用通知機制來解決鍵盤遮擋輸入框的問題,因為使用了分類並且在 IQKeyboardManager 的 + load 方法中激活了框架的使用,所以達到了零行代碼解決這一問題的效果。
雖然 IQKeyboardManager 很好地解決了這一問題、為我們帶來了良好的體驗。不過,由於其涉及 UI 層級;並且需要考慮非常多的邊界以及特殊條件,框架的代碼不是很容易閱讀,但是這不妨礙 IQKeyboardManager 成為非常優秀的開源項目。

- iOS用兩行代碼完善處理數據耐久化
- 一行代碼完成IOS 3DES加密解密
- 僅需幾行代碼完成便利易用的狀況欄指導器
- 20 行代碼極速為 App 加上聊天功能
- 一行代碼實現headView彈簧拉伸效果
- 一行代碼,快速為UITableView創建Delegate和DataSource
- 源碼推薦(8.05):一行代碼實現多風格的推送小紅點,效果很好的跑馬燈
- 8行代碼教你搞定導航控制器全屏滑動返回效果
- 源碼推薦(9.28):一行代碼實現輪播,動畫 心跳 波紋
- 源碼推薦(10.22):一行代碼搞定自動布局,無限循環自動輪播器
- 源碼推薦(12.01B):一行代碼搞定自動布局,自定義UICollectionViewFlowLayout
- 源碼推薦(12.21):一行代碼解決cell的自適應升級版,Voip後台
- 源碼推薦(01.04):XWAleratView,一行代碼搞定自動布局(二)
- 源碼推薦(01.08B):一行代碼搞定倒計時,登錄注冊找回密碼頁面邏輯
- 源碼推薦(01.20B):JS與OC中Webview交互, 兩行代碼搞定TouchID驗證