iOS 擴展機制category與associative
category和associative作為objective-c 擴展機制的兩個特性,category可以通過它來擴展方法;associative可以通過它來擴展屬性。
在iOS開發過程中,前者category比較常見,也比較簡單,這裡就不說了,這裡主要說一下associative;
後者associative相對用的就比較少,要用associative就必須使用#import
下面介紹一下這兩個方法:
①:void objc_setAssociatedObject(id object, void *key, id value, objc_AssociationPolicy policy)
其中的參數分別是:
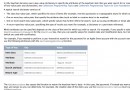
Parameters
object: The source object for the association.
key: The key for the association.
value: The value to associate with the key key for object. Pass nil to clear an existing association.
policy: The policy for the association
其中的policy有
enum {
OBJC_ASSOCIATION_ASSIGN = 0,
OBJC_ASSOCIATION_RETAIN_NONATOMIC = 1,
OBJC_ASSOCIATION_COPY_NONATOMIC = 3,
OBJC_ASSOCIATION_RETAIN = 01401,
OBJC_ASSOCIATION_COPY = 01403
};
②:id objc_getAssociatedObject(id object, void *key)
Parameters
object: The source object for the association.
key: The key for the association.
Return Value
The value associated with the key key for object.
都比較簡單,下面就通過一個demo來說明吧!
我這裡是擴展UIImageview為其添加一個方法和一個屬性。
category的頭文件:
[cpp] view plaincopy
- #import
- @interface UIImageView (associate)
- @property(nonatomic,strong)NSString* myString;
- -(void)Output;
- @end
category的實現文件:
[cpp] view plaincopy
- #import
#import "UIImageView+associate.h" - static void * MyKey = (void *)@"MyKey";
- @implementation UIImageView (associate)
- -(NSString*)myString {
- return objc_getAssociatedObject(self, MyKey); }
- -(void)setMyString:(NSString *)string {
- objc_setAssociatedObject(self, MyKey, string, OBJC_ASSOCIATION_COPY_NONATOMIC); }
- -(void)Output {
- NSLog(@"output mystring:%@",self.myString); }
- @end
- 說明:頭文件中添加了一個屬性和一個方法,在實現文件中使用associative特性為屬性重寫了setter和getter方法,都比較簡單。
測試一下:
[cpp] view plaincopy
- UIImageView *imageView = [[UIImageView alloc] initWithImage:[UIImage imageNamed:@"[email protected]"]]; imageView.bounds = CGRectMake(50, 50, 100, 100);
- imageView.myString = @"hello world"; [self.view addSubview:imageView];
- [imageView Output];
運行後,模擬器上就顯示一個圖片,終端輸出:output mystring:hello world