iOS實現輸入框跟隨鍵盤自動上移的實例代碼
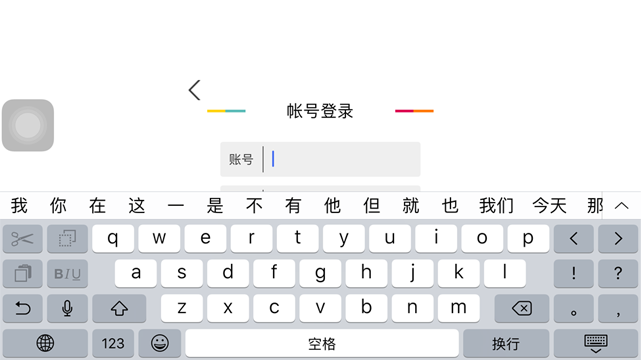
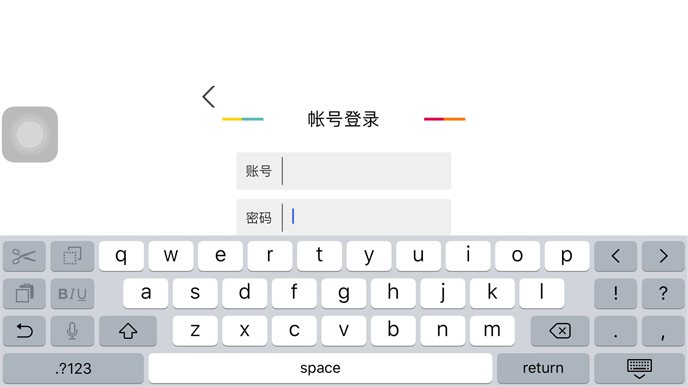
場景還原
有些時候在包含輸入框的頁面中,點擊輸入框輸入會因鍵盤彈起而遮擋住一部分輸入框,影響用戶體驗。iOS在默認情況下並不會處理這種問題,不過我們可以自己實現鍵盤彈起輸入框自動上移的效果。
實現思路
觀察鍵盤的彈起與收回,當彈起的鍵盤會遮擋住輸入框時,將輸入框跟隨鍵盤一並上移合適的距離,當鍵盤收回時,輸入框回到原始狀態。
具體方案
1. 注冊兩個觀察者,觀察鍵盤的彈起與收回
[[NSNotificationCenter defaultCenter] addObserver:self selector:@selector(keyboardWillShow:) name:UIKeyboardWillShowNotification object:nil];
[[NSNotificationCenter defaultCenter] addObserver:self selector:@selector(keyboardWillHide:) name:UIKeyboardWillHideNotification object:nil];
2. 在上面的keyboardWillShow和keyboardWillHide方法中分別實現輸入框的上移和還原
上移
當彈起的鍵盤遮住了頁面上的輸入框時,我們應該將輸入框移至鍵盤之上,而鍵盤沒有遮到輸入框時,並不需要操作。因此在ios的坐標系下,我們可以分別獲取鍵盤彈起後上端的Y坐標和輸入框下端的Y坐標,通過做差可以判斷出鍵盤是否遮住了輸入框。上移我們可以采用view的transform屬性進行平移變換,而不是直接去操作view的frame,這樣做的好處是當我們要還原view的狀態時可以直接將transform重置為0,而不需要再關心計算下移時的距離。
還原(下移至原始狀態)
根據前面所說,我們只要在恰當的時機操作view的transform屬性就可以實現了。
- (void)keyboardWillShow:(NSNotification *)notification
{
  //獲取處於焦點中的view
  NSArray *textFields = @[phoneNemberText, verifyCodeText];
  UIView *focusView = nil;
  for (UITextField *view in textFields) {
    if ([view isFirstResponder]) {
      focusView = view;
      break;
    }
  }
  if (focusView) {
    //獲取鍵盤彈出的時間
    double duration = [notification.userInfo[UIKeyboardAnimationDurationUserInfoKey] doubleValue];
    //獲取鍵盤上端Y坐標
    CGFloat keyboardY = [userInfo[UIKeyboardFrameEndUserInfoKey] CGRectValue].origin.y;
    //獲取輸入框下端相對於window的Y坐標
    CGRect rect = [focusView convertRect:focusView.bounds toView:[[[UIApplication sharedApplication] delegate] window]];
    CGPoint tmp = rect.origin;
    CGFloat inputBoxY = tmp.y + focusView.frame.size.height;
    //計算二者差值
    CGFloat ty = keyboardY - inputBoxY;
    NSLog(@"position keyboard: %f, inputbox: %f, ty: %f", keyboardY, inputBoxY, ty);
    //差值小於0,做平移變換
    [UIView animateWithDuration:duration animations:^{
      if (ty < 0) {
        self.view.transform = CGAffineTransformMakeTranslation(0, ty);
      }
    }];
  }
}

- (void)keyboardWillHide:(NSNotification *)notification
{
  //獲取鍵盤彈出的時間
  double duration = [notification.userInfo[UIKeyboardAnimationDurationUserInfoKey] doubleValue];
  //還原
  [UIView animateWithDuration:duration animations:^{
    self.view.transform = CGAffineTransformMakeTranslation(0, 0);
  }];
}
看上去這樣已經完美實現了輸入框隨鍵盤自動上移,我們也可以喝杯茶稍微休息一下了。沒錯,在iOS 8及之後的系統中,確實可以正常的工作,然而如果你的應用需要適配iOS 7並且要支持橫屏,那麼上面的方式在iOS7上,並不能按照我們的期望正確移動。
原因:在ios7上,鍵盤的frame,系統是按照豎屏狀態下window坐標系來計算的,並不考慮旋轉的因素,因此在橫屏下得到的鍵盤frame是錯誤的。受此影響的還有橫屏時獲取屏幕寬高[UIScreen mainScreen].bounds,也會有這樣的問題。這種情況我們不僅無法正確得到鍵盤的frame,而且輸入框相對於window的坐標計算結果也是錯誤的。
因此在ios7上,鍵盤上端的Y坐標以及輸入框下端相對於window的Y坐標需要單獨處理。鍵盤上端的Y坐標可以通過屏幕高度減鍵盤高度得到。我們通過下面的方法獲取鍵盤上端的Y坐標。
- (CGFloat)getKeyboardY:(NSDictionary *)userInfo
{
  CGFloat screenHeight;
  CGFloat keyboardY = 0;
  CGFloat keyboardHeight = 0;
  UIInterfaceOrientation orientation = [UIApplication sharedApplication].statusBarOrientation;
  if (( [[[UIDevice currentDevice] systemVersion] floatValue]<8) && UIInterfaceOrientationIsLandscape(orientation))
  {
    screenHeight = [[UIScreen mainScreen] bounds].size.width;
    keyboardHeight = [userInfo[UIKeyboardFrameEndUserInfoKey] CGRectValue].size.width;
    keyboardY = screenHeight - keyboardHeight;
  }
  else if (( [[[UIDevice currentDevice] systemVersion] floatValue]<8) && UIInterfaceOrientationIsPortrait(orientation)) {
    screenHeight = [[UIScreen mainScreen] bounds].size.height;
    keyboardHeight = [userInfo[UIKeyboardFrameEndUserInfoKey] CGRectValue].size.height;
    keyboardY = screenHeight - keyboardHeight;
  }
  else {
    keyboardY = [userInfo[UIKeyboardFrameEndUserInfoKey] CGRectValue].origin.y;
  }
  return keyboardY;
}
輸入框下端相對於window的坐標如何計算呢?我們首先獲得的其實是基於豎屏狀態下坐標系中的Y值,而我們期望的是橫屏下得到橫屏狀態下坐標系中的Y值,根據兩個坐標系的關系,可以將第一次轉換得到的坐標再做一次轉換,計算得出橫屏坐標系下的Y坐標值。我們通過下面的方法獲取輸入框下端的Y坐標。
- (CGPoint)getViewOriginPointToWindow:(UIView *)view
{
  CGPoint origin;
  if ([[[UIDevice currentDevice] systemVersion] floatValue] < 8) {
    CGPoint focusViewPoint = [view convertPoint:CGPointZero toView:nil];
    UIInterfaceOrientation orientation = [UIApplication sharedApplication].statusBarOrientation;
    if (orientation == UIInterfaceOrientationLandscapeLeft) {
      origin.y = focusViewPoint.x;
      origin.x = [[[UIApplication sharedApplication] delegate] window].bounds.size.height - focusViewPoint.y;
    }
    else if (orientation == UIInterfaceOrientationLandscapeRight) {
      origin.y = [[[UIApplication sharedApplication] delegate] window].bounds.size.width - focusViewPoint.x;
      origin.x = focusViewPoint.y;
    }
    else if (orientation == UIInterfaceOrientationPortraitUpsideDown) {
      origin.y = [[[UIApplication sharedApplication] delegate] window].bounds.size.height - focusViewPoint.y;
      origin.x = [[[UIApplication sharedApplication] delegate] window].bounds.size.width - focusViewPoint.x;
    }
    else {
      origin = focusViewPoint;
    }
  }
  else {
    CGRect rect = [view convertRect:view.bounds toView:[[[UIApplication sharedApplication] delegate] window]];
    origin = rect.origin;
  }
  return origin;
}
因此我們將之前獲取兩個Y坐標的代碼改用下面的方式:
//獲取鍵盤上端Y坐標
CGFloat keyboardY = [self getKeyboardY:notification.userInfo];
//獲取輸入框下端相對於window的Y坐標
CGPoint tmp = [self getViewOriginPointToWindow:focusView];
CGFloat inputBoxY = tmp.y + focusView.frame.size.height;
這樣就完美實現了輸入框隨鍵盤自動上移的效果。
以上就是本文的全部內容,希望對大家的學習有所幫助,也希望大家多多支持本站。