iOS開發UI篇—CAlayer(自定義layer)
編輯:IOS開發綜合
一、第一種方式
1.復雜闡明
以前想要在view中畫東西,需求自定義view,創立一個類與之關聯,讓這個類承繼自UIView,然後重寫它的DrawRect:辦法,然後在該辦法中畫圖。
繪制圖形的步驟: (1)獲取上下文 (2)繪制圖形 (3)渲染圖形 假如在layer上畫東西,與下面的進程類似。 代碼示例: 新建一個類,讓該類承繼自CALayer YYMylayer.m文件

 1 //
 2 //  YYMylayer.m
 3 //  05-自定義layer(1)
 4 //
 5 //  Created by apple on 14-6-21.
 6 //  Copyright (c) 2014年 itcase. All rights reserved.
 7 //
 8
 9 #import "YYMylayer.h"
10
11 @implementation YYMylayer
12 //重寫該辦法,在該辦法內繪制圖形
13 -(void)draWinContext:(CGContextRef)ctx
14 {
15     //1.繪制圖形
16     //畫一個圓
17     CGContextAddEllipseInRect(ctx, CGRectMake(50, 50, 100, 100));
18     //設置屬性(顏色)
19 //    [[UIColor yellowColor]set];
20     CGContextSetRGBFillColor(ctx, 0, 0, 1, 1);
21
22     //2.渲染
23     CGContextFillPath(ctx);
24 }
25 @end
在控制器中,創立一個自定義的類
 1 //
 2 //  YYViewController.m
 3 //  05-自定義layer(1)
 4 //
 5 //  Created by apple on 14-6-21.
 6 //  Copyright (c) 2014年 itcase. All rights reserved.
 7 //
 8
 9 #import "YYViewController.h"
10 #import "YYMylayer.h"
11
12 @interface YYViewController ()
13
14 @end
15
16 @implementation YYViewController
17
18 - (void)viewDidLoad
19 {
20     [super viewDidLoad];
21
22     //1.創立自定義的layer
23     YYMylayer *layer=[YYMylayer layer];
24     //2.設置layer的屬性
25     layer.backgroundColor=[UIColor brownColor].CGColor;
26     layer.bounds=CGRectMake(0, 0, 200, 150);
27     layer.anchorPoint=CGPointZero;
28     layer.position=CGPointMake(100, 100);
29     layer.cornerRadius=20;
30     layer.shadowColor=[UIColor blackColor].CGColor;
31     layer.shadowOffset=CGSizeMake(10, 20);
32     layer.shadowOpacity=0.6;
33
34     [layer setNeedsDisplay];
35     //3.添加layer
36     [self.view.layer addSublayer:layer];
37
38 }
39
40 @end
留意點:
(1)默許為無色,不會顯示。要想讓繪制的圖形顯示出來,還需求設置圖形的顏色。留意不能直接運用UI框架中的類
(2)在自定義layer中的-(void)draWinContext:辦法不會自己調用,只能自己經過setNeedDisplay辦法調用,在view中畫東西DrawRect:辦法在view第一次顯示的時分會自動調用。
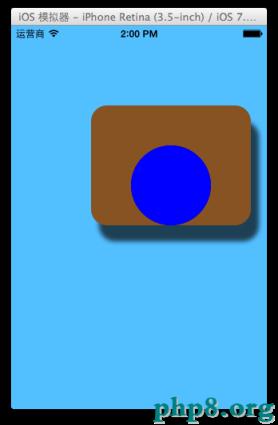
完成效果:
2.拓展
UIView中繪圖闡明
 1 #import "YYVIEW.h"
 2
 3 @implementation YYVIEW
 4
 5
 6 - (void)drawRect:(CGRect)rect
 7 {
 8     //1.獲取上下文
 9     CGContextRef ctx=UIGraphicsGetCurrentContext();
10     //2.繪制圖形
11     CGContextAddEllipseInRect(ctx, CGRectMake(50, 50, 100, 100));
12     //設置屬性(顏色)
13     //    [[UIColor yellowColor]set];
14     CGContextSetRGBFillColor(ctx, 0, 0, 1, 1);
15
16     //3.渲染
17     CGContextFillPath(ctx);
18     //在執行渲染操作的時分,實質上它的外部相當於調用了上面的辦法
19     [self.layer draWinContext:ctx];
20 }
闡明:在UIView中繪制圖形,獲取的上下文就是這個view對應的layer的上下文。在渲染的時分,就是把圖形渲染到對應的layer上。
在執行渲染操作的時分,實質上它的外部相當於執行了[self.layer drawInContext:ctx];
二、第二種方式
辦法描繪:設置CALayer的delegate,然後讓delegate完成drawLayer:inContext:辦法,當CALayer需求繪圖時,會調用delegate的drawLayer:inContext:辦法停止繪圖。
代碼示例:
 1 //
 2 //  YYViewController.m
 3 //  06-自定義layer(2)
 4 //
 5 //  Created by apple on 14-6-21.
 6 //  Copyright (c) 2014年 itcase. All rights reserved.
 7
 8 #import "YYViewController.h"
 9 @interface YYViewController ()
10 @end
11
12 @implementation YYViewController
13
14 - (void)viewDidLoad
15 {
16     [super viewDidLoad];
17     //1.創立自定義的layer
18     CALayer *layer=[CALayer layer];
19     //2.設置layer的屬性
20     layer.backgroundColor=[UIColor brownColor].CGColor;
21     layer.bounds=CGRectMake(0, 0, 200, 150);
22     layer.anchorPoint=CGPointZero;
23     layer.position=CGPointMake(100, 100);
24     layer.cornerRadius=20;
25     layer.shadowColor=[UIColor blackColor].CGColor;
26     layer.shadowOffset=CGSizeMake(10, 20);
27     layer.shadowOpacity=0.6;
28
29     //設置代理
30     layer.delegate=self;
31     [layer setNeedsDisplay];
32     //3.添加layer
33     [self.view.layer addSublayer:layer];
34 }
35
36 -(void)drawLayer:(CALayer *)layer inContext:(CGContextRef)ctx
37 {
38     //1.繪制圖形
39     //畫一個圓
40     CGContextAddEllipseInRect(ctx, CGRectMake(50, 50, 100, 100));
41     //設置屬性(顏色)
42     //    [[UIColor yellowColor]set];
43     CGContextSetRGBFillColor(ctx, 0, 0, 1, 1);
44
45     //2.渲染
46     CGContextFillPath(ctx);
47 }
48 @end
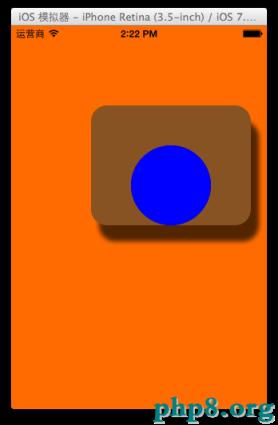
完成效果:
留意點:不能再將某個UIView設置為CALayer的delegate,由於UIView對象曾經是它外部根層的delegate,再次設置為其他層的delegate就會出問題。
在設置代理的時分,它並不要求我們恪守協議,闡明這個辦法是nsobject中的,就不需求再額定的顯示恪守協議了。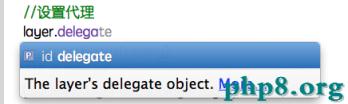 提示:當前假如要設置某個類的代理,但是這個代理沒要求我們恪守什麼特定的協議,那麼可以以為這個協議辦法是NSObject裡邊的。
三、補充闡明
(1)無論采取哪種辦法來自定義層,都必需調用CALayer的setNeedsDisplay辦法才干正常繪圖。 (2)詳細理想進程: 當UIView需求顯示時,它外部的層會預備好一個CGContextRef(圖形上下文),然後調用delegate(這裡就是UIView)的drawLayer:inContext:辦法,並且傳入曾經預備好的CGContextRef對象。而UIView在drawLayer:inContext:辦法中又會調用自己的drawRect:辦法。平常在drawRect:中經過UIGraphicsGetCurrentContext()獲取的就是由層傳入的CGContextRef對象,在drawRect:中完成的一切繪圖都會填入層的CGContextRef中,然後被拷貝至屏幕。
【iOS開發UI篇—CAlayer(自定義layer)】的相關資料介紹到這裡,希望對您有所幫助! 提示:不會對讀者因本文所帶來的任何損失負責。如果您支持就請把本站添加至收藏夾哦!
相關文章
+