[紹棠] 使用內領取(IAP)步驟
1、IAP流程
IAP流程分為兩種,一種是直接運用Apple的服務器停止購置和驗證,另一種就是自己假定服務器停止驗證。由於國際網絡銜接Apple服務器驗證十分慢,而且也為了避免黑客偽造購置憑證,通用做法是自己架設服務器停止驗證。
上面我們經過圖來看看兩種方式的差異:
1.1、運用Apple服務器![[紹棠] 應用內支付(IAP)步驟](https://www.ios5.online/ios/UploadFiles_8070/201703/2017031615370672.png)
復雜說下第二中狀況的流程:
用戶進入購置虛擬物品頁面,App從後台服務器獲取產品列表然後顯示給用戶用戶點擊購置購置某一個虛擬物品,APP就發送該虛擬物品的productionIdentifier到Apple服務器Apple服務器依據APP發送過去的productionIdentifier前往相應的物品的信息(描繪,價格等)用戶點擊確認鍵購置該物品,購置懇求發送到Apple服務器Apple服務器完成購置後,前往用戶一個完成購置的憑證APP發送這個憑證到後台服務器驗證後台服務器把這個憑證發送到Apple驗證,Apple前往一個字段給後台服務器標明該憑證能否無效後台服務器把驗證後果在發送到APP,APP依據驗證後果做相應的處置 2、iTunes Co.net操作搞清楚了自己架設服務器是如何完成IAP購置的流程了之後,我們下一步就是登錄到iTunes Co.net創立使用和指定虛擬物品價格表
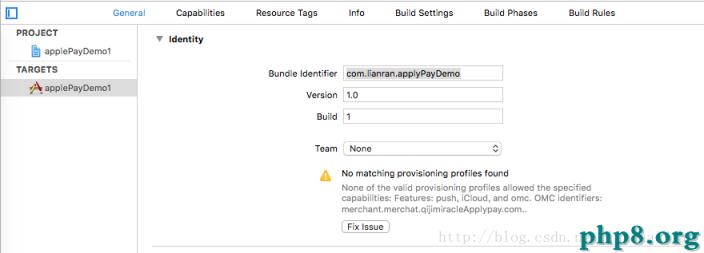
2.1、創立自己的App如下圖所示,我們需求創立一個自己的APP,要留意的是這裡的Bundle ID一定要跟你的項目中的info.plist中的Bundle ID保證分歧。也就是圖中紅框局部。
2.2、創立虛擬物品價格表 2.2.1、虛擬物品分為如下幾種:
耗費品(Consumable products):比方游戲內金幣等。
不可耗費品(Non-consumable products):復雜來說就是一次購置,終身可用(用戶可隨時從App Store restore)。
自動更新訂閱品(Auto-renewable subscriptions):和不可耗費品的不同點是有生效時間。比方一整年的付費周刊。在這種形式下,開發者活期投遞內容,用戶在訂閱期內隨時可以訪問這些內容。訂閱快要過時時,零碎將自動更新訂閱(假如用戶贊同)。
非自動更新訂閱品(Non-renewable subscriptions):普通運用場景是從用戶從IAP購置後,購置信息寄存在自己的開發者服務器上。生效日期/可用是由開發者服務器自行控制的,而非由App Store控制,這一點與自動更新訂閱品有差別。
收費訂閱品(Free subscriptions):在Newsstand中放置收費訂閱的一種方式。收費訂閱永不過時。只能用於Newsstand-enabled apps。
類型2、3、5都是以Apple ID為粒度的。比方小張有三個iPad,有一個Apple ID購置了不可耗費品,則三個iPad上都可以運用。
類型1、4普通來說則是現買現用。假如開發者自己想做更多控制,普通選4
2.2.2、創立成功後如下所示:
其中產品id是字母或許數字,或許兩者的組合,用於獨一表示該虛擬物品,app也是經過懇求產品id來從apple服務器獲取虛擬物品信息的。
2.3、設置稅務和銀行卡信息這一步必需設置,不然是無法從apple獲取虛擬產品信息。
設置成功後如下所示:
3、IOS端詳細代碼完成
完成了下面的預備任務,我們就可以開端著手IAP的代碼完成了。
我們假定你曾經完成了從後台服務器獲取虛擬物品列表這一步操作了,這一步後台服務器還會前往每個虛擬物品所對應的productionIdentifier,假定你也獲取到了,並保管在屬性self.productIdent中。
需求在工程中引入 storekit.framework。
我們來看看後續如何完成IAP
3.1、確認用戶能否允許IAP//移除監聽
-(void)dealloc
{
[[SKPaymentQueue defaultQueue] removeTransactionObserver:self];
}
//添加監聽
- (void)viewDidLoad{
[super viewDidLoad];
[self.tableView.mj_header beginRefreshing];
[[SKPaymentQueue defaultQueue] addTransactionObserver:self];
}
- (void)buyProdution:(UIButton *)sender{
if ([SKPaymentQueue canMakePayments]) {
[self getProductInfo:self.productIdent];
} else {
[self showMessage:@"用戶制止使用內付費購置"];
}
}假如用戶允許IAP,那麼就可以發起購置操作了
//從Apple查詢用戶點擊購置的產品的信息
- (void)getProductInfo:(NSString *)productIdentifier {
    NSArray *product = [[NSArray alloc] initWithObjects:productIdentifier, nil];
    NSSet *set = [NSSet setWithArray:product];
    SKProductsRequest * request = [[SKProductsRequest alloc] initWithProductIdentifiers:set];
    request.delegate = self;
    [request start];
    [self showMessageManualHide:@"正在購置,請稍後"];
}

// 查詢成功後的回調
- (void)productsRequest:(SKProductsRequest *)request didReceiveResponse:(SKProductsResponse *)response {
    [self hideHUD];
    NSArray *myProduct = response.products;
    if (myProduct.count == 0) {
        [self showMessage:@"無法獲取產品信息,請重試"];
        return;
    }
    SKPayment * payment = [SKPayment paymentWithProduct:myProduct[0]];
    [[SKPaymentQueue defaultQueue] addPayment:payment];
}

//查詢失敗後的回調
- (void)request:(SKRequest *)request didFailWithError:(NSError *)error {
    [self hideHUD];
    [self showMessage:[error localizedDescription]];
}
//購置操作後的回調
- (void)paymentQueue:(SKPaymentQueue *)queue updatedTransactions:(NSArray *)transactions {
    [self hideHUD];
    for (SKPaymentTransaction *transaction in transactions)
    {
        switch (transaction.transactionState)
        {
            case SKPaymentTransactionStatePurchased://買賣完成
                self.receipt = [GTMBase64 stringByEncodingData:[NSData dataWithContentsOfURL:[[NSBundle mainBundle] appStoreReceiptURL]]];
                [self checkReceiptIsValid];//把self.receipt發送到服務器驗證能否無效
                [self completeTransaction:transaction];
                break;

            case SKPaymentTransactionStateFailed://買賣失敗
                [self failedTransaction:transaction];
                break;

            case SKPaymentTransactionStateRestored://曾經購置過該商品
                [self showMessage:@"恢復購置成功"];
                [self restoreTransaction:transaction];
                break;

            case SKPaymentTransactionStatePurchasing://商品添加進列表
                [self showMessage:@"正在懇求付費信息,請稍後"];
                break;

            default:
                break;
        }
    }

}


- (void)completeTransaction:(SKPaymentTransaction *)transaction {
    [[SKPaymentQueue defaultQueue] finishTransaction: transaction];
}


- (void)failedTransaction:(SKPaymentTransaction *)transaction {
    if(transaction.error.code != SKErrorPaymentCancelled) {
        UIAlertView *alertView = [[UIAlertView alloc] initWithTitle:nil message:@"購置失敗,請重試"delegate:self cancelButtonTitle:@"取消" otherButtonTitles:@"重試", nil];
        [alertView show];
    } else {
        [self showMessage:@"用戶取消買賣"];
    }

    [[SKPaymentQueue defaultQueue] finishTransaction: transaction];
}


- (void)restoreTransaction:(SKPaymentTransaction *)transaction {
    [[SKPaymentQueue defaultQueue] finishTransaction: transaction];
}在這一步我們需求向服務器驗證Apple服務器前往的購置憑證的無效性,然後把驗證後果告訴用戶
- (void)checkReceiptIsValid{

    AFHTTPSessionManager manager]GET:@"後台服務器地址"  parameters::@"發送的參數(必需包括購置憑證)"
    success:^(NSURLSessionDataTask * _Nonnull task, id  _Nonnull responSEObject) {
        if(憑證無效){
          你要做的事
        }else{//憑證有效
          你要做的事
        }

    } failure:^(NSURLSessionDataTask * _Nullable task, NSError * _Nonnull error) {
                UIAlertView *alertView = [[UIAlertView alloc] initWithTitle:nil message:@"購置失敗,請重試"delegate:self cancelButtonTitle:@"取消" otherButtonTitles:@"重試", nil];
            [alertView show];
    }

}
假如呈現網絡問題,招致無法驗證。我們需求耐久化保管購置憑證,在用戶下次啟動APP的時分在後台向服務器再一次發起驗證,直到成功然後移除該憑證。
保證如下define可在全局訪問:
#define AppStoreInfoLocalFilePath [NSString stringWithFormat:@"%@/%@/", [NSSearchPathForDirectoriesInDomains(NSDocumentDirectory, NSUserDomainMask, YES) lastObject],@"EACEF35FE363A75A"]
-(void)alertView:(UIAlertView *)alertView clickedButtonAtIndex:(NSInteger)buttonIndex
{
    if (buttonIndex == 0)
    {
        [self saveReceipt];
    }
    else
    {
        [self checkReceiptIsValid];
    }
}


//耐久化存儲用戶購置憑證(這裡最好還要存儲以後日期,用戶id等信息,用於區分不同的憑證)
-(void)saveReceipt{
    NSString *fileName = [AppUtils getUUIDString];
    NSString *savedPath = [NSString stringWithFormat:@"%@%@.plist", AppStoreInfoLocalFilePath, fileName];

    NSDictionary *dic =[ NSDictionary dictionaryWithObjectsAndKeys:
                        self.receipt,                           Request_transactionReceipt,
                        self.date                               DATE
                        self.userId                             USERID
                        nil];

    [dic writeToFile:savedPath atomically:YES];
}- (BOOL)application:(UIApplication *)application didFinishLaunchingWithOptions:(NSDictionary *)launchOptions{
NSFileManager *fileManager = [NSFileManager defaultManager];
//從服務器驗證receipt失敗之後,在順序再次啟動的時分,運用保管的receipt再次到服務器驗證
if (![fileManager fileExistsAtPath:AppStoreInfoLocalFilePath]) {//假如在改路下不存在文件,闡明就沒有保管驗證失敗後的購置憑證,也就是說發送憑證成功。
[fileManager createDirectoryAtPath:AppStoreInfoLocalFilePath//創立目錄
withIntermediateDirectories:YES
attributes:nil
error:nil];
}
else//存在購置憑證,闡明發送憑證失敗,再次發起驗證
{
[self sendFailedIapFiles];
}
}
//驗證receipt失敗,App啟動後再次驗證
- (void)sendFailedIapFiles{
NSFileManager *fileManager = [NSFileManager defaultManager];
NSError *error = nil;
//搜索該目錄下的一切文件和目錄
NSArray *cacheFileNameArray = [fileManager contentsOfDirectoryAtPath:AppStoreInfoLocalFilePath error:&error];
if (error == nil)
{
for (NSString *name in cacheFileNameArray)
{
if ([name hasSuffix:@".plist"])//假如有plist後綴的文件,闡明就是存儲的購置憑證
{
NSString *filePath = [NSString stringWithFormat:@"%@/%@", AppStoreInfoLocalFilePath, name];
[self sendAppStoreRequestBuyPlist:filePath];
}
}
}
else
{
DebugLog(@"AppStoreInfoLocalFilePath error:%@", [error domain]);
}
}
-(void)sendAppStoreRequestBuyPlist:(NSString *)plistPath
{
NSString *path = [NSString stringWithFormat:@"%@%@", AppStoreInfoLocalFilePath, plistPath];
NSDictionary *dic = [NSDictionary dictionaryWithContentsOfFile:path];
//這裡的參數請依據自己公司後台服務器接口定制,但是必需發送的是耐久化保管購置憑證
NSMutableDictionary *params = [NSMutableDictionary dictionaryWithObjectsAndKeys:
[dic objectForKey:USERID], USERID,
[dic objectForKey:DATE], DATE, [dic objectForKey:Request_transactionReceipt], Request_transactionReceipt,
nil];
AFHTTPSessionManager manager]GET:@"後台服務器地址" parameters:params success:^(NSURLSessionDataTask * _Nonnull task, id _Nonnull responSEObject) {
if(憑證無效){
[self removeReceipt]
}else{//憑證有效
你要做的事
}
} failure:^(NSURLSessionDataTask * _Nullable task, NSError * _Nonnull error) {
}
}
//驗證成功就從plist中移除憑證
-(void)removeReceipt{
[AppUtils removeIapFailedPath:AppStoreInfoLocalFilePath];
}
//AppUtils類辦法,驗證成功,移除存儲的receipt
+ (void)removeIapFailedPath:(NSString *)plistPath{
NSString *path = [NSString stringWithFormat:@"%@/%@", AppStoreInfoLocalFilePath, plistPath];
NSFileManager *fileManager = [NSFileManager defaultManager];
if ([fileManager fileExistsAtPath:AppStoreInfoLocalFilePath])
{
[fileManager removeItemAtPath:AppStoreInfoLocalFilePath error:nil];
}
if ([fileManager fileExistsAtPath:path])
{
[fileManager removeItemAtPath:path error:nil];
}
}
至此,整個流程完畢.
【[紹棠] 使用內領取(IAP)步驟】的相關資料介紹到這裡,希望對您有所幫助! 提示:不會對讀者因本文所帶來的任何損失負責。如果您支持就請把本站添加至收藏夾哦!
- 上一頁:iOS 啟動頁image大小
- 下一頁:swift開發新項目總結

- iphone6美版和港版有什麼不同?蘋果6美版和港版特點介紹[圖]
- ios8有哪些新功能? ios8正式版新功能介紹[圖]
- ios8如何恢復被刪照片? ios8恢復最近被刪照片及隱照片功能介紹[多圖]
- ios8獨立運行計步器功能介紹[多圖]
- iOS8.1.2有哪些新功能? iOS8.1.2新特性介紹[多圖]
- UC免費WIFI電腦版怎麼用?UC免費WIFI電腦版使用方法介紹[多圖]
- 啪啪模擬器怎麼玩?啪啪模擬器使用圖文教程介紹[多圖]
- 馬上賺錢怎麼注冊?馬上賺錢注冊流程介紹[多圖]
- iPhone6S升級iOS9.0.1詳細介紹[多圖]
- 石榴直播下載地址什麼?石榴直播app下載地址介紹[多圖]
- iOS10.1正式版什麼時候出?蘋果iOS10.1正式版推送時間介紹[圖]
- 知商金融怎麼注冊?知商金融注冊方法介紹[多圖]
- 上文引立客戶端怎麼注冊?上文引立官網注冊登錄方法介紹[多圖]
- iOS8 GM版與正式版有什麼區別? iOS8 GM版本介紹[圖]
- 酷米客公交怎麼用?酷米客公交使用方法圖文介紹[多圖]