MQTT配置安全策略
最近在mac上部署了MQTT服務,直接用brew install mqtt,然後通過/usr/local/Cellar/mosquitto/1.4.11/etc/mosquitto找到目錄下的mosquito.conf來配置相關的選項。
借用網上都搜的到的一套配置,裡面中文注釋已經很清晰了
# =================================================================
# General configuration
# =================================================================

# 客戶端心跳的間隔時間
#retry_interval 20

# 系統狀態的刷新時間
#sys_interval 10

# 系統資源的回收時間,0表示盡快處理
#store_clean_interval 10

# 服務進程的PID
#pid_file /var/run/mosquitto.pid

# 服務進程的系統用戶
#user mosquitto

# 客戶端心跳消息的最大並發數
#max_inflight_messages 10

# 客戶端心跳消息緩存隊列
#max_queued_messages 100

# 用於設置客戶端長連接的過期時間,默認永不過期
#persistent_client_expiration

# =================================================================
# Default listener
# =================================================================

# 服務綁定的IP地址
#bind_address

# 服務綁定的端口號
#port 1883

# 允許的最大連接數,-1表示沒有限制
#max_connections -1

# cafile:CA證書文件
# capath:CA證書目錄
# certfile:PEM證書文件
# keyfile:PEM密鑰文件
#cafile
#capath
#certfile
#keyfile
capath /etc/mosquitto/tls/
cafile /etc/mosquitto/tls/ca.crt
certfile /etc/mosquitto/tls/server.crt
keyfile /etc/mosquitto/tls/server.key

# 必須提供證書以保證數據安全性
#require_certificate false
require_certificate true

# 若require_certificate值為true,use_identity_as_username也必須為true
#use_identity_as_username false
use_identity_as_username true

# 啟用PSK(Pre-shared-key)支持
#psk_hint

# SSL/TSL加密算法,可以使用“openssl ciphers”命令獲取
# as the output of that command.
#ciphers

# =================================================================
# Persistence
# =================================================================

# 消息自動保存的間隔時間
#autosave_interval 1800

# 消息自動保存功能的開關
#autosave_on_changes false

# 持久化功能的開關
persistence true

# 持久化DB文件
#persistence_file mosquitto.db

# 持久化DB文件目錄
#persistence_location /var/lib/mosquitto/

# =================================================================
# Logging
# =================================================================

# 4種日志模式:stdout、stderr、syslog、topic
# none 則表示不記日志,此配置可以提升些許性能
log_dest none

# 選擇日志的級別(可設置多項)
#log_type error
#log_type warning
#log_type notice
#log_type information

# 是否記錄客戶端連接信息
#connection_messages true

# 是否記錄日志時間
#log_timestamp true

# =================================================================
# Security
# =================================================================

# 客戶端ID的前綴限制,可用於保證安全性
#clientid_prefixes

# 允許匿名用戶
#allow_anonymous true

# 用戶/密碼文件,默認格式:username:password
#password_file

# PSK格式密碼文件,默認格式:identity:key
#psk_file

# pattern write sensor/%u/data
# ACL權限配置,常用語法如下:
# 用戶限制:user <username>
# 話題限制:topic [read|write] <topic>
# 正則限制:pattern write sensor/%u/data
#acl_file

# =================================================================
# Bridges
# =================================================================

# 允許服務之間使用“橋接”模式(可用於分布式部署)
#connection <name>
#address <host>[:<port>]
#topic <topic> [[[out | in | both] qos-level] local-prefix remote-prefix]

# 設置橋接的客戶端ID
#clientid

# 橋接斷開時,是否清除遠程服務器中的消息
#cleansession false

# 是否發布橋接的狀態信息
#notifications true

# 設置橋接模式下,消息將會發布到的話題地址
# $SYS/broker/connection/<clientid>/state
#notification_topic

# 設置橋接的keepalive數值
#keepalive_interval 60

# 橋接模式,目前有三種:automatic、lazy、once
#start_type automatic

# 橋接模式automatic的超時時間
#restart_timeout 30

# 橋接模式lazy的超時時間
#idle_timeout 60

# 橋接客戶端的用戶名
#username

# 橋接客戶端的密碼
#password

# bridge_cafile:橋接客戶端的CA證書文件
# bridge_capath:橋接客戶端的CA證書目錄
# bridge_certfile:橋接客戶端的PEM證書文件
# bridge_keyfile:橋接客戶端的PEM密鑰文件
#bridge_cafile
#bridge_capath
#bridge_certfile
#bridge_keyfile
後面需要用到ssl加密通信,上一篇博客提到了折騰openssl,安裝好了之後直接打開終端,現在用openssl來折騰生成證書。
首先生成(Certificate Authority,CA)的認證和密鑰,需要填很多參數,comme name用本機IP
openssl req -new -x509 -days 365 -extensions v3_ca -keyout ca.key -out ca.crt
接下來生成服務器使用的秘鑰
openssl genrsa -des3 -out server.key 2048
除去密碼
openssl genrsa -out server.key 2048
然後為MQTT代理准備一個認證注冊請求(Certificate Signing Request,CSR),這裡的Common Name也要寫對:
openssl req -out server.csr -key server.key -new
最後通過CA簽署這個CSR生成MQTT代理證書:
openssl x509 -req -in server.csr -CA ca.crt -CAkey ca.key -CAcreateserial -out server.crt -days 365
然後重新修改 mosquito.conf,指定證書的目錄
capath /etc/mosquitto/tls/
cafile /etc/mosquitto/tls/ca.crt
certfile /etc/mosquitto/tls/server.crt
keyfile /etc/mosquitto/tls/server.key
然後啟動mosquito的服務,可以用命令啟動
我圖方便,直接在/usr/local/Cellar/mosquitto/1.4.11/sbin目錄下找到mosquito可執行文件來啟動服務。
配置client端
cd到證書目錄下,然後轉換下client端證書格式
openssl x509 -in ca.crt -out ca.der -outform der
IOS端用的是MQTT-Client-Framework框架,具體配置如下:
MQTTCFSocketTransport *transport = [[MQTTCFSocketTransport alloc] init];
    transport.host = @"***.***.***.80";
    transport.port = 1883;

    session_app = [[MQTTSession alloc] init];
    session_app.transport = transport;

    //設置policy
    MQTTSSLSecurityPolicy* securityPolicy = [MQTTSSLSecurityPolicy policyWithPinningMode:MQTTSSLPinningModePublicKey];
    NSString * cerPath = [[NSBundle mainBundle] pathForResource:@"ca" ofType:@"der"];
    NSData * cerData = [NSData dataWithContentsOfFile:cerPath];
    session_app.securityPolicy.pinnedCertificates = [[NSArray alloc] initWithObjects:cerData, nil];
    securityPolicy.alloWinvalidCertificates = YES; // we using self-signed certificate and didn't coupled with CA infrastructure

    session_app.delegate = self;

    [session_app connectAndWaitTimeout:30];
這裡有個小細節,der證書是我直接從目錄拖進xcode工程的,直接在pathForResource裡面是搜不到這個證書的,還需要將der加入到build phases->copy bundle resources中。
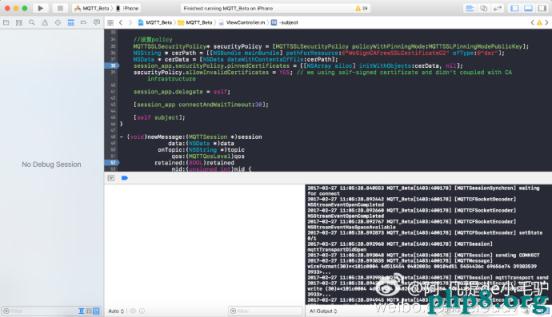
最後用IOS client端訂閱一個服務,mac終端顯示訂閱成功,搞定!

【MQTT配置安全策略】的相關資料介紹到這裡,希望對您有所幫助! 提示:不會對讀者因本文所帶來的任何損失負責。如果您支持就請把本站添加至收藏夾哦!

- iOS9與XCode7中不克不及應用http銜接的疾速處理方法
- iOS設置UIButton文字顯示地位和字體年夜小、色彩的辦法
- iOS自帶文本轉語音技巧(TTS)的完成即語音播報的理論
- 詳解iOS中Button按鈕的狀況和點擊事宜
- IOS 粒子體系 (CAEmitterLayer)實例詳解
- iOS運用中UICollectionViewCell定制Button
- IOS 處理UIButton 點擊卡頓/延遲的成績
- IOS代碼筆記之勾選記住暗碼全體button
- iOS中應用NSURLConnection處置HTTP同步與異步要求
- iOS的HTTP要求和要求回執類用法小結
- iOS運用開辟中AFNetworking庫的經常使用HTTP操作辦法小結
- 詳解iOS運用中自界說UIBarButtonItem導航按鈕的創立辦法
- 詳解iOS中UIButton的三年夜UIEdgeInsets屬性用法
- 舉例講授iOS運用開辟中hitTest觸摸事宜的編寫辦法
- HTTP/2 協定用於 iOS 推送提示辦事 (APNS)