IOS中實現圖片點擊全屏預覽
編輯:IOS開發綜合
如果你感覺累,那就對了那是因為你在走上坡路。。這句話似乎有點道理的樣子,時常提醒自己無論走到哪都不要忘記自己當初為什麼出發。有時想想感覺有的東西可以記錄一下,就把它記錄下來吧,這次想寫一下關於單張圖片點擊全屏預覽的問題,網上查了一些大神寫的有的功能確實很強大但自己暫時想要的只是簡單的功能就好,還有些方法自己也沒弄出想要的效果,最後寫了一個比較簡單的點擊單張圖片的全屏預覽和雙指捏合縮小放大,可能有時要對圖片做一些處理,這裡放大後只是顯示同一張圖片並未做處理,下面直接貼出代碼
//
// ViewController.m
// XWZoomImageView
//
// Created by xiao on 15/11/13.
// Copyright © 2015年 xiao. All rights reserved.
//

#import "ViewController.h"

@interface ViewController ()<UIScrollViewDelegate>
@property (weak, nonatomic) IBOutlet UIImageView *picView;
@property (weak, nonatomic) UIScrollView *scrollView;
@property (weak, nonatomic) UIImageView *lastImageView;
@property (nonatomic, assign)CGRect originalFrame;
@property (nonatomic, assign)BOOL isDoubleTap;
@end

@implementation ViewController

- (void)viewDidLoad {
 [super viewDidLoad];

 self.picView.userInteractionEnabled = YES;
 //添加單擊手勢
 UITapGestureRecognizer *tap = [[UITapGestureRecognizer alloc] initWithTarget:self action:@selector(showZoomImageView:)];

 [self.picView addGestureRecognizer:tap];

}

-(void)showZoomImageView:(UITapGestureRecognizer *)tap
{
 if (![(UIImageView *)tap.view image]) {
  return;
 }
 //scrollView作為背景
 UIScrollView *bgView = [[UIScrollView alloc] init];
 bgView.frame = [UIScreen mainScreen].bounds;
 bgView.backgroundColor = [UIColor blackColor];
 UITapGestureRecognizer *tapBg = [[UITapGestureRecognizer alloc] initWithTarget:self action:@selector(tapBgView:)];
 [bgView addGestureRecognizer:tapBg];

 UIImageView *picView = (UIImageView *)tap.view;

 UIImageView *imageView = [[UIImageView alloc] init];
 imageView.image = picView.image;
 imageView.frame = [bgView convertRect:picView.frame fromView:self.view];
 [bgView addSubview:imageView];

 [[[UIApplication sharedApplication] keyWindow] addSubview:bgView];

 self.lastImageView = imageView;
 self.originalFrame = imageView.frame;
 self.scrollView = bgView;
 //最大放大比例
 self.scrollView.maximumZoomScale = 1.5;
 self.scrollView.delegate = self;

 [UIView animateWithDuration:0.5 animations:^{
  CGRect frame = imageView.frame;
  frame.size.width = bgView.frame.size.width;
  frame.size.height = frame.size.width * (imageView.image.size.height / imageView.image.size.width);
  frame.origin.x = 0;
  frame.origin.y = (bgView.frame.size.height - frame.size.height) * 0.5;
  imageView.frame = frame;
 }];
}

-(void)tapBgView:(UITapGestureRecognizer *)tapBgRecognizer
{
 self.scrollView.contentOffset = CGPointZero;
 [UIView animateWithDuration:0.5 animations:^{
  self.lastImageView.frame = self.originalFrame;
  tapBgRecognizer.view.backgroundColor = [UIColor clearColor];
 } completion:^(BOOL finished) {
  [tapBgRecognizer.view removeFromSuperview];
  self.scrollView = nil;
  self.lastImageView = nil;
 }];
}

//返回可縮放的視圖
-(UIView *)viewForZoomingInScrollView:(UIScrollView *)scrollView
{
 return self.lastImageView;
}
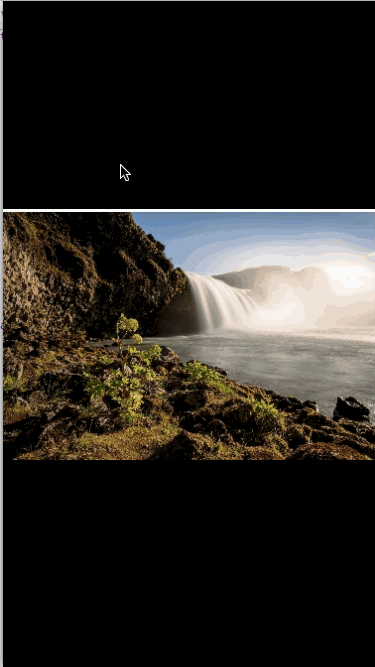
最後同樣帶上一張圖片吧,大致是這樣子
再給大家分享一則IOS中點擊圖片後放大的代碼
.h文件-----------------------------------------------------------------
#import
@interface ZoomImage : NSObject
/**
 *@brief點擊圖片放大,再次點擊縮小
 *
 *@param oldImageView 頭像所在的imageView
 */
+(void)showImage:(UIImageView*)avatarImageView;
@end
.m文件-----------------------------------------------------------------
#import "ZoomImage.h"
static CGRect oldframe;
@implementation ZoomImage
+(void)showImage:(UIImageView*)avatarImageView
{
 UIImage *image =avatarImageView.image;
 // 獲得根窗口
 UIWindow *window =[UIApplication sharedApplication].keyWindow;
 UIView *backgroundView =[[UIView alloc]initWithFrame:CGRectMake(0, 0, WIDTH, HEIGHT)];
 oldframe =[avatarImageView convertRect:avatarImageView.bounds toView:window];
 backgroundView.backgroundColor =[UIColor blackColor];
 backgroundView.alpha =0.5;
 UIImageView *imageView =[[UIImageView alloc]initWithFrame:oldframe];
 imageView.image =image;
 imageView.tag =1;
 [backgroundView addSubview:imageView];
 [window addSubview:backgroundView];
 //點擊圖片縮小的手勢
 UITapGestureRecognizer *tap =[[UITapGestureRecognizer alloc]initWithTarget:self action:@selector(hideImage:)];
 [backgroundView addGestureRecognizer:tap];
 [UIView animateWithDuration:0.3 animations:^{
  imageView.frame =CGRectMake(0,([UIScreen mainScreen].bounds.size.height-image.size.height*[UIScreen mainScreen].bounds.size.width/image.size.width)/2, [UIScreen mainScreen].bounds.size.width, image.size.height*[UIScreen mainScreen].bounds.size.width/image.size.width);
  backgroundView.alpha =1;
 }];
}
+(void)hideImage:(UITapGestureRecognizer *)tap{
 UIView *backgroundView =tap.view;
 UIImageView *imageView =(UIImageView *)[tap.view viewWithTag:1];
 [UIView animateWithDuration:0.3 animations:^{
  imageView.frame =oldframe;
  backgroundView.alpha =0;
 } completion:^(BOOL finished) {
  [backgroundView removeFromSuperview];
 }];
}

相關文章
+