iOS實現側拉欄抽屜效果
編輯:IOS開發綜合
本文實例介紹了iOS實現側拉欄抽屜效果的相關代碼,分享給大家供大家參考,具體內容如下
需要導入第三方的類庫如下:
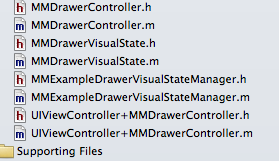
抽屜效果所需第三方類庫下載
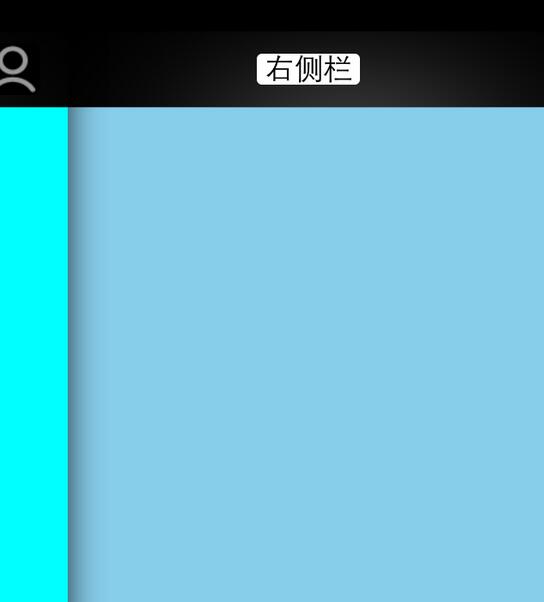
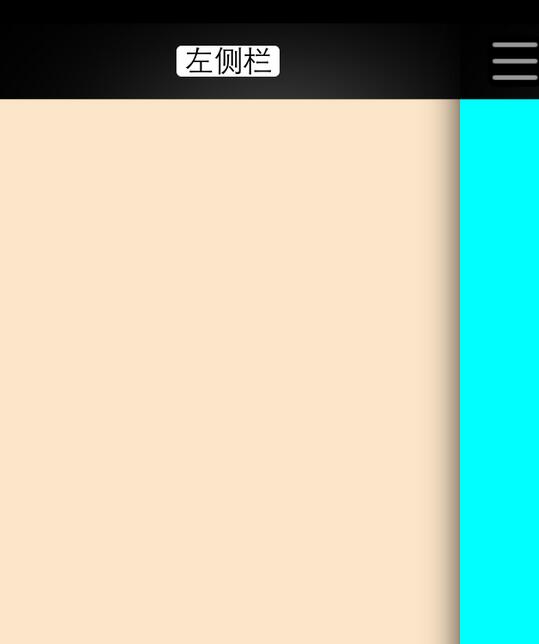
效果:既可以兩側都實現抽屜效果也可只實現左側欄或者右側欄的抽屜效果
關於抽屜效果主要是AppDelegate的代碼
AppDelegate.h文件代碼:
 <span style="font-size:18px;"><span style="font-size:18px;">#import <UIKit/UIKit.h>

@interface YJFAppDelegate : UIResponder <UIApplicationDelegate>

@property (strong, nonatomic) UIWindow *window;

@end</span></span>
AppDelegate.m文件代碼

<span style="font-size:18px;"><span style="font-size:24px;"><span style="font-size:18px;">#import "YJFAppDelegate.h"
#import "CustomizedNavigationController.h"
#import "FirstViewController.h"
#import "SecondViewController.h"
#import "ThirdViewController.h"
@implementation YJFAppDelegate

- (BOOL)application:(UIApplication *)application didFinishLaunchingWithOptions:(NSDictionary *)launchOptions
{
 self.window = [[UIWindow alloc] initWithFrame:[[UIScreen mainScreen] bounds]];
 //主視圖
 FirstViewController *firstVC = [[FirstViewController alloc] init];
 //左邊視圖
 SecondViewController *secondVC = [[SecondViewController alloc] init];
 //右邊視圖
 ThirdViewController *thirdVC = [[ThirdViewController alloc] init];

 CustomizedNavigationController *navigationVC = [[CustomizedNavigationController alloc] initWithRootViewController:firstVC];


 CustomizedNavigationController *leftNavigationVC = [[CustomizedNavigationController alloc] initWithRootViewController:secondVC];

 CustomizedNavigationController *rightNavigationVC = [[CustomizedNavigationController alloc] initWithRootViewController:thirdVC];

 //抽屜管理 第三方
 //該第三方既可以只實現打開左側欄也可以實現打開右側欄,還可以同時都實現
 MMDrawerController *rooVC = [[MMDrawerController alloc] initWithCenterViewController:navigationVC leftDrawerViewController:leftNavigationVC rightDrawerViewController:rightNavigationVC];

 //只實現打開左側欄
 //MMDrawerController *rooVCLeft = [[MMDrawerController alloc] initWithCenterViewController:navigationVC leftDrawerViewController:firstVC];
 //只實現打開右側欄
 //MMDrawerController *rooVCRight = [[MMDrawerController alloc] initWithCenterViewController:navigationVC rightDrawerViewController:thirdVC];

 //指定window的根視圖
 self.window.rootViewController = rooVC;
 //測了門的寬度
 [rooVC setMaximumLeftDrawerWidth:270];
 //設置側拉門開與關的動畫
 [rooVC setOpenDrawerGestureModeMask:MMOpenDrawerGestureModeAll];
 [rooVC setCloseDrawerGestureModeMask:MMCloseDrawerGestureModeAll];
 //側開內容展示效果
 //設置向左滑動打開右側欄
 [[MMExampleDrawerVisualStateManager sharedManager] setRightDrawerAnimationType:MMDrawerAnimationTypeNone];
 //設置向右滑動打開左側欄
 [[MMExampleDrawerVisualStateManager sharedManager] setLeftDrawerAnimationType:MMDrawerAnimationTypeNone];

 //
 [rooVC setDrawerVisualStateBlock:^(MMDrawerController *drawerController, MMDrawerSide drawerSide, CGFloat percentVisible) {
  MMDrawerControllerDrawerVisualStateBlock block;
  block = [[MMExampleDrawerVisualStateManager sharedManager]
     drawerVisualStateBlockForDrawerSide:drawerSide];
  if(block){
   block(drawerController, drawerSide, percentVisible);
  }

 }];


 self.window.backgroundColor = [UIColor whiteColor];
 [self.window makeKeyAndVisible];
 return YES;
}</span>
</span>
</span>
以上就是本文的全部內容,希望對大家學習ios抽屜效果有所幫助。
- 上一頁:iOS開發之微信聊天工具欄的封裝
- 下一頁:iOS實現簡單的抽屜效果

相關文章
+