iOS App開發中使cell高度自適應的黑魔法詳解
在使用 table view 的時侯經常會遇到這樣的需求:table view 的 cell 中的內容是動態的,導致在開發的時候不知道一個 cell 的高度具體是多少,所以需要提供一個計算 cell 高度的算法,在每次加載到這個 cell 的時候計算出 cell 真正的高度。
在 iOS 8 之前
沒有使用 Autolayout 的情況下,需要實現 table view delegate 的 tableView(tableView: UITableView, heightForRowAtIndexPath indexPath: NSIndexPath) -> CGFloat 方法,在這個方法中計算並返回 cell 的高度。比如,我有一個可以顯示任意行數的純文本 cell,計算 cell 的代碼可以是這樣:
復制代碼 代碼如下:
override func tableView(tableView: UITableView, heightForRowAtIndexPath indexPath: NSIndexPath) -> CGFloat {
let content = self.datas[indexPath.row] as String
let padding: CGFloat = 20
let width = tableView.frame.size.width - padding * 2;
let size = CGSizeMake(width, CGFloat.max)
let attributes = [NSFontAttributeName: UIFont(name: "Helvetica", size: 14)!]
let frame = content.boundingRectWithSize(size,
options: NSStringDrawingOptions.UsesLineFragmentOrigin,
attributes: attributes,
context: nil)
return frame.size.height+1;
}
上面的代碼是一個最簡單的例子,這個例子看起來好像沒有什麼問題。但是通過查看這個 delegate 方法的文檔後,可以知道,在每次 reload tableview 的時候,程序會先計算出每一個 cell 的高度,等所有高度計算完畢,確定了 tableview 的總的高度後,才開始渲染視圖並顯示在屏幕上。這意味著在顯示 table view 之前需要執行一堆的計算,並且這是在主線程中進行的,如果計算量太大程序就很有可能出現卡頓感。比如: table view 的數據有上千條,或者計算高度的代碼中還要先獲取圖片再根據圖片計算高度,這些操作都是非常慢的。
如果在 cell 中使用了 autolayout,在計算 cell 高度時會更麻煩。有興趣的可以看這裡有篇關於如何在 autolayout 下動態計算高度 的文章。
為什麼不能等滾動到某個 cell 的時候,再調用計算這個 cell 高度的 delegate 呢?原因是 tableview 需要獲得它的內容的總高度,用這個高度去確定滾動條的大小等。直到 iOS 7 UITableViewDelegate中添加了新的 API
tableView(tableView: UITableView, estimatedHeightForRowAtIndexPath indexPath: NSIndexPath) -> CGFloat
這個方法用於返回一個 cell 的預估高度,如果在程序中實現了這個方法,tableview 首次加載的時候就不會調用heightForRowAtIndexPath 方法,而是用 estimatedHeightForRowAtIndexPath 返回的預估高度計算 tableview 的總高度,然後 tableview 就可以顯示出來了,等到 cell 可見的時候,再去調用heightForRowAtIndexPath 獲取 cell 的正確高度。
通過使用estimatedHeightForRowAtIndexPath 這個 Delegate 方法,解決了首次加載 table view 出現的性能問題。但還有一個麻煩的問題,就是在 cell 沒有被加載的時候計算 cell 的高度,上面給出的代碼中,僅僅是計算一個 NSString 的高度,就需要不少代碼了。這種計算實際上是必須的,然而在 iOS 8 開始,你可能可以不用再寫這些煩人的計算代碼了!
iOS 8 的魔法
在 iOS 8 中,self size cell 提供了這樣一種機制:cell 如果有一個確定的寬度/高度,autolayout 會自動根據 cell 中的內容計算出對應的高度/寬度。
TableView 中的 cell 自適應
要讓 table view 的 cell 自適應內容,有幾個要點:
設置的 AutoLayout 約束必須讓 cell 的 contentView 知道如何自動延展。關鍵點是 contentView 的 4 個邊都要設置連接到內容的約束,並且內容是會動態改變尺寸的。
UITableView 的 rowHeight 的值要設置為 UITableViewAutomaticDimension
和 iOS 7 一樣,可以實現 estimatedHeightForRowAtIndexPath 方法提升 table view 的第一次加載速度。
任何時候 cell 的 intrinsicContentSize 改變了(比如 table view 的寬度變了),都必須重新加載 table view 以更新 cell。
例子
在 Xcode 中新建一個項目,在 storyboard 中創建一個 UITableViewController 的 IB,創建一個如下樣子的 cell:

這個 cell 中有 3 個元素,其中 imageView 的 autoLayout 約束為:
- imageView 左邊離 contentView 左邊 0
- imageView 上邊離 contentView 上邊 0
- imageView 的 width 和 height 為 80
- imageView 下邊離 contentView 下邊大於等於 0(為了防止內容太少,導致 cell 高度小於圖片高度)
titleLabel 的 autoLayout 約束為:
- titleLabel 左邊離 imageView 右邊 8
- titleLabel 上邊和 imageView 上邊在同一只線上
- titleLabel 右邊離 contentView 右邊 0
- titleLabel 下邊離 description 上邊 8
- titleLabel 的高度小於等於 22,優先級為 250
descriptionLabel 的約束為:
- descriptionLabel 左邊和 titleLabel 左邊在同一直線上
- descriptionLabel 上邊裡 titleLabel 8
- descriptionLabel 下邊裡 contentView 下邊 0
- descriptionLabel 右邊離 contentView 右邊 0
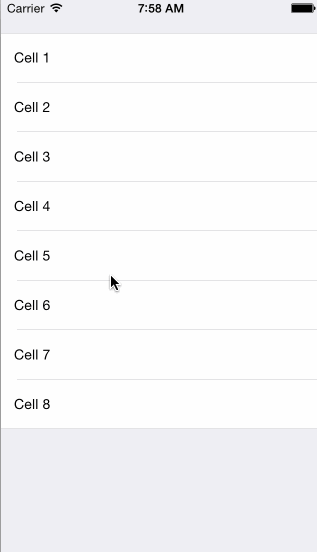
然後在這個 IB 對應的 UITableViewController 中加載一些數據進去,顯示效果如圖:

實現這個效果,我除了設置了 autoLayout,還設置了 tableView 的 rowHeight = UITableViewAutomaticDimension,然後就是這樣了。一點計算 cell 高度的代碼都沒有!!我連 heightForRowAtIndexPath都不用實現,真的是….爽出味啊!所以如果已經在開發 iOS 8 Only 的應用了一定要用autolayout,把煩人的計算交給 autolayout 去吧。
CollectionView 中的 cell 自適應
在 collection view 中也能讓 cell 自適應內容大小,如果 UICollectionView 的 layout 是一個 UICollectionViewFlowLayout,只需要將 layout.itemSize = ... 改成 layout.estimatedItemSize = ...。 只要設置了 layout 的 estimatedItemSize,collection view 就會根據 cell 裡面的 autolayout 約束去確定cell 的大小。
原理:
- collection view 根據 layout 的 estimatedItemSize 算出估計的 contentSize,有了 contentSize collection view 就開始顯示
- collection view 在顯示的過程中,即將被顯示的 cell 根據 autolayout 的約束算出自適應內容的 size
- layout 從 collection view 裡獲取更新過的 size attribute
- layout 返回最終的 size attribute 給 collection view
- collection 使用這個最終的 size attribute 展示 cell
UITextView 輸入內容實時更新 cell 的高度
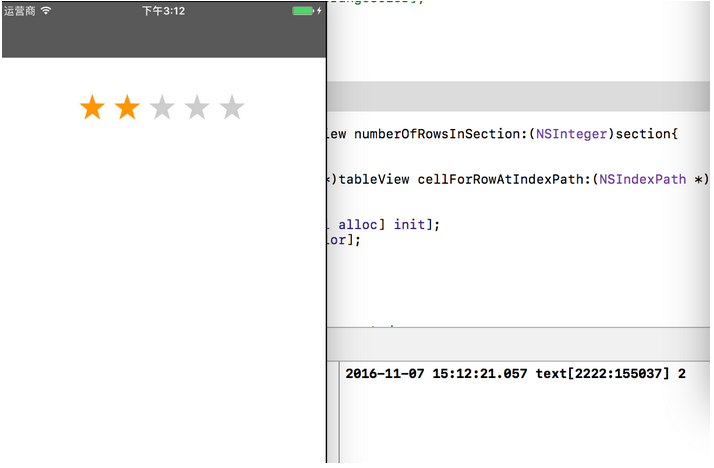
在一個動態數據的 table view 中,cell 根據 text view 內容的輸入實時改變 cell 和 table view 的高度。自動計算 cell 高度的功能使用 iOS 8 才支持的自適應 cell,先上圖,我們最終要實現的效果是這樣的:
實現上面效果的基本原理是:
- 在 cell 中設置好 text view 的 autolayout,讓 cell 可以根據內容自適應大小
- text view 中輸入內容,根據內容更新 textView 的高度
- 調用 tableView 的 beginUpdates 和 endUpdates,重新計算 cell 的高度
將 text view 更新後的數據保存,以免 table view 滾動超過一屏再滾回來 text view 中的數據又不刷新成原來的數據了。
功能具體實現方法:
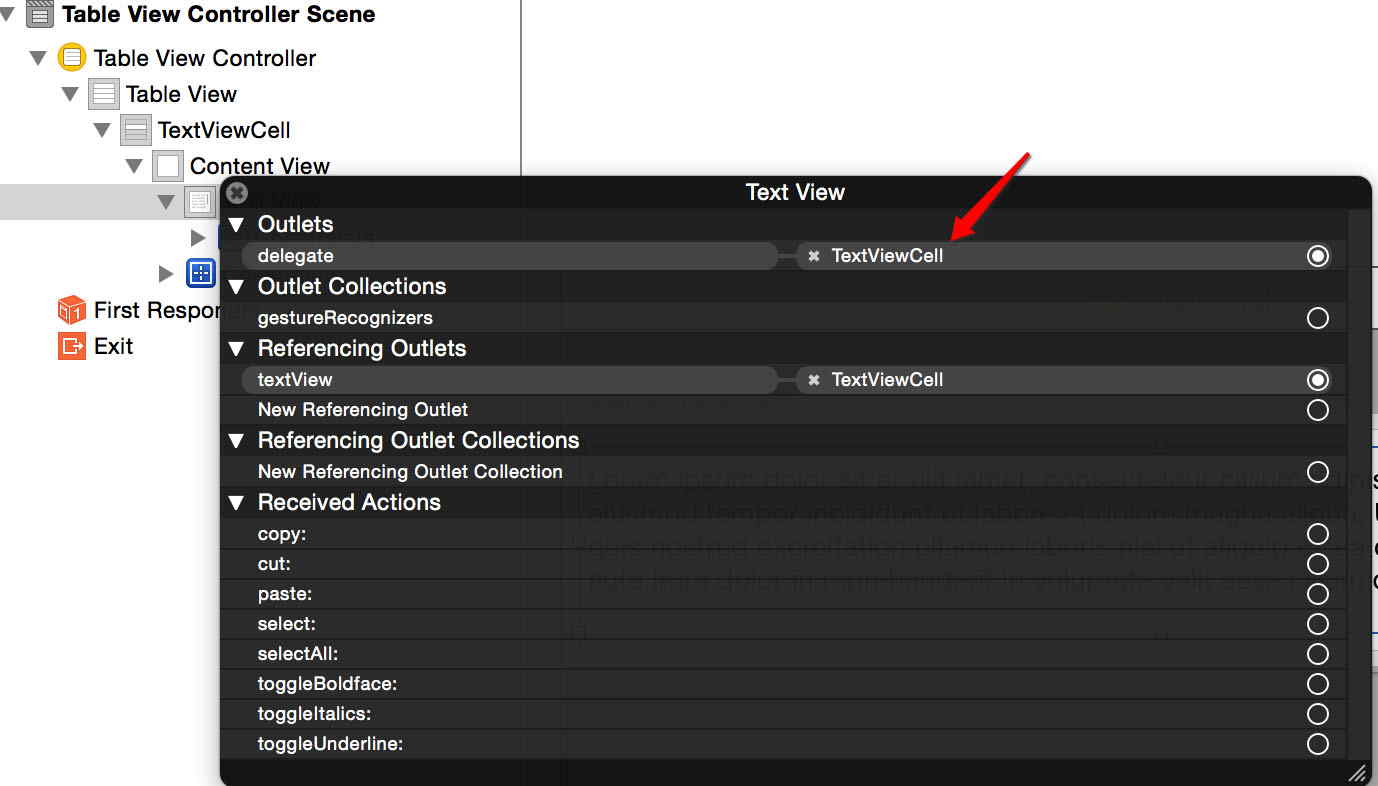
新建一個項目,拉出 TableViewController,在 cell 上添加一個 UITextView。
首先設置 text view 的 autolayout,比較關鍵的 constraint 是要設置 textView 的高度大於等於一個值。如圖:
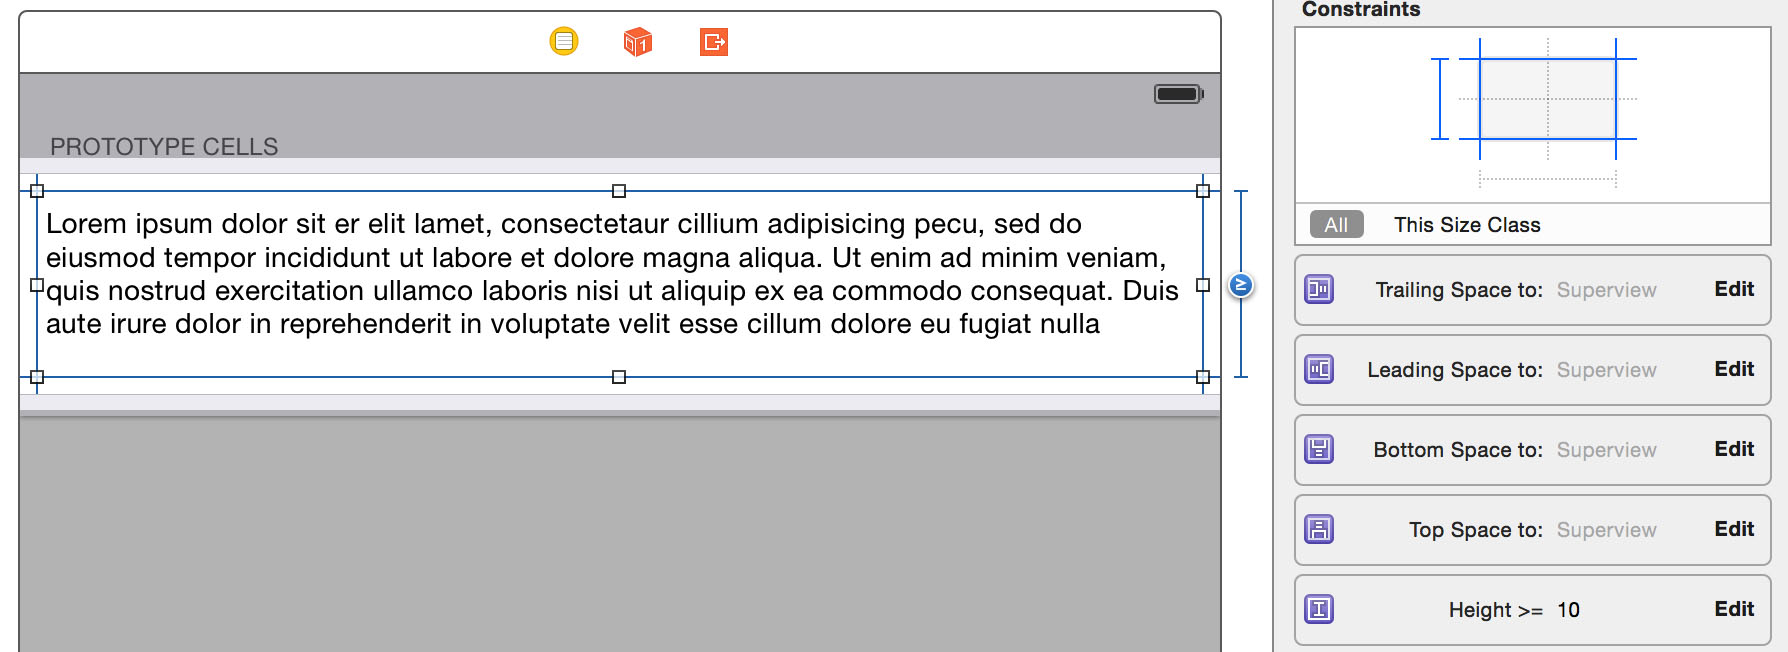
然後,設置 UITextView 的 scrollEnable 為 NO。這一點很關鍵,如果不設置為 NO,UITextView 在內容超出 frame 後,重新設置 text view 的高度會失效,並出現滾動條。

根據剛才在 storyboard 中創建的 cell,新建一個 UITableViewCell 類。
復制代碼 代碼如下:
#import <UIKit/UIKit.h>
@interface TextViewCell : UITableViewCell
@property (weak, nonatomic) IBOutlet UITextView *textView;
@end
創建 TableViewController 並初始化一些數據
復制代碼 代碼如下:
#import "TableViewController.h"
#import "TextViewCell.h"
@interface TableViewController ()
@property (nonatomic, strong) NSArray *data;
@end
復制代碼 代碼如下:
@implementation TableViewController
- (void)viewDidLoad {
[super viewDidLoad];
// 支持自適應 cell
self.tableView.estimatedRowHeight = 100;
self.tableView.rowHeight = UITableViewAutomaticDimension;
self.data = @[@"Cell 1 ", @"Cell 2", @"Cell 3", @"Cell 4", @"Cell 5", @"Cell 6", @"Cell 7", @"Cell 8"];
}
#pragma mark - Table view data source
- (NSInteger)tableView:(UITableView *)tableView numberOfRowsInSection:(NSInteger)section {
return [self.data count];
}
- (UITableViewCell *)tableView:(UITableView *)tableView cellForRowAtIndexPath:(NSIndexPath *)indexPath {
TextViewCell *cell = [tableView dequeueReusableCellWithIdentifier:@"TextViewCell" forIndexPath:indexPath];
cell.textView.text = self.data[indexPath.row];
return cell;
}
使用上面的代碼項目已經可以運行了,但是 text view 還不能自動更新大小,下面來實現 text view 根據內容計算高度
先在 storyboard 中,將 UITextView 的 delegate 設置為 cell
在 TextViewCell.m 中實現 - (void)textViewDidChange:(UITextView *)textView,每次 text view 內容改變的時候,就重新計算一次 text view 的大小,並讓 table view 更新高度。
復制代碼 代碼如下:
#import "TextViewCell.h"
@implementation TextViewCell
- (void)textViewDidChange:(UITextView *)textView
{
CGRect bounds = textView.bounds;
// 計算 text view 的高度
CGSize maxSize = CGSizeMake(bounds.size.width, CGFLOAT_MAX);
CGSize newSize = [textView sizeThatFits:maxSize];
bounds.size = newSize;
textView.bounds = bounds;
// 讓 table view 重新計算高度
UITableView *tableView = [self tableView];
[tableView beginUpdates];
[tableView endUpdates];
}
- (UITableView *)tableView
{
UIView *tableView = self.superview;
while (![tableView isKindOfClass:[UITableView class]] && tableView) {
tableView = tableView.superview;
}
return (UITableView *)tableView;
}
@end
這樣就已經實現了 text view 改變內容自動更新 cell 高度的功能,這篇文章沒有涉及到計算 cell 高度的代碼,因為計算 cell 高度的工作全部交給 iOS 8 的 autolayout 自動計算了,這讓我們少寫了許多令人痛苦的代碼。
最後:為了防止 table view 過長,導致滾動後重新加載 cell,會讓 text view 中的內容還原的問題,我們應該在更新了 text view 的內容之後保存數據。(如果是在編輯狀態下,還需要考慮取消編輯後的回滾功能。 普通數組數據,可以保存一個原始數據的副本,如果用戶取消編輯,就設置 data 為原始數據的副本。如果是 NSManagedObject 對象可以使用 NSUndoManage,不過這些已經超出本篇文章的內容范圍了。)
為了在 text view 更新後能讓 TableViewController 中的 data 更新,需要為 cell 添加一個 delegate,在 text view 更新後調用 delegate,TableViewController 中收到 delegate 信息後更新 data。
修改後的 TextViewCell.h
復制代碼 代碼如下:
#import <UIKit/UIKit.h>
@protocol TextViewCellDelegate;
@interface TextViewCell : UITableViewCell
@property (weak, nonatomic) IBOutlet UITextView *textView;
@property (weak, nonatomic) id<TextViewCellDelegate> delegate;
@end
復制代碼 代碼如下:
@protocol TextViewCellDelegate <NSObject>
- (void)textViewCell:(TextViewCell *)cell didChangeText:(NSString *)text;
@end
在 TextView.m的 - (void)textViewDidChange:(UITextView *)textView 中添加 delegate 的調用
復制代碼 代碼如下:
- (void)textViewDidChange:(UITextView *)textView
{
if ([self.delegate respondsToSelector:@selector(textViewCell:didChangeText:)]) {
[self.delegate textViewCell:self didChangeText:textView.text];
}
// 計算 text view 的高度
...
// 讓 table view 重新計算高度
...
}
最後在 TableViewController.m 的最後實現 TextViewCellDelegate 的方法,更新 data
復制代碼 代碼如下:
#pragma mark - TextViewCellDelegate
- (void)textViewCell:(TextViewCell *)cell didChangeText:(NSString *)text
{
NSIndexPath *indexPath = [self.tableView indexPathForCell:cell];
NSMutableArray *data = [self.data mutableCopy];
data[indexPath.row] = text;
self.data = [data copy];
}