詳解iOS App中UiTabBarController組件的基本用法
UiTabBarController這個控制器絕對是項目架構時做常用的一個控件。
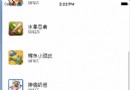
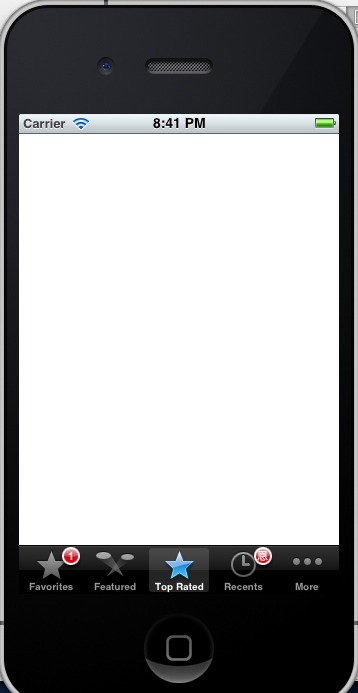
我們大致看下控件的效果,我們就知道為什麼說他常見了。
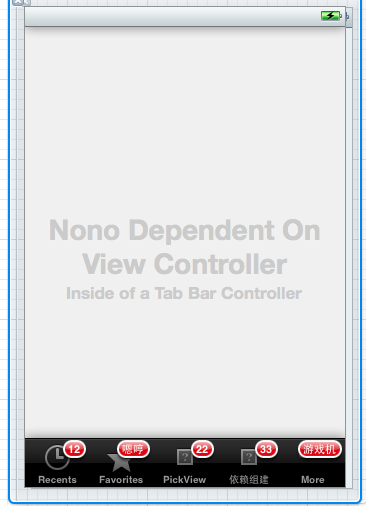
這就是最簡單的一個雛形,想必現在基本70%的應用界面結構都會是這樣的。
在Android中我們以ActivityGroup或是現在的fragment來實現,一個容器中包含多個子控制器。
下面我們還是以建立xib文件的形式來實現一個這樣的整體布局的例子。
當然在 xcode中我們會發現其實直接有這麼一個模板了
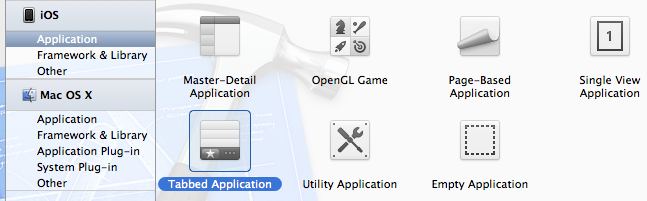
但是直接使用模板後會發現是直接在代碼裡實現了子布局得添加,由於我們不熟練,對於item,tabbar什麼的圖片文字自定義,一下子找不到代碼裡的api,
可能說用xib來實現可以看得比較明了。
據說以前直接有base_window模板,不過沒關系,模板只是為了給我快速建立一個應用而已,我們這邊手動的從最基礎得開始
1.首先建立一個Empty Application
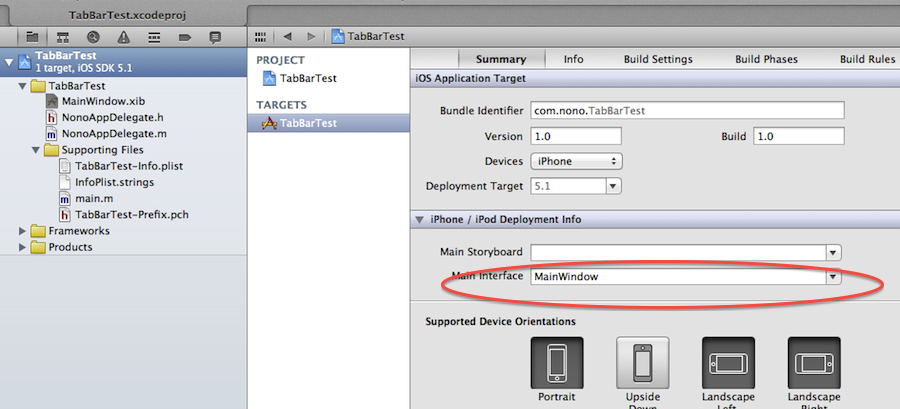
2.建立完後我們自定頂一個MainWindow.xib(當然,這個名字可以隨意取,但是按照規范以及一種默認留下來的習慣),作為應用啟動時加載的首個nib文件,
在新建xib文件你可以選擇window也可以是empt什麼,其實都差不多,我們這邊選window模板得xib文件
3.然後我們其實是要把XXXAppdelegate和這個xib文件連接起來。因此把.h文件定義成這樣:
復制代碼 代碼如下:
#import <UIKit/UIKit.h>
@interface NonoAppDelegate : UIResponder <UIApplicationDelegate>
{
UIWindow *window;
UITabBarController *tabTarController;
}
@property (retain, nonatomic) IBOutlet UIWindow *window;//該控件模板生成是不帶IBOutlet的,但是我們為了xib文件布局得統一性,將其也作為一個輸出口和在Mainxib中連接起來可以
@property (retain, nonatomic) IBOutlet UITabBarController *tabTarController;
@end
4.然後我們來大致設計我們的xib文件,打開MainWindow.xib文件,我們大致看到視圖元素,一個是文件擁有者Filesowner,然後是reponder(這個一直沒
怎麼用到,具體干嗎使的還不是明確),然後最主要得是Object這個標簽下得元素,此時就一個window。
首先我們要將文件擁有者這個類改成UIApplication,點擊File'sOwner標簽後在右側的屬性欄選擇Indentity inspector,看到此時customclass是NSobject,
我們改成UIApplication,改完後會發現File'sOwner得Outlets用了一個delegate的輸出口東東,看過上一篇關於outlets和reference outlet我們就知道,
這個東東等會可以指向一個實例對象什麼的。
5.好了,那麼我們在object下的添加一個delegate的對象,操作很簡單,在右側控件組中
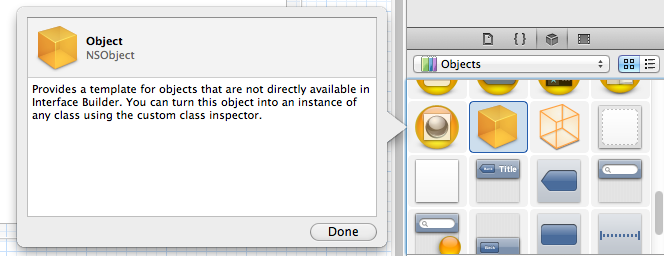
拖一個這樣得對象到xib下得Object標簽下,
然後我們來自定這個對象,根據上面所知,我們大致可以知道我們需要一個類似於delegate類得對象,對了
我們的AppDelegate不就剛好是這麼一個東西麼。於是很自然的,選中這個object然後在右側屬性欄將custom class設置成NonoAppDelagate。
然後點擊File's Owner將其輸出口delegate和我們剛放上去的NonoAppdelagate鏈接起來。
6.設置完以上後,我們可以點擊Object下得XXXAppDelegate,然後看右邊屬性欄的 Outlets,對了,我們剛在該文件得.h中申明過兩個輸出口,此刻我們是
要創建兩個這樣的對象然後將其連接起來。window這時已經有了,還少個UITabBarController。那麼我們從右邊拖個過來咯
然後輸出口和對象鏈接起來。
此刻,最基本的tabbarcontroller布局框架就ok了,此刻的xib文件如下圖

然後我們打開AppDelegate.m進行實現和修改
復制代碼 代碼如下:
#import "NonoAppDelegate.h"
@implementation NonoAppDelegate
@synthesize window ;
@synthesize tabTarController ;
- (void)dealloc
{
[self.window release];
[self.tabTarController release];
[super dealloc];
}
- (BOOL)application:(UIApplication *)application didFinishLaunchingWithOptions:(NSDictionary *)launchOptions
{
// self.window = [[[UIWindow alloc] initWithFrame:[[UIScreen mainScreen] bounds]] autorelease];
// Override point for customization after application launch.
self.window.backgroundColor = [UIColor whiteColor];
self.window.rootViewController = self.tabTarController;
[self.window makeKeyAndVisible];
return YES;
}
恩,就是這麼簡單。
理論上我們現在啟動模擬器後程序可以啟動了。
但是卻發現起來後是空白的。
我們從應用的main.m中看
復制代碼 代碼如下:
int main(int argc, char *argv[])
{
@autoreleasepool {
return UIApplicationMain(argc, argv, nil, NSStringFromClass([NonoAppDelegate class]));
}
}
然後應用到了我們自定義得delegate類了,然後發現一個問題,按照這個流程,我們MainWindow.xib文件貌似沒加載進來啊.
這就對了,以前我們定義個controller的xib文件後都會有initWithNibName,而對於UIApplication類型的xib文件(其實局勢整個應用最先要啟動的一個類),
據說是這樣的加載
這個具體你可以去看上一篇中提到過ios應用啟動內容,有個不錯得博文給了很好得一個解釋。
此刻我們可以將main.h代碼稍微修改下
復制代碼 代碼如下:
#import <UIKit/UIKit.h>
#import "NonoAppDelegate.h"
int main(int argc, char *argv[])
{
@autoreleasepool {
return UIApplicationMain(argc, argv, nil, nil);
}
}
原本第四個參數是指定AppDelegate,但是我們知道,在加載MainWindow.xib實例化裡面一個delegate對象時,我們已經鏈接了AppDelegate類了,
感覺如果第四個參數指定後,這個類像是被實例化了2次,更多具體內容還是參考上面提到那個博客去看吧。
7.好了。最基本得tabbar界面完成,接下來是往裡面添加子控制器。
首先我們來熟悉下UITabBarController這個控件:
從界面我們可以推測出,該控件裡面大致上有什麼東西:
1>.應該有個類似於管理一組子控件的東西吧。
2>界面下面切換得切換條吧 tabBar
3>當然還回發現有個delegate這樣得東西,就是代理對象麼。
當然上面是在代碼中,我們得到這些屬性,做相應得操作。
在xib文件裡可能說看上去會比較直觀
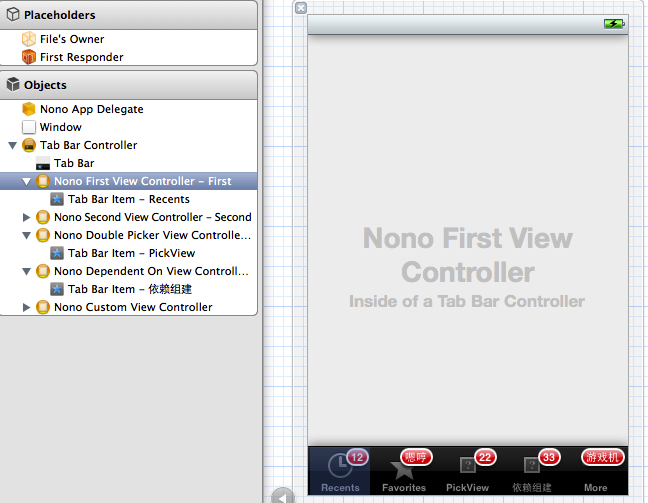
1>Tab bar裡面放的是由一個或是多個TabbarItem組成的數組,每個itm對應一個ViewController。
2>下面的 First,Second等等就是每個Item對應 的Controller,這裡也要注意一點,默認的我們我們拖進去一個
TabBarItem,一般我們會設置對應得XXXcontroller.xib文件
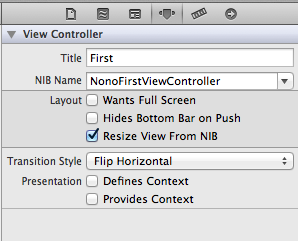
之後還需將Custom class改成對應XXXXController類,因為默認的類是UIViewController。這會在應用啟動後報錯的。
3>tabbarItem中可以設置title ,系統默認的幾種圖標,還有是自定義圖標,以及badgeValue,就是上面標簽上每個紅色的值,
這個比Android上先見之明多了呵呵。
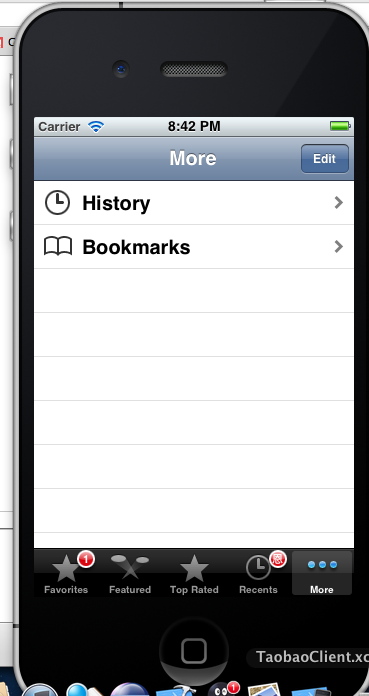
4> 當底部的按鈕超過5個時,系統會自動增加一個more按鈕,點擊more後,剩余的按鈕會被顯示出來。
8.UITabbarController左右滑動切換標簽頁
每個Tabbar ViewController都要添加如下代碼,建議在基類中添加:
復制代碼 代碼如下:
ViewDidLoad
UISwipeGestureRecognizer *swipeLeft = [[UISwipeGestureRecognizer alloc] initWithTarget:self action:@selector(tappedRightButton:)];
[swipeLeft setDirection:UISwipeGestureRecognizerDirectionLeft];
[self.view addGestureRecognizer:swipeLeft];
UISwipeGestureRecognizer *swipeRight = [[UISwipeGestureRecognizer alloc] initWithTarget:self action:@selector(tappedLeftButton:)];
[swipeRight setDirection:UISwipeGestureRecognizerDirectionRight];
[self.view addGestureRecognizer:swipeRight];
再添加2個函數,包含切換動畫效果:
復制代碼 代碼如下:
- (IBAction) tappedRightButton:(id)sender
{
NSUInteger selectedIndex = [self.tabBarController selectedIndex];
NSArray *aryViewController = self.tabBarController.viewControllers;
if (selectedIndex < aryViewController.count - 1) {
UIView *fromView = [self.tabBarController.selectedViewController view];
UIView *toView = [[self.tabBarController.viewControllers objectAtIndex:selectedIndex + 1] view];
[UIView transitionFromView:fromView toView:toView duration:0.5f options:UIViewAnimationOptionTransitionFlipFromRight completion:^(BOOL finished) {
if (finished) {
[self.tabBarController setSelectedIndex:selectedIndex + 1];
}
}];
}
}
復制代碼 代碼如下:
- (IBAction) tappedLeftButton:(id)sender
{
NSUInteger selectedIndex = [self.tabBarController selectedIndex];
if (selectedIndex > 0) {
UIView *fromView = [self.tabBarController.selectedViewController view];
UIView *toView = [[self.tabBarController.viewControllers objectAtIndex:selectedIndex - 1] view];
[UIView transitionFromView:fromView toView:toView duration:0.5f options:UIViewAnimationOptionTransitionFlipFromLeft completion:^(BOOL finished) {
if (finished) {
[self.tabBarController setSelectedIndex:selectedIndex - 1];
}
}];
}
}