iOS10 推送最新特性研究
最近在研究iOS10關於推送的新特性, 相比之前確實做了很大的改變,總結起來主要是以下幾點:
1.推送內容更加豐富,由之前的alert 到現在的title, subtitle, body
2.推送統一由trigger觸發
3.可以為推送增加附件,如圖片、音頻、視頻,這就使推送內容更加豐富多彩
4.可以方便的更新推送內容
import 新框架
添加新的框架 UserNotifications.framework
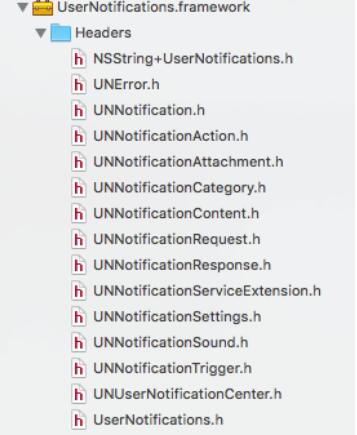
#import <UserNotifications/UserNotifications.h>
注冊推送
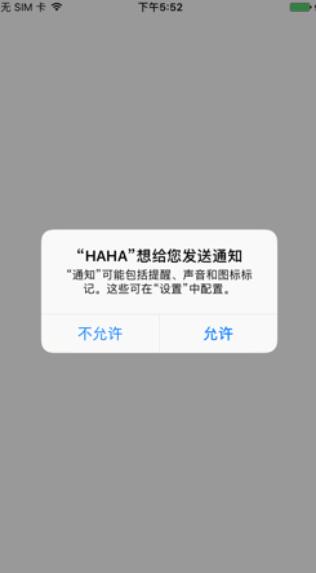
在設置通知的時候,需要先進行注冊,獲取授權
iOS10 所有通知都是通過UNUserNotificationCenter來管理,包括遠程通知和本地通知
  //iOS8以下
  [application registerForRemoteNotificationTypes:UIRemoteNotificationTypeBadge | UIRemoteNotificationTypeAlert | UIRemoteNotificationTypeSound];

  //iOS8 - iOS10
  [application registerUserNotificationSettings:[UIUserNotificationSettings settingsForTypes:UIUserNotificationTypeAlert | UIUserNotificationTypeSound | UIUserNotificationTypeBadge categories:nil]];

  //iOS10
  UNUserNotificationCenter *center = [UNUserNotificationCenter currentNotificationCenter];
  [center requestAuthorizationWithOptions:(UNAuthorizationOptionAlert | UNAuthorizationOptionBadge | UNAuthorizationOptionSound) completionHandler:^(BOOL granted, NSError * _Nullable error) {

  }
獲取用戶設置
iOS10 提供了獲取用戶授權相關設置信息的接口getNotificationSettingsWithCompletionHandler: , 回調帶有一個UNNotificationSettings對象,它具有以下屬性,可以准確獲取各種授權信息
authorizationStatus
soundSetting
badgeSetting
alertSetting
notificationCenterSetting
lockScreenSetting
carPlaySetting
alertStyle
像下面的方法,點擊allow
   UNUserNotificationCenter *center = [UNUserNotificationCenter currentNotificationCenter];
  [center requestAuthorizationWithOptions:(UNAuthorizationOptionAlert | UNAuthorizationOptionBadge | UNAuthorizationOptionSound) completionHandler:^(BOOL granted, NSError * _Nullable error) {
     if (granted) {
        //點擊允許
        NSLog(@"注冊通知成功");
        [center getNotificationSettingsWithCompletionHandler:^(UNNotificationSettings * _Nonnull settings) {
        NSLog(@"%@", settings);
        }];
      } else {
        //點擊不允許
        NSLog(@"注冊通知失敗");
      }
    }];
打印信息: *<UNNotificationSettings: 0x174090a90; authorizationStatus: Authorized, notificationCenterSetting: Enabled, soundSetting: Enabled, badgeSetting: Enabled, lockScreenSetting: Enabled, alertSetting: NotSupported, carPlaySetting: Enabled, alertStyle: Banner>*
注冊APNS, 獲取token
iOS10, 注冊APNS和獲取token的方法還和之前一樣
在application: didFinishLaunchingWithOptions:調用 registerForRemoteNotifications方法
[[UIApplication sharedApplication] registerForRemoteNotifications];
在代理方法application: didRegisterForRemoteNotificationsWithDeviceToken:中獲取token
 - (void)application:(UIApplication *)application didRegisterForRemoteNotificationsWithDeviceToken:(NSData *)deviceToken NS_AVAILABLE_IOS(3_0){
    NSLog(@"deviceToken:%@",deviceToken);
  }

- (void)application:(UIApplication *)application didFailToRegisterForRemoteNotificationsWithError:(NSError *)error NS_AVAILABLE_IOS(3_0){
    NSLog(@"didFailToRegisterForRemoteNotificationsWithError:%@",error);
  }
設置處理通知的action 和 category
在iOS8以前是沒有category這個屬性的;
在iOS8注冊推送,獲取授權的時候,可以一並設置category, 注冊的方法直接帶有這個參數;
在iOS10, 需要調用一個方法setNotificationCategories:來為管理推送的UNUserNotificationCenter實例設置category, category又可以對應設置action;
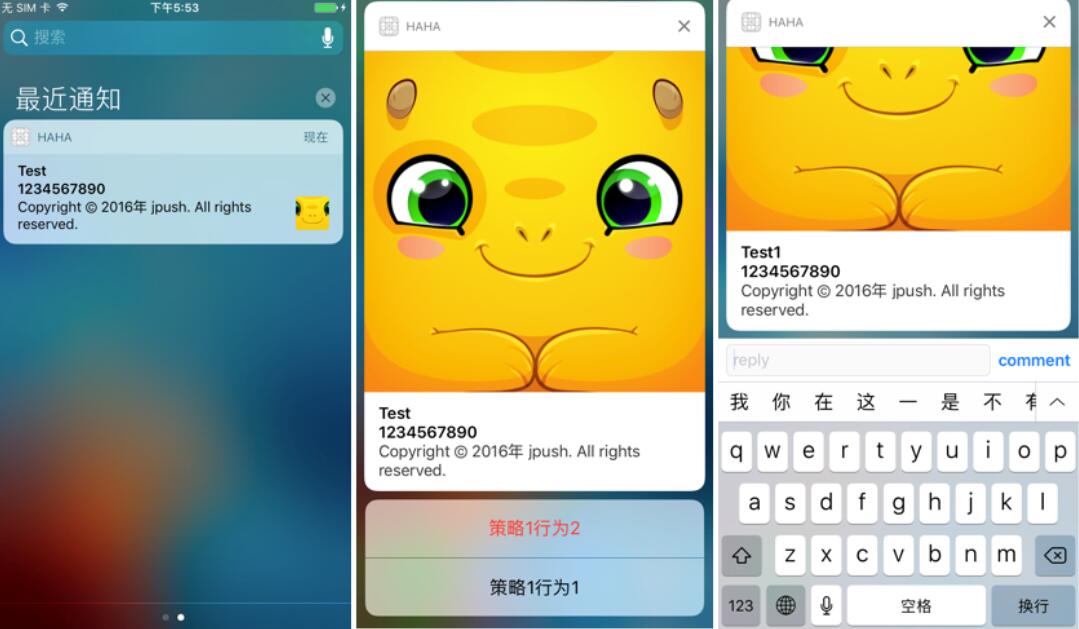
 //設置category
//UNNotificationActionOptionAuthenticationRequired 需要解鎖
//UNNotificationActionOptionDestructive 顯示為紅色
//UNNotificationActionOptionForeground  點擊打開app

UNNotificationAction *action1 = [UNNotificationAction actionWithIdentifier:@"action1" title:@"策略1行為1" options:UNNotificationActionOptionForeground];

UNTextInputNotificationAction *action2 = [UNTextInputNotificationAction actionWithIdentifier:@"action2" title:@"策略1行為2" options:UNNotificationActionOptionDestructive textInputButtonTitle:@"comment" textInputPlaceholder:@"reply"];

 //UNNotificationCategoryOptionNone
 //UNNotificationCategoryOptionCustomDismissAction 清除通知被觸發會走通知的代理方法
 //UNNotificationCategoryOptionAllowInCarPlay    適用於行車模式
UNNotificationCategory *category1 = [UNNotificationCategory categoryWithIdentifier:@"category1" actions:@[action2,action1] minimalActions:@[action2,action1] intentIdentifiers:@[] options:UNNotificationCategoryOptionCustomDismissAction];

UNNotificationAction *action3 = [UNNotificationAction actionWithIdentifier:@"action3" title:@"策略2行為1" options:UNNotificationActionOptionForeground];

UNNotificationAction *action4 = [UNNotificationAction actionWithIdentifier:@"action4" title:@"策略2行為2" options:UNNotificationActionOptionForeground];
UNNotificationCategory *category2 = [UNNotificationCategory categoryWithIdentifier:@"category2" actions:@[action3,action4] minimalActions:@[action3,action4] intentIdentifiers:@[] options:UNNotificationCategoryOptionCustomDismissAction];

[[UNUserNotificationCenter currentNotificationCenter] setNotificationCategories:[NSSet setWithObjects:category1,category2, nil]];
設置通知內容
因為iOS10遠程通知與本地通知統一起來了,通知內容屬性是一致的,不過遠程推送就需要在payload進行具體設置了,下面以本地通知為例,介紹關於UNNotificationContent的內容
官網上明確說明了,我們是不能直接創建UNNotificationContent的實例的, 如果我們需要自己去配置內容的各個屬性,我們需要用到UNMutableNotificationContent
看一下它的一些屬性:
attachments //附件
badge //徽標
body //推送內容body
categoryIdentifier //category標識
launchImageName //點擊通知進入應用的啟動圖
sound //聲音
subtitle //推送內容子標題
title //推送內容標題
userInfo //遠程通知內容
UNMutableNotificationContent *content = [[UNMutableNotificationContent alloc] init];
  content.title = @"Test";
  content.subtitle = @"1234567890";
  content.body = @"Copyright © 2016年 jpush. All rights reserved.";
  content.badge = @1;
  NSError *error = nil;
  NSString *path = [[NSBundle mainBundle] pathForResource:@"718835727" ofType:@"png"];
  UNNotificationAttachment *att = [UNNotificationAttachment attachmentWithIdentifier:@"att1" URL:[NSURL fileURLWithPath:path] options:nil error:&error];
  if (error) {
    NSLog(@"attachment error %@", error);
  }
  content.attachments = @[att];
  content.categoryIdentifier = @"category1”; //這裡設置category1, 是與之前設置的category對應
  content.launchImageName = @"1-Eb_0OvtcxJXHZ7-IOoBsaQ";

UNNotificationSound *sound = [UNNotificationSound defaultSound];
content.sound = sound;
通知觸發器
UNNotificationTrigger
iOS 10觸發器有4種
•UNPushNotificationTrigger 觸發APNS服務,系統自動設置(這是區分本地通知和遠程通知的標識)
•UNTimeIntervalNotificationTrigger 一段時間後觸發
•UNCalendarNotificationTrigger 指定日期觸發
•UNLocationNotificationTrigger 根據位置觸發,支持進入某地或者離開某地或者都有
 //十秒後
UNTimeIntervalNotificationTrigger *trigger1 = [UNTimeIntervalNotificationTrigger triggerWithTimeInterval:10 repeats:NO];

//每周日早上8:00
NSDateComponents *component = [[NSDateComponents alloc] init];
component.weekday = 1;
component.hour = 8;
UNCalendarNotificationTrigger *trigger2 = [UNCalendarNotificationTrigger triggerWithDateMatchingComponents:component repeats:YES];

//圓形區域,進入時候進行通知
CLLocationCoordinate2D cen = CLLocationCoordinate2DMake(80.335400, -90.009201);
CLCircularRegion *region = [[CLCircularRegion alloc] initWithCenter:cen
                               radius:500.0 identifier:@“center"];
region.notifyOnEntry = YES; //進入的時候
region.notifyOnExit = NO;  //出去的時候
UNLocationNotificationTrigger *trigger3 = [UNLocationNotificationTrigger
  triggerWithRegion:region repeats:NO];
添加通知 / 更新通知
1.創建一個UNNotificationRequest類的實例,一定要為它設置identifier, 在後面的查找,更新, 刪除通知,這個標識是可以用來區分這個通知與其他通知
2.把request加到UNUserNotificationCenter, 並設置觸發器,等待觸發
3.
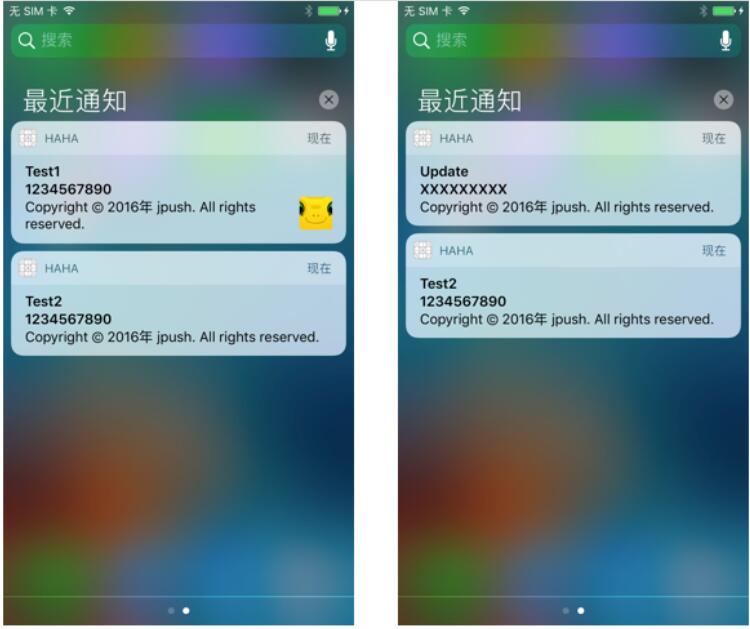
如果另一個request具有和之前request相同的標識,不同的內容, 可以達到更新通知的目的
  NSString *requestIdentifer = @"TestRequest";
  UNNotificationRequest *request = [UNNotificationRequest requestWithIdentifier:requestIdentifer content:content trigger:trigger1];
  //把通知加到UNUserNotificationCenter, 到指定觸發點會被觸發
  [center addNotificationRequest:request withCompletionHandler:^(NSError * _Nullable error) {
  }];

 //在另外需要更新通知的地方
UNMutableNotificationContent *newContent = [[UNMutableNotificationContent alloc] init];
newContent.title = @"Update";
newContent.subtitle = @"XXXXXXXXX";
newContent.body = @"Copyright © 2016年 jpush. All rights reserved.";
UNTimeIntervalNotificationTrigger *trigger1 = [UNTimeIntervalNotificationTrigger triggerWithTimeInterval:3 repeats:NO];
 UNNotificationRequest *request = [UNNotificationRequest requestWithIdentifier:@"TestRequest" content:newContent trigger:trigger1];
[[UNUserNotificationCenter currentNotificationCenter] addNotificationRequest:request withCompletionHandler:^(NSError * _Nullable error) {

}];
獲取和刪除通知
這裡通知是有兩種狀態
•Pending 等待觸發的通知
•Delivered 已經觸發展示在通知中心的通知
 //獲取未觸發的通知
[[UNUserNotificationCenter currentNotificationCenter] getPendingNotificationRequestsWithCompletionHandler:^(NSArray<UNNotificationRequest *> * _Nonnull requests) {
  NSLog(@"pending: %@", requests);
}];

//獲取通知中心列表的通知
[[UNUserNotificationCenter currentNotificationCenter] getDeliveredNotificationsWithCompletionHandler:^(NSArray<UNNotification *> * _Nonnull notifications) {
  NSLog(@"Delivered: %@", notifications);
}];

 //清除某一個未觸發的通知
 [[UNUserNotificationCenter currentNotificationCenter] removePendingNotificationRequestsWithIdentifiers:@[@"TestRequest1"]];
 //清除某一個通知中心的通知
 [[UNUserNotificationCenter currentNotificationCenter] removeDeliveredNotificationsWithIdentifiers:@[@"TestRequest2"]];
 //對應的刪除所有通知
[[UNUserNotificationCenter currentNotificationCenter] removeAllPendingNotificationRequests];
[[UNUserNotificationCenter currentNotificationCenter] removeAllDeliveredNotifications];
delegate
<UNUserNotificationCenterDelegate>
iOS10收到通知不再是在application: didReceiveRemoteNotification:方法去處理, iOS10推出新的代理方法,接收和處理各類通知(本地或者遠程)
 - (void)userNotificationCenter:(UNUserNotificationCenter *)center willPresentNotification:(UNNotification *)notification withCompletionHandler:(void (^)(UNNotificationPresentationOptions))completionHandler {
  //應用在前台收到通知
  NSLog(@"========%@", notification);
}

- (void)userNotificationCenter:(UNUserNotificationCenter *)center didReceiveNotificationResponse:(UNNotificationResponse *)response withCompletionHandler:(void (^)())completionHandler {
  //點擊通知進入應用
  NSLog(@"response:%@", response);
}
最後
下一篇文章繼續介紹關於富媒體推送的 UNNotificationServiceExtension 和 Notification content extension, 未完待續。。。