iOS利用UIScrollView實現無限滾動效果
編輯:IOS開發綜合
前言
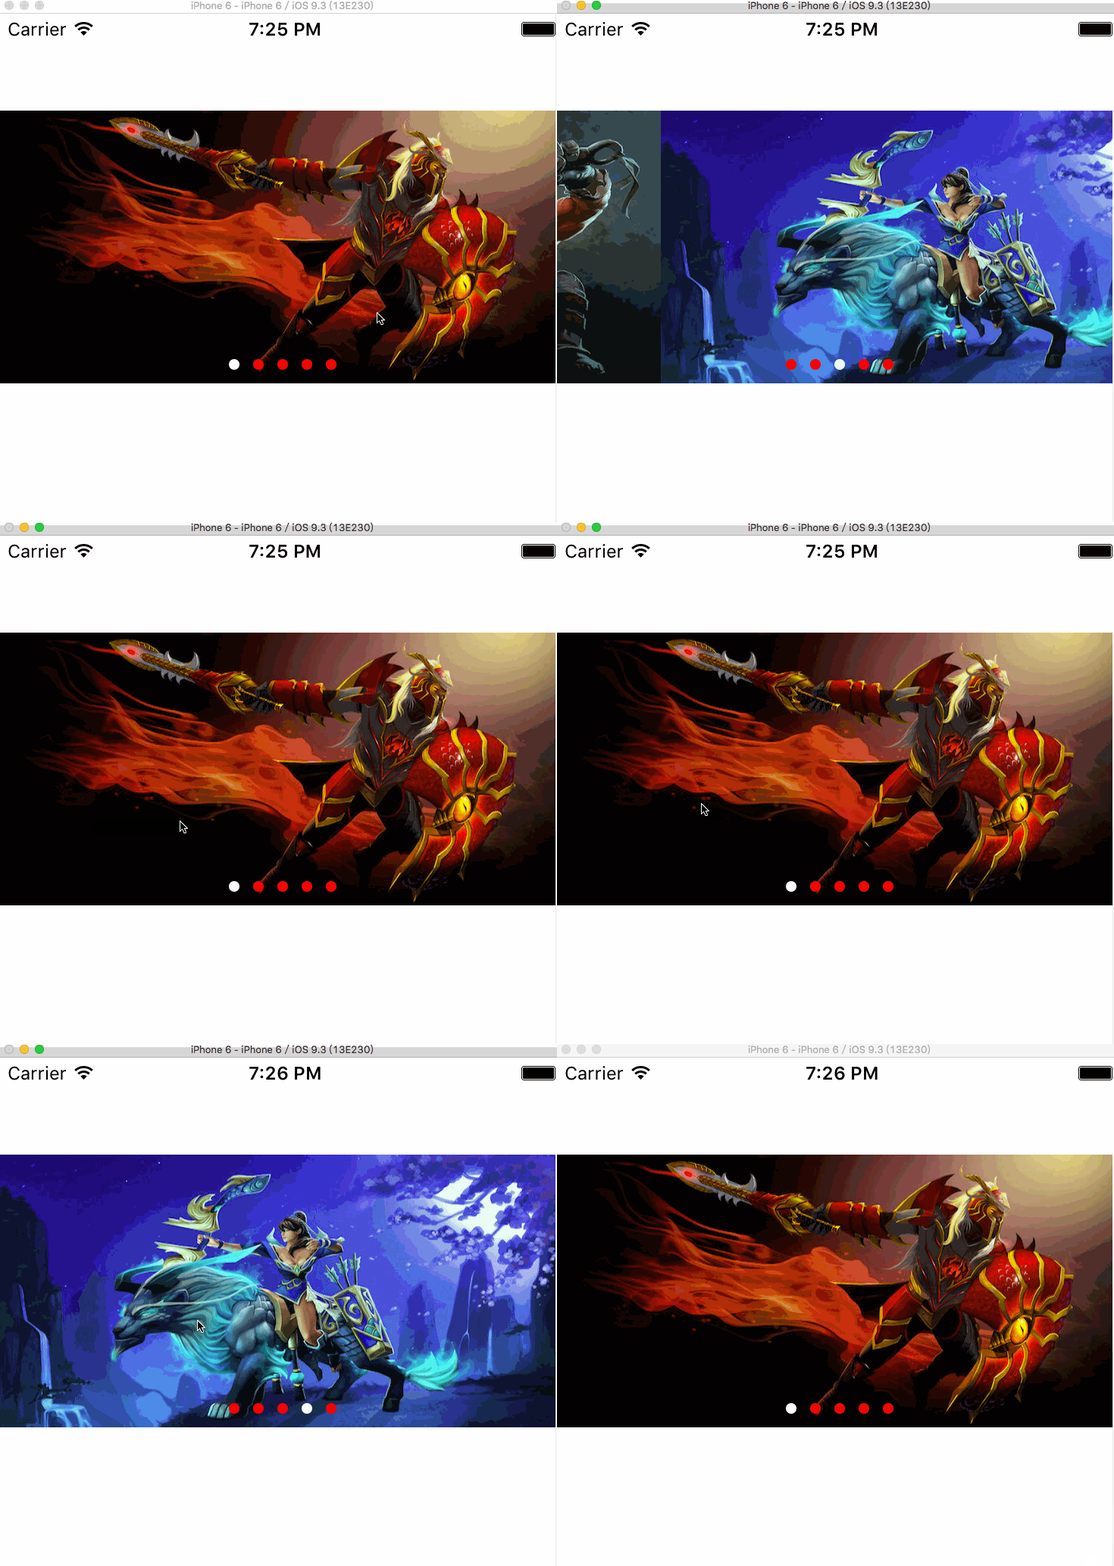
眾所周知UIScrollView 的無限滾動主要應用在圖片輪播器、歡迎界面等場景。它的原理是在要顯示的圖片前後各加一張圖片即在第一張圖片之前放最後一張圖片,在最後一張圖片之後放第一張圖片,然後在滾動到邊緣的時候,巧妙的過渡一下就可以"瞞天過海","以假亂真"的造成無限滾動的假象。網絡上有很多只用三張或兩張圖片實現的方法,效率比這個方法高,但實現起來稍微麻煩一點,有興趣的可以去深入研究。
實現步驟
1、根據需求准備幾張圖片,在網上找了5張圖片,分別命名為 img_01,img_02,img_03,img_04,img_05 。
2、代碼實現,主要分為:添加UIScrollView,添加顯示圖片,添加UIPageControl,然後監聽UIScrollView的滾動,根據滾動的位置來設置UIPageControl,最重要的是對於滾動到兩個邊緣時要特殊處理一下
代碼如下:
#import "ViewController.h"

//屏幕寬度
#define SCREEN_WIDTH [UIScreen mainScreen].bounds.size.width
//圖片高度
#define IMG_HEIGHT 180
//要顯示的圖片總數
#define MAX_SIZE 7

#import "ViewController.h"

@interface ViewController () <UIScrollViewDelegate>

//滾動視圖
@property (strong, nonatomic) UIScrollView *loopScrollView;
//指示器
@property (strong, nonatomic) UIPageControl *pageIndicator;
//要展示的圖片數組
@property(strong, nonatomic) NSMutableArray *imgArray;

@end

@implementation ViewController

//懶加載數組
-(NSMutableArray *)imgArray
{
  if(_imgArray == nil)
  {
    _imgArray = [[NSMutableArray alloc]initWithCapacity:MAX_SIZE];
    //在要展示的5張圖片的前後各加一張圖片,第一張前面加第五張,第五張後面加第一張
    [_imgArray addObject:[UIImage imageNamed:@"img_05.jpg"]];
    for (int i = 1; i< MAX_SIZE - 1; i++) {
      NSString *imgName = [[NSString alloc]initWithFormat:@"img_0%d.jpg", i];
      [_imgArray addObject:[UIImage imageNamed:imgName]];
    }
    [_imgArray addObject:[UIImage imageNamed:@"img_01.jpg"]];

  }
  return _imgArray;
}


- (void)viewDidLoad {
  [super viewDidLoad];

  [self setupScrollView];
  [self setupPageControl];

}

/**
 * 創建UIScrollView並設置其屬性
 */
-(void)setupScrollView
{
  UIScrollView *sc = [[UIScrollView alloc]initWithFrame:CGRectMake(0, 64, SCREEN_WIDTH, IMG_HEIGHT)];

  //創建UIImageView並添加到UIScrollView中
  for (int i = 0; i< MAX_SIZE; i++) {
    UIImageView *img = [[UIImageView alloc]initWithImage:[self.imgArray objectAtIndex:i]];
    img.frame = CGRectMake(SCREEN_WIDTH * i, 0, SCREEN_WIDTH, IMG_HEIGHT);
    [sc addSubview:img];
  }

  //設置UIScrollView的屬性
  sc.contentSize = CGSizeMake(SCREEN_WIDTH * self.imgArray.count, IMG_HEIGHT);
  sc.showsHorizontalScrollIndicator = NO;
  sc.pagingEnabled = YES;
  //剛開始應該滾動到第二張顯示,因為第一張其實是最後一張圖片
  [sc setContentOffset:CGPointMake(SCREEN_WIDTH, 0) animated:NO];


  //設置代理並添加到當前view中
  sc.delegate = self;
  [self.view addSubview:sc];

  self.loopScrollView = sc;
}


/**
 * 創建UIPageControl並設置其屬性
 */
-(void)setupPageControl
{
  //注意frame,這樣設置可以居中顯示
  UIPageControl *pc = [[UIPageControl alloc]initWithFrame:CGRectMake(self.view.center.x - 50, CGRectGetMaxY(self.loopScrollView.frame) - 25 , 100, 25)];
  //設置UIPageControl的屬性並添加到當前view中
  pc.numberOfPages = MAX_SIZE - 2;
  pc.currentPage = 0;
  pc.pageIndicatorTintColor = [UIColor redColor];
  [self.view addSubview:pc];

  self.pageIndicator = pc;

}

//UIScrollView的代理方法,在該方法中改變UIPageControl並且處理邊緣滾動
-(void)scrollViewDidEndDecelerating:(UIScrollView *)scrollView
{
  //獲取當前UIScrollView的位置
  CGPoint offset = [scrollView contentOffset];
  //算出滾動到第幾頁
  int currentPage = offset.x/SCREEN_WIDTH;
  //設置UIPageControl
  self.pageIndicator.currentPage = currentPage - 1;
  //對最後一張和第一張要進行特殊處理
  //1、如果是第一張
  if (currentPage == 0) {
    //下面兩個方法任選其一都可以達到效果,但是注意動畫一定要設置為NO,不然會有視覺會有辣眼睛的感覺
    //方法1
    [self.loopScrollView setContentOffset:CGPointMake(SCREEN_WIDTH * (MAX_SIZE-2), 0) animated:NO];
    //方法2,該方法要求設置contentSize時,任一方向就算不滾動也不能為0,否則無效
    //[self.loopScrollView scrollRectToVisible:CGRectMake(SCREEN_WIDTH * (MAX_SIZE-2), 0, SCREEN_WIDTH, IMG_HEIGHT) animated:NO];
    self.pageIndicator.currentPage = MAX_SIZE - 2;
  }

  //2、如果是最後一張
  else if(currentPage == MAX_SIZE - 1) {
    [self.loopScrollView setContentOffset:CGPointMake(SCREEN_WIDTH, 0) animated:NO];
    //[self.loopScrollView scrollRectToVisible:CGRectMake(SCREEN_WIDTH, 0, SCREEN_WIDTH, IMG_HEIGHT) animated:NO];
    self.pageIndicator.currentPage = 0;
  }
}

@end
實現效果

總結
好了,以上就是這篇文章的全部內容了,其實實現輪播現在最好的方案應該是使用UICollectionView,因為它是利用重用機制來實現的,性能會好很多,代碼寫起來類似。希望本文的內容對大家的學習或者工作能帶來一定的幫助,如果有疑問大家可以留言交流。
相關文章
+


