iOS中 支付寶錢包詳解/第三方支付 韓俊強的博客
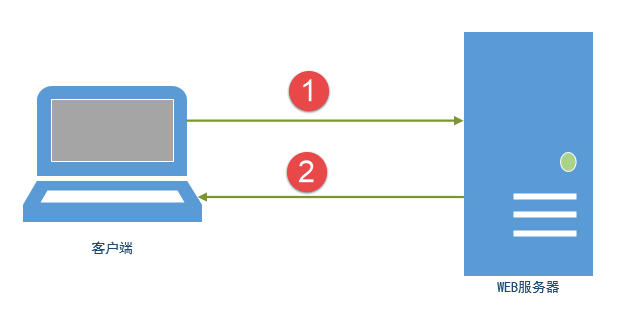
一、在app中成功完成支付寶支付的過程
1、申請支付寶錢包。參考網址:
https://b.alipay.com/order/productDetail.htm?productId=2014110308141993&tabId=4#ps-tabinfo-hash這是使用支付寶支付的第一步,合作申請通過之後,會集成一個開發文件。即使不申請也可以下載,只是demo中會缺少幾個必須的參數: 在demo中的 PartnerConfig.h 文件中可以看到
//合作身份者id,以2088開頭的16位純數字
#define PartnerID @""
//收款支付寶賬號
#define SellerID @""
//安全校驗碼(MD5)密鑰,以數字和字母組成的32位字符
#define MD5_KEY @""
//商戶私鑰,自助生成
#define PartnerPrivKey
//支付寶公鑰(老板給你的)
#define AlipayPubKey @"MIGfMA0GCSqGSIb3DQEBAQUAA4GNADCBiQKBgQCnxj/9qwVfgoUh/y2W89L6BkRAFljhNhgPdyPuBV64bfQNN1PjbCzkIM6qRdKBoLPXmKKMiFYnkd6rAoprih3/PrQEB/VsW8OoM8fxn67UDYuyBTqA23MML9q1+ilIZwBC2AQ2UBVOrFXfFl75p6/B5KsiNG9zpgmLCUYuLkxpLQIDAQAB"
只有這幾個參數備齊之後,demo才可以完成支付,所以接下來第二步
2、生成RSA 這個需要在windows系統下生成,開發文檔中也有生成的步驟。我是直接問後台要了這幾個參數,所以這一步只能簡單寫到這。 3、導入框架 根據集成文件的開發文檔,導入框架。可以參考demo。當四個參數都備齊之後可以先在demo上試一下能不能成功支付。然後再往自己的程序中導入。二、代碼的使用 1、支付需要的參數 在demo中的ViewController.h中可以看到有這麼一段代碼
@interface Product :NSObject{
@private
float _price;
NSString *_subject;
NSString *_body;
NSString *_orderId;
}
@property (nonatomic,assign) float price;
@property (nonatomic,retain) NSString *subject;
@property (nonatomic,retain) NSString *body;
@property (nonatomic,retain) NSString *orderId;
@end
這個就是所支付產品需要的幾個必要的字段。在開發文檔中可以看到需要好多參數,但在真正用時,只需要特別注意這幾個就行。demo中有自動拼接的方法,到時候直接調用就行。
2、app和支付寶客戶端之間的跳轉
NSString *appScheme = @"AlipaySdkDemo"; //應用跳轉的URL
*這裡要和plist文件中URL types 下面的字段保持一致
3、支付結果的入口
首先是WAP端的入口,在ViewController.m文件中可以找到,這裡返回支付結果,比較簡單,不多說。
獨立端的入口,在AppDelegate裡面,我試著在viewcontroller中找這個,但最後沒找到。最後只能設置一個觀察者,把支付結果發送過來再進行處理。
三、總結
第一次接觸支付方面的東西,剛開始很迷茫,不明白其中財務方面是怎麼對上號的。
那些都是在後台進行處理的,iOS開發時需要做的,就是完成這個支付流程。
==================================具體看下面流程====================================
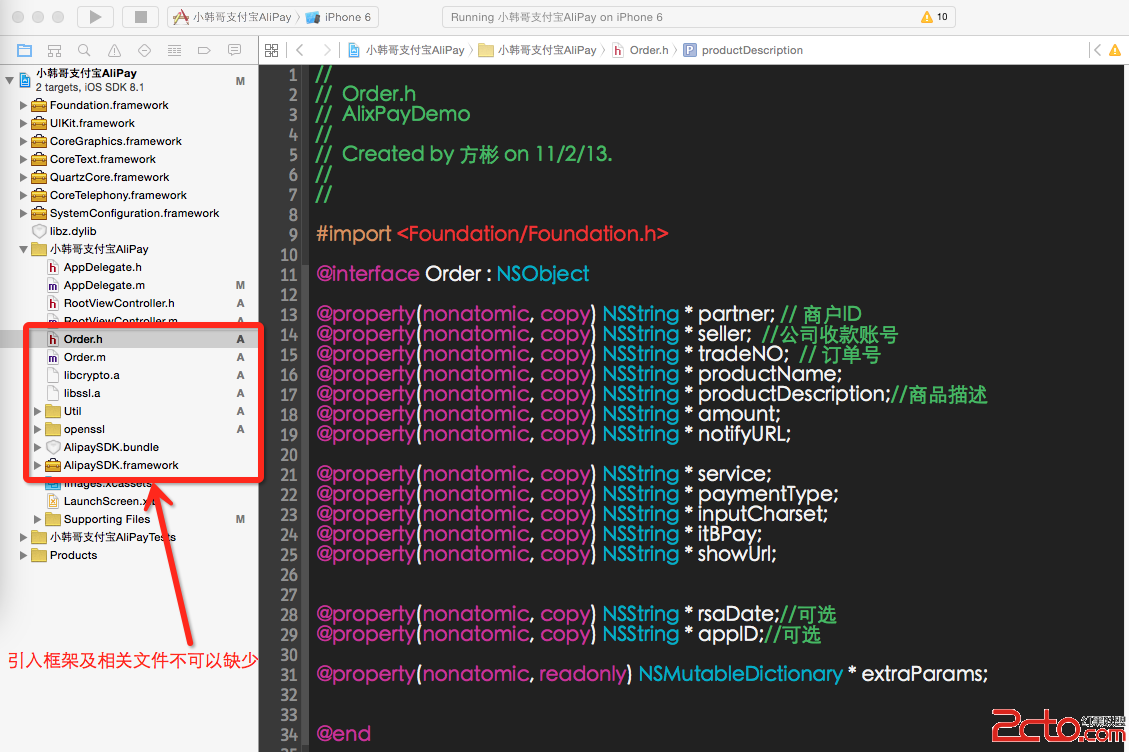
第一步:引入框架
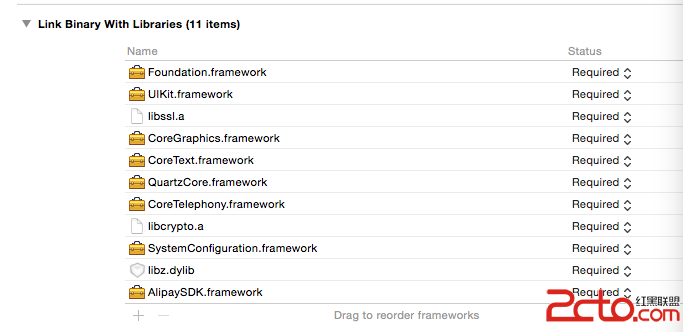
第二步:注意框架及拉進相關文件
第三步:上代碼
直接建立根視圖:
#import "RootViewController.h"
#import
#import "Order.h"
#import "DataSigner.h"
@interface RootViewController ()

@end

@implementation RootViewController

- (void)viewDidLoad {
    [super viewDidLoad];
    UIButton *button = [UIButton buttonWithType:(UIButtonTypeSystem)];
    [button addTarget:self action:@selector(buttonAction :) forControlEvents:(UIControlEventTouchUpInside)];
    button.frame = CGRectMake(100, 200, 100, 100);
    [button setTitle:@"支付" forState:(UIControlStateNormal)];
    [button setBackgroundColor:[UIColor yellowColor]];
    [self.view addSubview:button];
    self.view.backgroundColor = [UIColor greenColor];


}
點擊事件:
- (void)buttonAction : (UIButton *)sender
{
//    NSLog(@"支付");

    /*
     *點擊獲取prodcut實例並初始化訂單信息
     */
//    Product *product = [self.productList objectAtIndex:indexPath.row];

    /*
     *商戶的唯一的parnter和seller。
     *簽約後,支付寶會為每個商戶分配一個唯一的 parnter 和 seller。
     */

    /*============================================================================*/
    /*=======================需要填寫商戶app申請的===================================*/
    /*============================================================================*/
    // 16位的純數字
    NSString *partner = @"2088。。公司唯一ID";
    // 收款賬戶
    NSString *seller = @"收款賬號";
    NSString *privateKey = @"密鑰";
    /*============================================================================*/
    /*============================================================================*/
    /*============================================================================*/

    //partner和seller獲取失敗,提示
    if ([partner length] == 0 ||
        [seller length] == 0 ||
        [privateKey length] == 0)
    {
        UIAlertView *alert = [[UIAlertView alloc] initWithTitle:@"提示"
                                                        message:@"缺少partner或者seller或者私鑰。"
                                                       delegate:self
                                              cancelButtonTitle:@"確定"
                                              otherButtonTitles:nil];
        [alert show];
        return;
    }

    /*
     *生成訂單信息及簽名
     */
    //將商品信息賦予AlixPayOrder的成員變量
    Order *order = [[Order alloc] init];
    order.partner = partner;
    order.seller = seller;
    order.tradeNO = @"123456"; //訂單ID(由商家自行制定)
    order.productName = @"太空杯"; //商品標題
    order.productDescription = @"耐摔的太空杯"; //商品描述
    order.amount = [NSString stringWithFormat:@"%.2f",0.01]; //商品價格
    order.notifyURL =  @"http://www.lanou3g.com"; //回調URL

    order.service = @"mobile.securitypay.pay";
    order.paymentType = @"1";
    order.inputCharset = @"utf-8";
    order.itBPay = @"30m";
    order.showUrl = @"m.alipay.com";

    //應用注冊scheme,在AlixPayDemo-Info.plist定義URL types
    NSString *appScheme = @"xiaohange";

    //將商品信息拼接成字符串
    NSString *orderSpec = [order description];
    NSLog(@"orderSpec = %@",orderSpec);

    //獲取私鑰並將商戶信息簽名,外部商戶可以根據情況存放私鑰和簽名,只需要遵循RSA簽名規范,並將簽名字符串base64編碼和UrlEncode
    id signer = CreateRSADataSigner(privateKey);
    NSString *signedString = [signer signString:orderSpec];

    //將簽名成功字符串格式化為訂單字符串,請嚴格按照該格式
    NSString *orderString = nil;
    if (signedString != nil) {
        orderString = [NSString stringWithFormat:@"%@&sign=\"%@\"&sign_type=\"%@\"",
                       orderSpec, signedString, @"RSA"];

        [[AlipaySDK defaultService] payOrder:orderString fromScheme:appScheme callback:^(NSDictionary *resultDic) {
            NSLog(@"reslut = %@",resultDic);
        }];


    }
}

//選中商品調用支付寶極簡支付
- (void)tableView:(UITableView *)tableView didSelectRowAtIndexPath:(NSIndexPath *)indexPath
{

}
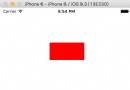
最終效果: