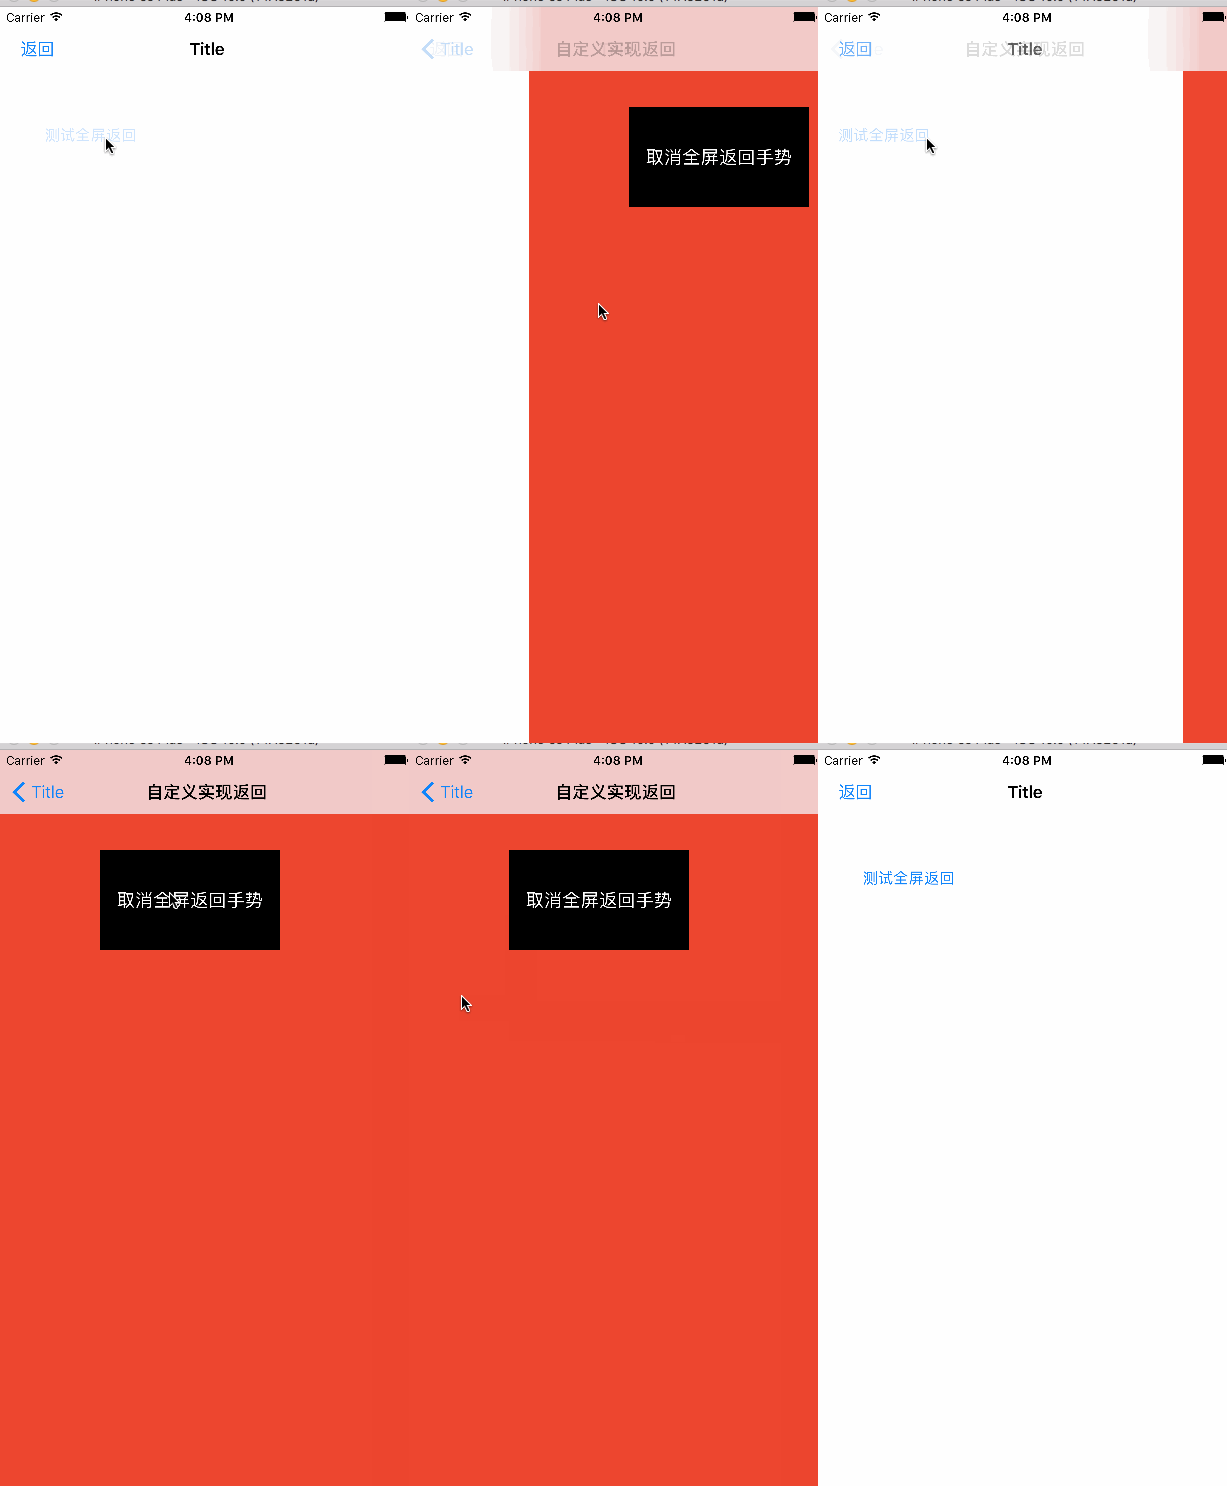
分享iOS中實現navigationController全屏手勢滑動pop
授權轉載,作者:ZeroJ
前言
其實, Apple已經提供了navigationController中的控制器都有一個從屏幕左邊滑動pop的手勢, 並且轉換控制器之間的各種動畫也是已經實現好了, 但是現在很多APP中都有全屏滑動返回的功能, 確實手機屏幕變大後在一定程度上使用是方便了很多。暫且不管這種交互設計好還是不好, 既然這麼多的APP(微博, QQ, 簡書, 網易新聞...)中都在使用, 肯定在開發中實現這個功能也是必要的了。
最終效果

首先展示一下最終的使用方法, 使用還是比較方便
第一種, 使用提供的自定義的navigationController
如果在storyboard中使用, 子需要將navigationController設置為自定義的即可, 默認擁有全屏滑動返回功能, 如果需要關閉, 在需要的地方設置如下即可
// 設置為true的時候開啟全屏滑動返回功能, 設置為false, 關閉
   (navigationController as? CustomNavigationController)?.enabledFullScreenPop(isEnabled: false)

storyboard中使用
如果使用代碼初始化, 那麼直接使用自定義的navigationController初始化即可
// 同樣的默認是開啟全屏滑動返回功能的
let navi = CustomNavigationController(rootViewController: rootVc)
//如果需要關閉或者重新開啟, 在需要的地方使用下面方法
(navigationController as? CustomNavigationController)?.enabledFullScreenPop(isEnabled: false)
第二種, 使用提供的navigationController的分類
這種方法, 並沒有默認開啟, 需要我們自己開啟或者關閉全屏滑動返回功能
// 在需要的地方, 獲取到navigationController, 然後使用分類方法開啟(關閉)全屏返回手勢即可
navigationController?.zj_enableFullScreenPop(isEnabled: true)
實現方法: 實現的方法很多, 比如可以利用系統提供的navigationController的手勢方法, 利用運行時獲取到這個手勢的target和selector, 然後, 我們使用分類或者自定義navigationController在上面添加一個pan手勢, 將這個手勢的target和selector設置為運行時獲取到系統手勢的target和selector, 那麼, 這個手勢就擁有了和系統滑動返回相同的效果, 實現上還是很方便的
但是這裡, 我想介紹的是另一種Apple推薦的自定義轉場動畫的方法,
關於自定義轉場動畫的各種知識, 如果你不是很熟悉, 介意大家看看我之前的這篇文章介紹(當時寫就是為了實現這篇文章鋪墊), 裡面介紹了詳細的自定義教程, 不過利用是示例了present/dismiss的使用。
新建一個ZJNavigationControllerDelegate用於自定義的navigationController的delegate
class ZJNavigationControllerDelegate: NSObject, UINavigationControllerDelegate {
 let animator = ZJNavigationControllerAnimator()
 let interactive = ZJNavigationControllerInteractiveTransition()
 var panGesture: UIPanGestureRecognizer! = nil {
     didSet {
         interactive.panGesture = panGesture
     }
 }
 func navigationController(_ navigationController: UINavigationController, animationControllerFor operation: UINavigationControllerOperation, from fromVC: UIViewController, to toVC: UIViewController) -> UIViewControllerAnimatedTransitioning? {
     interactive.navigationController = navigationController
     animator.operation = operation
     return animator
 }
 // 這裡是手勢交互動畫需要的對象
 func navigationController(_ navigationController: UINavigationController, interactionControllerFor animationController: UIViewControllerAnimatedTransitioning) -> UIViewControllerInteractiveTransitioning? {
     return interactive.isInteracting ? interactive : nil
 }
//    deinit {
//        print("\(self.debugDescription) --- 銷毀")
//    }
}
新建一個ZJNavigationControllerAnimator繼承自NSObject,並實現UIViewControllerAnimatedTransitioning協議, 來實現具體的動畫
class ZJNavigationControllerAnimator: NSObject, UIViewControllerAnimatedTransitioning {
  let duration = 0.35
  var operation: UINavigationControllerOperation = .none
  func transitionDuration(_ transitionContext: UIViewControllerContextTransitioning?) -> TimeInterval {
      return duration
  }
  func animateTransition(_ transitionContext: UIViewControllerContextTransitioning) {
      // fromVc 總是獲取到正在顯示在屏幕上的Controller
      let fromVc = transitionContext.viewController(forKey: UITransitionContextFromViewControllerKey)!
      // toVc 總是獲取到將要顯示的controller
      let toVc = transitionContext.viewController(forKey: UITransitionContextToViewControllerKey)!
      let containView = transitionContext.containerView()
      let toView: UIView
      let fromView: UIView
      // Animators should not directly manipulate a view controller's views and should
      // use viewForKey: to get views instead.
      if transitionContext.responds(to:NSSelectorFromString("viewForKey:")) {
          // 通過這種方法獲取到view不一定是對應controller.view
          toView = transitionContext.view(forKey: UITransitionContextToViewKey)!
          fromView = transitionContext.view(forKey: UITransitionContextFromViewKey)!
      } else {
          toView = toVc.view
          fromView = fromVc.view
      }
      // 最終顯示在屏幕上的controller的frame
      let visibleFrame = transitionContext.initialFrame(for: fromVc)
      // 隱藏在右邊的controller的frame
      let rightHiddenFrame = CGRect(origin: CGPoint(x: visibleFrame.width, y: visibleFrame.origin.y) , size: visibleFrame.size)
      // 隱藏在左邊的controller的frame
      let leftHiddenFrame = CGRect(origin: CGPoint(x: -visibleFrame.width/2, y: visibleFrame.origin.y) , size: visibleFrame.size)
      if operation == .push {// push
          toView.frame = rightHiddenFrame
          fromView.frame = visibleFrame
          //  添加toview到最上面(fromView是當前顯示在屏幕上的view不用添加)
          containView.addSubview(toView)
      } else {// pop
          fromView.frame = visibleFrame
          toView.frame = leftHiddenFrame
          // 有時需要將toView添加到fromView的下面便於執行動畫
          containView.insertSubview(toView, belowSubview: fromView)
      }
      UIView.animate(withDuration: duration, delay: 0.0, options: [.curveLinear], animations: {
          if self.operation == .push {
              toView.frame = visibleFrame
              fromView.frame = leftHiddenFrame
          } else {
              fromView.frame = rightHiddenFrame
              toView.frame = visibleFrame
          }
      }) { (_) in
          let cancelled = transitionContext.transitionWasCancelled()
          if cancelled {
              // 如果中途取消了就移除toView(可交互的時候會發生)
              toView.removeFromSuperview()
          }
          // 通知系統動畫是否完成或者取消了(必須)
          transitionContext.completeTransition(!cancelled)
      }
  }
//    deinit {
//        print("\(self.debugDescription) --- 銷毀")
//    }
}
新建一個ZJNavigationControllerInteractiveTransition繼承自
UIPercentDrivenInteractiveTransition, 來處理手勢的過程
class ZJNavigationControllerInteractiveTransition: UIPercentDrivenInteractiveTransition {
  var panGesture: UIPanGestureRecognizer! = nil {
      didSet {
          panGesture.addTarget(self, action: #selector(self.handlePan(gesture:)))
      }
  }
  var containerView: UIView!
  var navigationController: UINavigationController! = nil {
      didSet {
          containerView = navigationController.view
          containerView.addGestureRecognizer(panGesture)
      }
  }
  var isInteracting = false
  override init() {
      super.init()
  }
  func handlePan(gesture: UIPanGestureRecognizer) {
      func finishOrCancel() {
          let translation = gesture.translation(in: containerView)
          let percent = translation.x / containerView.bounds.width
          let velocityX = gesture.velocity(in: containerView).x
          let isFinished: Bool
          // 修改這裡可以改變手勢結束時的處理
          if velocityX > 100 {
              isFinished = true
          } else if percent > 0.5 {
              isFinished = true
          } else {
              isFinished = false
          }
          isFinished ? finish() : cancel()
      }
      switch gesture.state {
      case .began:
          isInteracting = true
          // pop
          if navigationController.viewControllers.count > 0 {
              _ = navigationController.popViewController(animated: true)
          }
      case .changed:
          if isInteracting {
              let translation = gesture.translation(in: containerView)
              var percent = translation.x / containerView.bounds.width
              percent = max(percent, 0)
              update(percent)
          }
      case .cancelled:
          if isInteracting {
              finishOrCancel()
              isInteracting = false
          }
      case .ended:
          if isInteracting {
              finishOrCancel()
              isInteracting = false
          }
      default:
          break
      }
  }
}
最後自定義navigationController
class CustomNavigationController: UINavigationController {
  private(set) var panGesture: UIPanGestureRecognizer?
  private var customDelegate: CustomNavigationControllerDelegate?
  required init?(coder aDecoder: NSCoder) {
      super.init(coder: aDecoder)
      enabledFullScreenPop(isEnabled: true)
  }
  override init(rootViewController: UIViewController) {
      super.init(rootViewController: rootViewController)
      enabledFullScreenPop(isEnabled: true)
  }
  init() {
      super.init(nibName: nil, bundle: nil)
      enabledFullScreenPop(isEnabled: true)
  }
  // 開啟或者關閉全屏pop手勢(默認開啟)
  func enabledFullScreenPop(isEnabled: Bool) {
      if isEnabled {
          if customDelegate == nil {
              // 創建代理對象
              customDelegate = CustomNavigationControllerDelegate()
              // 創建手勢
              panGesture = UIPanGestureRecognizer()
              // 傳遞手勢給代理
              customDelegate?.panGesture = panGesture
              // 設置代理為自定義的
              delegate = customDelegate
          }
      } else {
          customDelegate = nil
          panGesture = nil
          delegate = nil
      }
  }
}
到這裡, 實現的全部過程就完成了, 如果你對代碼不是很理解, 建議先去看看自定義轉場動畫相關的教程, 或者看看這裡。使用效果如圖所示,當然了,這裡並沒有處理控制器中如果有scrollView的時候的可能的手勢沖突, 大家可以自己去嘗試處理一下,歡迎關注,歡迎star,同時附上Demo地址。


