iOS自動布局框架

原文
目前iOS開發中大多數頁面都已經開始使用Interface Builder的方式進行UI開發了,但是在一些變化比較復雜的頁面,還是需要通過代碼來進行UI開發的。而且有很多比較老的項目,本身就還在采用純代碼的方式進行開發。
而現在iPhone和iPad屏幕尺寸越來越多,雖然開發者只需要根據屏幕點進行開發,而不需要基於像素點進行UI開發。但如果在項目中根據不同屏幕尺寸進行各種判斷,寫死坐標的話,這樣開發起來是很吃力的。
所以一般用純代碼開發UI的話,一般都是配合一些自動化布局的框架進行屏幕適配。蘋果為我們提供的適配框架有:VFL、UIViewAutoresizing、Auto Layout、Size Classes等。
其中Auto Layout是使用頻率最高的布局框架,但是其也有弊端。就是在使用UILayoutConstraint的時候,會發現代碼量很多,而且大多都是重復性的代碼,以至於好多人都不想用這個框架。
後來Github上的出現了基於UILayoutConstraint封裝的第三方布局框架Masonry,Masonry使用起來非常方便,本篇文章就詳細講一下Masonry的使用。
Masonry介紹
這篇文章只是簡單介紹Masonry,以及Masonry的使用,並且會舉一些例子出來。但並不會涉及到Masonry的內部實現,以後會專門寫篇文章來介紹其內部實現原理,包括順便講一下鏈式語法。
什麼是Masonry
Masonry是一個對系統NSLayoutConstraint進行封裝的第三方自動布局框架,采用鏈式編程的方式提供給開發者API。系統AutoLayout支持的操作,Masonry都支持,相比系統API功能來說,Masonry是有過之而無不及。
Masonry采取了鏈式編程的方式,代碼理解起來非常清晰易懂,而且寫完之後代碼量看起來非常少。之前用NSLayoutConstraint寫很多代碼才能實現的布局,用Masonry最少一行代碼就可以搞定。下面看到Masonry的代碼就會發現,太簡單易懂了。
Masonry是同時支持Mac和iOS兩個平台的,在這兩個平台上都可以使用Masonry進行自動布局。我們可以從MASUtilities.h文件中,看到下面的定義,這就是Masonry通過宏定義的方式,區分兩個平台獨有的一些關鍵字。

Github地址:https://github.com/SnapKit/Masonry
集成方式
Masonry支持CocoaPods,可以直接通過podfile文件進行集成,需要在CocoaPods中添加下面代碼:
pod 'Masonry'
Masonry學習建議
在UI開發中,純代碼和Interface Builder我都是用過的,在開發過程中也積累了一些經驗。對於初學者學習純代碼AutoLayout,我建議還是先學會Interface Builder方式的AutoLayout,領悟蘋果對自動布局的規則和思想,然後再把這套思想嵌套在純代碼上。這樣學習起來更好入手,也可以避免踩好多坑。
在項目中設置的AutoLayout約束,起到對視圖布局的標記作用。設置好約束之後,程序運行過程中創建視圖時,會根據設置好的約束計算frame,並渲染到視圖上。
所以在純代碼情況下,視圖設置的約束是否正確,要以運行之後顯示的結果和打印的log為准。
Masonry中的坑
在使用Masonry進行約束時,有一些是需要注意的。
在使用Masonry添加約束之前,需要在addSubview之後才能使用,否則會導致崩潰。
在添加約束時初學者經常會出現一些錯誤,約束出現問題的原因一般就是兩種:約束沖突和缺少約束。對於這兩種問題,可以通過調試和log排查。
之前使用Interface Builder添加約束,如果約束有錯誤直接就可以看出來,並且會以紅色或者黃色警告體現出來。而Masonry則不會直觀的體現出來,而是以運行過程中崩潰或者打印異常log體現,所以這也是手寫代碼進行AutoLayout的一個缺點。
這個問題只能通過多敲代碼,積攢純代碼進行AutoLayout的經驗,慢慢就用起來越來越得心應手了。
Masonry基礎使用
Masonry基礎API
mas_makeConstraints()    添加約束
mas_remakeConstraints()  移除之前的約束,重新添加新的約束
mas_updateConstraints()  更新約束

equalTo()       參數是對象類型,一般是視圖對象或者mas_width這樣的坐標系對象
mas_equalTo()   和上面功能相同,參數可以傳遞基礎數據類型對象,可以理解為比上面的API更強大

width()         用來表示寬度,例如代表view的寬度
mas_width()     用來獲取寬度的值。和上面的區別在於,一個代表某個坐標系對象,一個用來獲取坐標系對象的值
Auto Boxing
上面例如equalTo或者width這樣的,有時候需要涉及到使用mas_前綴,這在開發中需要注意作區分。
如果在當前類引入#import "Masonry.h"之前,用下面兩種宏定義聲明一下,就不需要區分mas_前綴。
// 定義這個常量,就可以不用在開發過程中使用"mas_"前綴。
#define MAS_SHORTHAND
// 定義這個常量,就可以讓Masonry幫我們自動把基礎數據類型的數據,自動裝箱為對象類型。
#define MAS_SHORTHAND_GLOBALS
修飾語句
Masonry為了讓代碼使用和閱讀更容易理解,所以直接通過點語法就可以調用,還添加了and和with兩個方法。這兩個方法內部實際上什麼都沒干,只是在內部將self直接返回,功能就是為了更加方便閱讀,對代碼執行沒有實際作用。
例如下面的例子:
make.top.and.bottom.equalTo(self.containerView).with.offset(padding);
其內部代碼實現,實際上就是直接將self返回。
- (MASConstraint *)with {
    return self;
}
更新約束和布局
關於更新約束布局相關的API,主要用以下四個API:
- (void)updateConstraintsIfNeeded  調用此方法,如果有標記為需要重新布局的約束,則立即進行重新布局,內部會調用updateConstraints方法
- (void)updateConstraints          重寫此方法,內部實現自定義布局過程
- (BOOL)needsUpdateConstraints     當前是否需要重新布局,內部會判斷當前有沒有被標記的約束
- (void)setNeedsUpdateConstraints  標記需要進行重新布局
關於UIView重新布局相關的API,主要用以下三個API:
- (void)setNeedsLayout  標記為需要重新布局
- (void)layoutIfNeeded  查看當前視圖是否被標記需要重新布局,有則在內部調用layoutSubviews方法進行重新布局
- (void)layoutSubviews  重寫當前方法,在內部完成重新布局操作
Masonry示例代碼
Masonry本質上就是對系統AutoLayout進行的封裝,包括裡面很多的API,都是對系統API進行了一次二次包裝。
typedef NS_OPTIONS(NSInteger, MASAttribute) {
    MASAttributeLeft = 1 << NSLayoutAttributeLeft,
    MASAttributeRight = 1 << NSLayoutAttributeRight,
    MASAttributeTop = 1 << NSLayoutAttributeTop,
    MASAttributeBottom = 1 << NSLayoutAttributeBottom,
    MASAttributeLeading = 1 << NSLayoutAttributeLeading,
    MASAttributeTrailing = 1 << NSLayoutAttributeTrailing,
    MASAttributeWidth = 1 << NSLayoutAttributeWidth,
    MASAttributeHeight = 1 << NSLayoutAttributeHeight,
    MASAttributeCenterX = 1 << NSLayoutAttributeCenterX,
    MASAttributeCenterY = 1 << NSLayoutAttributeCenterY,
    MASAttributeBaseline = 1 << NSLayoutAttributeBaseline,
};
常用方法
設置內邊距
/**
 設置yellow視圖和self.view等大,並且有10的內邊距。
 注意根據UIView的坐標系,下面right和bottom進行了取反。所以不能寫成下面這樣,否則right、bottom這兩個方向會出現問題。
 make.edges.equalTo(self.view).with.offset(10);

 除了下面例子中的offset()方法,還有針對不同坐標系的centerOffset()、sizeOffset()、valueOffset()之類的方法。
 */
[self.yellowView mas_makeConstraints:^(MASConstraintMaker *make) {
    make.left.equalTo(self.view).with.offset(10);
    make.top.equalTo(self.view).with.offset(10);
    make.right.equalTo(self.view).with.offset(-10);
    make.bottom.equalTo(self.view).with.offset(-10);
}];
通過insets簡化設置內邊距的方式
// 下面的方法和上面例子等價,區別在於使用insets()方法。
[self.blueView mas_makeConstraints:^(MASConstraintMaker *make) {
    // 下、右不需要寫負號,insets方法中已經為我們做了取反的操作了。
    make.edges.equalTo(self.view).with.insets(UIEdgeInsetsMake(10, 10, 10, 10));
}];
更新約束
// 設置greenView的center和size,這樣就可以達到簡單進行約束的目的
[self.greenView mas_makeConstraints:^(MASConstraintMaker *make) {
    make.center.equalTo(self.view);
    // 這裡通過mas_equalTo給size設置了基礎數據類型的參數,參數為CGSize的結構體
    make.size.mas_equalTo(CGSizeMake(300, 300));
}];

// 為了更清楚的看出約束變化的效果,在顯示兩秒後更新約束。
dispatch_after(dispatch_time(DISPATCH_TIME_NOW, (int64_t)(2.f * NSEC_PER_SEC)), dispatch_get_main_queue(), ^{
    [self.greenView mas_updateConstraints:^(MASConstraintMaker *make) {
        make.centerX.equalTo(self.view).offset(100);
        make.size.mas_equalTo(CGSizeMake(100, 100));
    }];
});
大於等於和小於等於某個值的約束
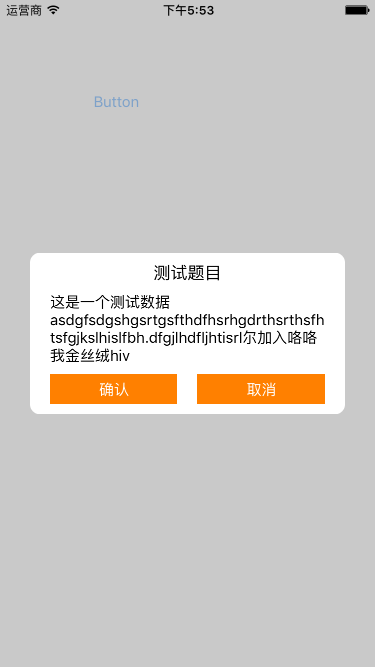
[self.textLabel mas_makeConstraints:^(MASConstraintMaker *make) {
    make.center.equalTo(self.view);
    // 設置寬度小於等於200
    make.width.lessThanOrEqualTo(@200);
    // 設置高度大於等於10
    make.height.greaterThanOrEqualTo(@(10));
}];
self.textLabel.text = @"這是測試的字符串。能看到1、2、3個步驟,第一步當然是上傳照片了,要上傳正面近照哦。上傳後,網站會自動識別你的面部,如果覺得識別的不准,你還可以手動修改一下。左邊可以看到16項修改參數,最上面是整體修改,你也可以根據自己的意願單獨修改某項,將鼠標放到選項上面,右邊的預覽圖會顯示相應的位置。";
textLabel只需要設置一個屬性即可
self.textLabel.numberOfLines = 0;
使用基礎數據類型當做參數
/**
 如果想使用基礎數據類型當做參數,Masonry為我們提供了"mas_xx"格式的宏定義。
 這些宏定義會將傳入的基礎數據類型轉換為NSNumber類型,這個過程叫做封箱(Auto Boxing)。

 "mas_xx"開頭的宏定義,內部都是通過MASBoxValue()函數實現的。
 這樣的宏定義主要有四個,分別是mas_equalTo()、mas_offset()和大於等於、小於等於四個。
 */
[self.redView mas_makeConstraints:^(MASConstraintMaker *make) {
    make.center.equalTo(self.view);
    make.width.mas_equalTo(100);
    make.height.mas_equalTo(100);
}];
設置約束優先級
/**
 Masonry為我們提供了三個默認的方法,priorityLow()、priorityMedium()、priorityHigh(),這三個方法內部對應著不同的默認優先級。
 除了這三個方法,我們也可以自己設置優先級的值,可以通過priority()方法來設置。
 */
[self.redView mas_makeConstraints:^(MASConstraintMaker *make) {
    make.center.equalTo(self.view);
    make.width.equalTo(self.view).priorityLow();
    make.width.mas_equalTo(20).priorityHigh();
    make.height.equalTo(self.view).priority(200);
    make.height.mas_equalTo(100).priority(1000);
}];
Masonry也幫我們定義好了一些默認的優先級常量,分別對應著不同的數值,優先級最大數值是1000。 static const MASLayoutPriority MASLayoutPriorityRequired = UILayoutPriorityRequired; static const MASLayoutPriority MASLayoutPriorityDefaultHigh = UILayoutPriorityDefaultHigh; static const MASLayoutPriority MASLayoutPriorityDefaultMedium = 500; static const MASLayoutPriority MASLayoutPriorityDefaultLow = UILayoutPriorityDefaultLow; static const MASLayoutPriority MASLayoutPriorityFittingSizeLevel = UILayoutPriorityFittingSizeLevel;
設置約束比例
// 設置當前約束值乘以多少,例如這個例子是redView的寬度是self.view寬度的0.2倍。
[self.redView mas_makeConstraints:^(MASConstraintMaker *make) {
    make.center.equalTo(self.view);
    make.height.mas_equalTo(30);
    make.width.equalTo(self.view).multipliedBy(0.2);
}];
小練習
子視圖等高練習
/**
 下面的例子是通過給equalTo()方法傳入一個數組,設置數組中子視圖及當前make對應的視圖之間等高。

 需要注意的是,下面block中設置邊距的時候,應該用insets來設置,而不是用offset。
 因為用offset設置right和bottom的邊距時,這兩個值應該是負數,所以如果通過offset來統一設置值會有問題。
 */
CGFloat padding = LXZViewPadding;
[self.redView mas_makeConstraints:^(MASConstraintMaker *make) {
    make.left.right.top.equalTo(self.view).insets(UIEdgeInsetsMake(padding, padding, 0, padding));
    make.bottom.equalTo(self.blueView.mas_top).offset(-padding);
}];

[self.blueView mas_makeConstraints:^(MASConstraintMaker *make) {
    make.left.right.equalTo(self.view).insets(UIEdgeInsetsMake(0, padding, 0, padding));
    make.bottom.equalTo(self.yellowView.mas_top).offset(-padding);
}];

/**
 下面設置make.height的數組是關鍵,通過這個數組可以設置這三個視圖高度相等。其他例如寬度之類的,也是類似的方式。
 */
[self.yellowView mas_makeConstraints:^(MASConstraintMaker *make) {
    make.left.right.bottom.equalTo(self.view).insets(UIEdgeInsetsMake(0, padding, padding, padding));
    make.height.equalTo(@[self.blueView, self.redView]);
}];
子視圖垂直居中練習
/**
 要求:(這個例子是在其他人博客裡看到的,然後按照要求自己寫了下面這段代碼)
 兩個視圖相對於父視圖垂直居中,並且兩個視圖以及父視圖之間的邊距均為10,高度為150,兩個視圖寬度相等。
 */
CGFloat padding = 10.f;
[self.blueView mas_makeConstraints:^(MASConstraintMaker *make) {
    make.centerY.equalTo(self.view);
    make.left.equalTo(self.view).mas_offset(padding);
    make.right.equalTo(self.redView.mas_left).mas_offset(-padding);
    make.width.equalTo(self.redView);
    make.height.mas_equalTo(150);
}];

[self.redView mas_makeConstraints:^(MASConstraintMaker *make) {
    make.centerY.equalTo(self.view);
    make.right.equalTo(self.view).mas_offset(-padding);
    make.width.equalTo(self.blueView);
    make.height.mas_equalTo(150);
}];
UITableView動態Cell高度
在iOS UI開發過程中,UITableView的動態Cell高度一直都是個問題。實現這樣的需求,實現方式有很多種,只是實現起來復雜程度和性能的區別。
在不考慮性能的情況下,tableView動態Cell高度,可以采取估算高度的方式。如果通過估算高度的方式實現的話,無論是純代碼還是Interface Builder,都只需要兩行代碼就可以完成Cell自動高度適配。
實現方式:
需要設置tableView的rowHeight屬性,這裡設置為自動高度,告訴系統Cell的高度是不固定的,需要系統幫我們進行計算。然後設置tableView的estimatedRowHeight屬性,設置一個估計的高度。(我這裡用的代理方法,實際上都一樣)
原理:
這樣的話,在tableView被創建之後,系統會根據estimatedRowHeight屬性設置的值,為tableView設置一個估計的值。然後在Cell顯示的時候再獲取Cell的高度,並刷新tableView的contentSize。
- (void)tableViewConstraints {
    [self.tableView mas_makeConstraints:^(MASConstraintMaker *make) {
        make.edges.equalTo(self.view);
    }];
}

- (NSInteger)tableView:(UITableView *)tableView numberOfRowsInSection:(NSInteger)section {
    return self.dataList.count;
}

- (MasonryTableViewCell *)tableView:(UITableView *)tableView cellForRowAtIndexPath:(NSIndexPath *)indexPath {
    MasonryTableViewCell *cell = [tableView dequeueReusableCellWithIdentifier:LXZTableViewCellIdentifier];
    [cell reloadViewWithText:self.dataList[indexPath.row]];
    return cell;
}

// 需要注意的是,這個代理方法和直接返回當前Cell高度的代理方法並不一樣。
// 這個代理方法會將當前所有Cell的高度都預估出來,而不是只計算顯示的Cell,所以這種方式對性能消耗還是很大的。
// 所以通過設置estimatedRowHeight屬性的方式,和這種代理方法的方式,最後性能消耗都是一樣的。
- (CGFloat)tableView:(UITableView *)tableView estimatedHeightForRowAtIndexPath:(NSIndexPath *)indexPath {
    return 50.f;
}

- (UITableView *)tableView {
    if (!_tableView) {
        _tableView = [[UITableView alloc] initWithFrame:CGRectZero style:UITableViewStylePlain];
        _tableView.delegate = self;
        _tableView.dataSource = self;
        // 設置tableView自動高度
        _tableView.rowHeight = UITableViewAutomaticDimension;
        [_tableView registerClass:[MasonryTableViewCell class] forCellReuseIdentifier:LXZTableViewCellIdentifier];
        [self.view addSubview:_tableView];
    }
    return _tableView;
}
UIScrollView自動布局
之前聽很多人說過UIScrollView很麻煩,然而我並沒有感覺到有多麻煩(並非裝逼)。我感覺說麻煩的人可能根本就沒試過吧,只是覺得很麻煩而已。
我這裡就講一下兩種進行UIScrollView自動布局的方案,並且會講一下自動布局的技巧,只要掌握技巧,布局其實很簡單。
布局小技巧:
給UIScrollView添加的約束是定義其frame,設置contentSize是定義其內部大小。UIScrollView進行addSubview操作,都是將其子視圖添加到contentView上。
所以,添加到UIScrollView上的子視圖,對UIScrollView添加的約束都是作用於contentView上的。只需要按照這樣的思路給UIScrollView設置約束,就可以掌握設置約束的技巧了。
提前設置contentSize
// 提前設置好UIScrollView的contentSize,並設置UIScrollView自身的約束
self.scrollView.contentSize = CGSizeMake(1000, 1000);
[self.scrollView mas_makeConstraints:^(MASConstraintMaker *make) {
    make.edges.equalTo(self.view);
}];

// 雖然redView的get方法內部已經執行過addSubview操作,但是UIView始終以最後一次添加的父視圖為准,也就是redView始終是在最後一次添加的父視圖上。
[self.scrollView addSubview:self.redView];
[self.redView mas_makeConstraints:^(MASConstraintMaker *make) {
    make.left.top.equalTo(self.scrollView);
    make.width.height.mas_equalTo(200);
}];

[self.scrollView addSubview:self.blueView];
[self.blueView mas_makeConstraints:^(MASConstraintMaker *make) {
    make.left.equalTo(self.redView.mas_right);
    make.top.equalTo(self.scrollView);
    make.width.height.equalTo(self.redView);
}];

[self.scrollView addSubview:self.greenView];
[self.greenView mas_makeConstraints:^(MASConstraintMaker *make) {
    make.left.equalTo(self.scrollView);
    make.top.equalTo(self.redView.mas_bottom);
    make.width.height.equalTo(self.redView);
}];
自動contentSize
上面的例子是提前設置好UIScrollView的contentSize的內部size,然後直接向裡面addSubview。但是這有個要求就是,需要提前知道contentSize的大小,不然沒法設置。
這個例子中將會展示動態改變contentSize的大小,內部視圖有多少contentSize就自動擴充到多大。
這種方式的實現,主要是依賴於創建一個containerView內容視圖,並添加到UIScrollView上作為子視圖。UIScrollView原來的子視圖都添加到containerView上,並且和這個視圖設置約束。
因為對UIScrollView進行addSubview操作的時候,本質上是往其contentView上添加。也就是containerView的父視圖是contentView,通過containerView撐起contentView視圖的大小,以此來實現動態改變contentSize。
// 在進行約束的時候,要對containerView的上下左右都添加和子視圖的約束,以便確認containerView的邊界區域。
[self.scrollView mas_makeConstraints:^(MASConstraintMaker *make) {
    make.edges.equalTo(self.view);
}];

CGFloat padding = LXZViewPadding;
[self.containerView mas_makeConstraints:^(MASConstraintMaker *make) {
    make.edges.equalTo(self.scrollView).insets(UIEdgeInsetsMake(padding, padding, padding, padding));
}];

[self.containerView addSubview:self.greenView];
[self.greenView mas_makeConstraints:^(MASConstraintMaker *make) {
    make.top.left.equalTo(self.containerView).offset(padding);
    make.size.mas_equalTo(CGSizeMake(250, 250));
}];

[self.containerView addSubview:self.redView];
[self.redView mas_makeConstraints:^(MASConstraintMaker *make) {
    make.top.equalTo(self.containerView).offset(padding);
    make.left.equalTo(self.greenView.mas_right).offset(padding);
    make.size.equalTo(self.greenView);
    make.right.equalTo(self.containerView).offset(-padding);
}];

[self.containerView addSubview:self.yellowView];
[self.yellowView mas_makeConstraints:^(MASConstraintMaker *make) {
    make.left.equalTo(self.containerView).offset(padding);
    make.top.equalTo(self.greenView.mas_bottom).offset(padding);
    make.size.equalTo(self.greenView);
    make.bottom.equalTo(self.containerView).offset(-padding);
}];
- 上一頁:程序員取悅女票的正確姿勢
- 下一頁:HTML