觸摸事件
編輯:IOS技巧綜合
案例:通過觸摸事件拖動imageView和view1和view2
注意:1.imgeview默認不能響應觸摸事件,2.視圖有三個子視圖,如何區分多個視圖
用storyBoard托人2個view和一個imageView,IBOutlet連線
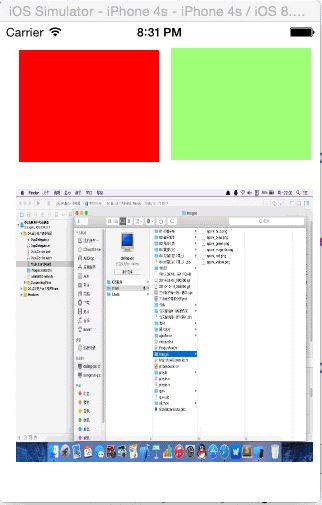
案例圖片:
//讓imageView接受用戶觸摸
[self.imageView setUserInteractionEnabled:YES];
區分哪個視圖
[touch view] == self.imageView
觸摸事件代碼
 -(void)touchesMoved:(NSSet *)touches withEvent:(UIEvent *)event
 {
     //1.獲取用戶點擊
     UITouch *touch = [touches anyObject];
     CGPoint location = [touch locationInView:self.view];
     CGPoint preLocation = [touch previousLocationInView:self.view];
     CGPoint dertPoint = CGPointMake(location.x - preLocation.x, location.y - preLocation.y);
     //2.判斷點擊了那個視圖
     if ([touch view] == self.imageView) {
         NSLog(@"點擊了圖像");

         [self.imageView setCenter:CGPointMake(self.imageView.center.x + dertPoint.x, self.imageView.center.y + dertPoint.y)];
     }else if ([touch view] == self.redView){
         NSLog(@"點擊了 hongse");
         [self.redView setCenter:CGPointMake(self.redView.center.x + dertPoint.x, self.redView.center.y + dertPoint.y)];

     }else if ([touch view] == self.greenView){
         //提示最好不要直接用else處理,因為隨時有可能添加新的控件
         NSLog(@"點擊 green");
         [self.greenView setCenter:CGPointMake(self.greenView.center.x + dertPoint.x, self.greenView.center.y + dertPoint.y)];
     }

 }


相關文章
+